

Are you looking for a stylish and functional desk for your home office or craft studio? Look no further! The free plans to build a One Kings Lane Sereno desk are here to help you create a stunning masterpiece that suits your style. With its drawers on each side, this desk offers ample storage space to keep your workspace organized and clutter-free.
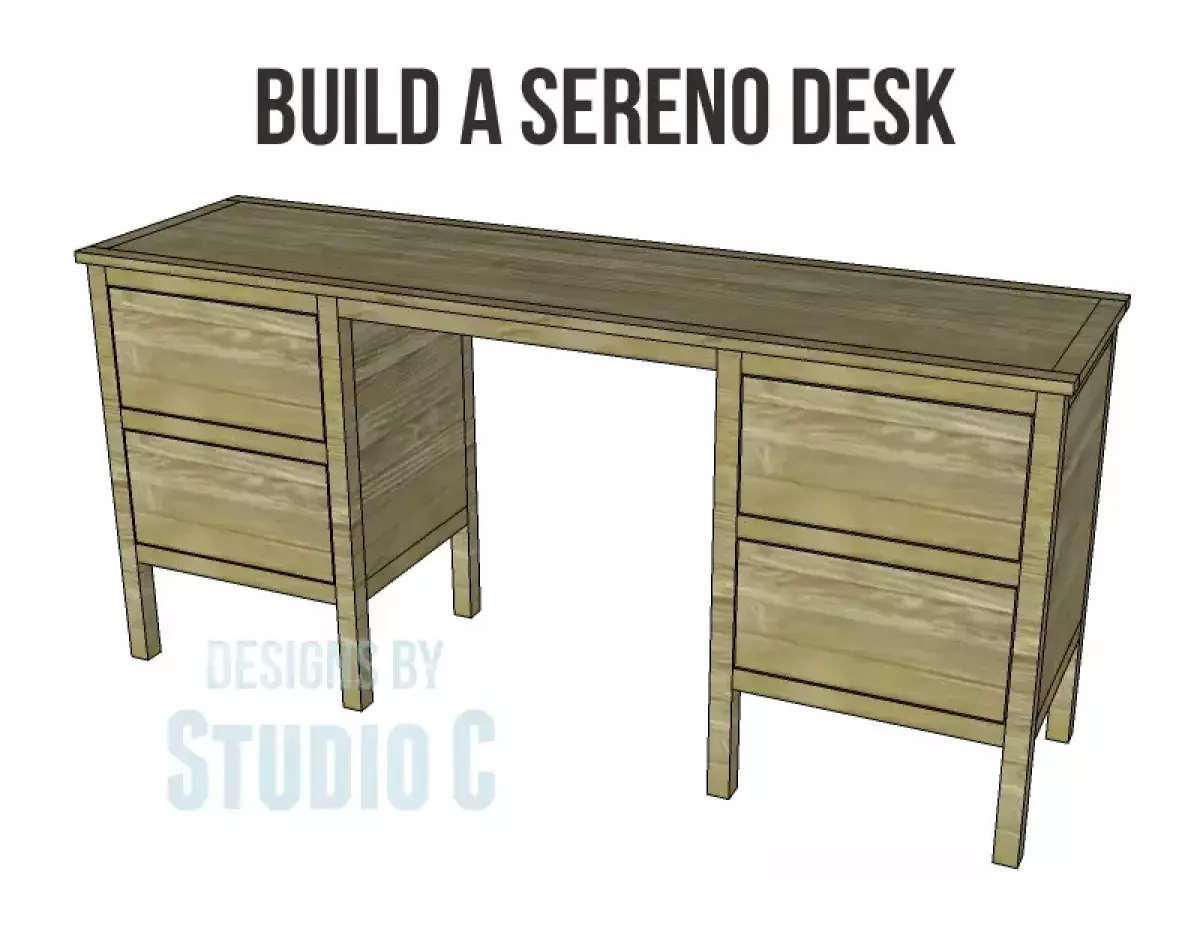 Caption: The One Kings Lane Sereno desk - a perfect blend of style and functionality.
Materials You'll Need
To build this desk, gather the following materials:
- 1-1/4" pocket hole screws
- 2-1/2" pocket hole screws
- 1-1/4" screws
- 1-1/4" brad nails
- Edge banding
- 4 sets of 14" drawer slides
- 4 cabinet pulls
- Finishing supplies
Required Lumber
Here's a list of the lumber you'll need:
- 3 - 1x2 at 8'
- 6 - 2x2 at 8'
- 2 sheets of 3/4" plywood
Cutting List
To make the desk, follow this cutting list:
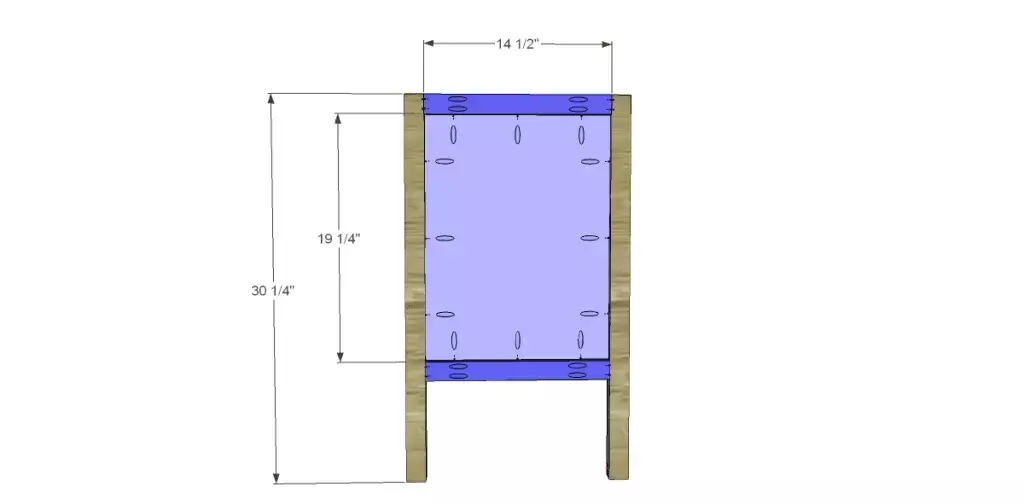
- 8 - 2x2 at 30-1/4" for legs
- 8 - 2x2 at 14-1/2" for side frames
- 4 - 3/4" plywood at 14-1/2" x 19-1/4" for side panels
- 8 - 1x2 at 14-1/2" for spacers
- 4 - 2x2 at 17" for back frame
- 2 - 3/4" plywood at 17" x 19-1/4" for back panels
- 6 - 2x2 at 17" for front stretchers
- 2 - 2x2 at 26" for stretchers
- 1 - 3/4" plywood at 15-1/2" x 64" for top
- 2 - 1x2 at 15-1/2" for top frame
- 2 - 1x2 at 67" for top frame
- 4 - 3/4" plywood at 13-1/4" x 14-1/2" for drawer bottoms
- 8 - 3/4" plywood at 7-5/8" x 13-1/4" for drawer sides
- 4 - 3/4" plywood at 7-5/8" x 16" for drawer backs
- 4 - 3/4" plywood at 8-5/8" x 16-3/4" for drawer fronts
 Caption: Detailed plans and measurements for building a Sereno desk.
Step One: Assembling the Desk Frame
Start by cutting the pieces for the legs, side frames, and side panels. Attach the frame pieces to the panels using pocket hole screws. Then, secure the sides to the legs using pocket hole screws as well.
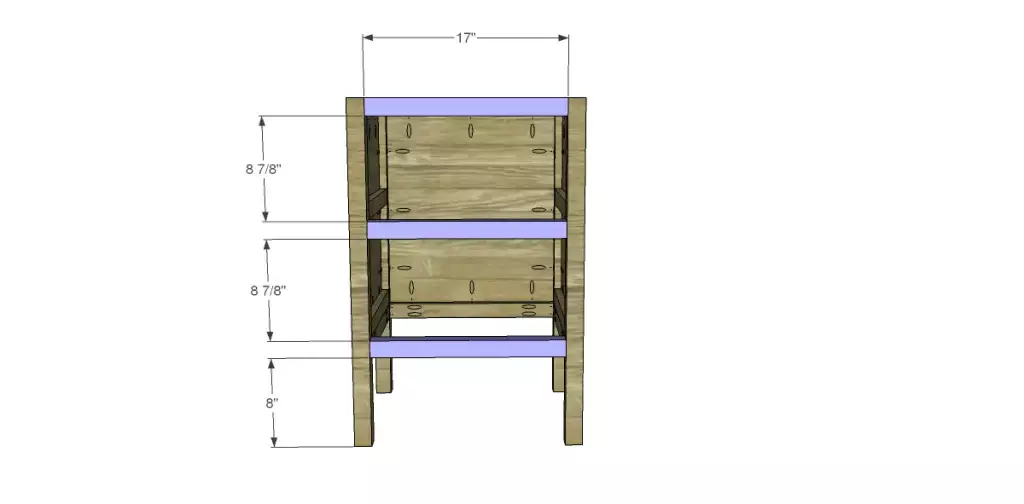
Step Two: Adding Spacers
Cut the spacers and secure them as shown using screws. These spacers will provide additional stability to the desk.
Step Three: Attaching the Back
Cut the pieces for the back frame and panels. Attach the frame pieces to the panels using pocket hole screws. Then, attach the backs to the legs using pocket hole screws.
Step Four: Adding Front Stretchers
Cut the stretchers and secure them to the legs using glue and pocket hole screws. These stretchers will further enhance the stability of the desk.
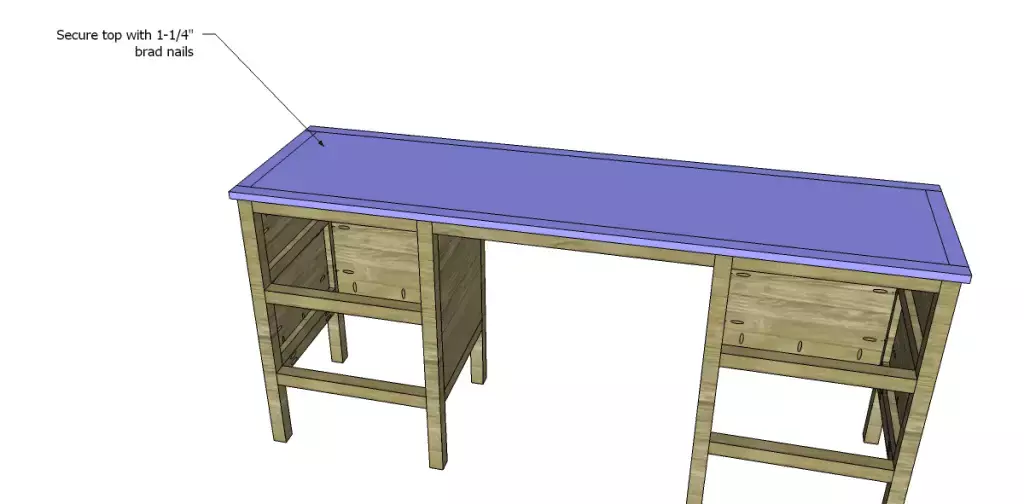
Step Five: Building the Tabletop
Cut the pieces for the top and attach them using pocket hole screws. Make sure to position the top with a slight overhang on all sides. Secure the top using glue and brad nails.
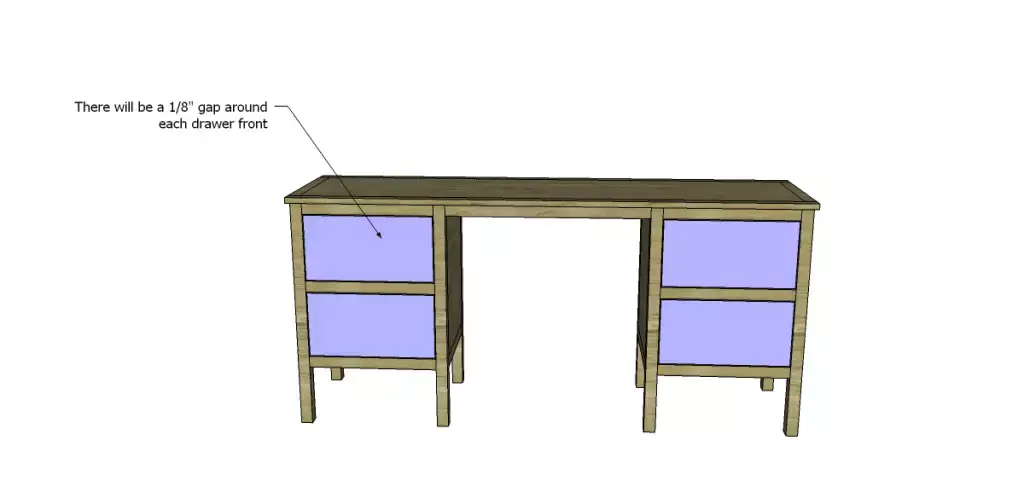
Step Six: Building the Drawers
Cut the pieces for the drawers and assemble them using pocket hole screws. Install the drawer slides according to the manufacturer's instructions and make any necessary adjustments.
Finish as Desired!
Once you've built the desk, it's time to add your personal touch. You can finish it in a dark stain with a wet-sanded finish for a truly stunning look. Let your creativity shine and make this Sereno desk truly your own!
The plans to build a One Kings Lane Sereno desk are easy to follow, and the end result is a beautiful and functional piece of furniture. Get started on your own Sereno desk project today!
Originally posted on 2013-05-15 08:00:25.


