

An Expert's Advice on Installation Kits for Dometic RTX 2000
If you're considering installing the Dometic RTX 2000 -12 Volt Air Conditioner (6,824 BTU) for your van build or any other outdoor setup, there are a few things you need to know. In this article, we'll guide you through the optional installation kits offered by Dometic and help you make an informed decision.
The Essential "Installation Hardware Kit"
The first kit to consider is the "installation hardware kit." This kit includes crucial components like crossbars, brackets, threaded inserts, and bolts. It simplifies the installation process and ensures a secure fit for the air conditioner. We highly recommend including this kit with your purchase as it is essential for a successful installation.
Picture: Dometic RTX 2000 -12 Volt Air Conditioner
However, it's worth noting that the "installation hardware kit" includes a large interior trim piece that may not be suitable for most van builds. Additionally, it includes a 24-volt wiring harness, which you won't need for a 12-volt AC setup. If these parts are not necessary for your installation, you can choose to exclude them and save some money.
The Cost-Effective DIY Wiring Option
The second kit to consider is the "wiring kit." This kit provides all the necessary wiring components for the Dometic RTX 2000. However, it comes at a relatively high price compared to a do-it-yourself solution. If you have the skills and want to save some money, you can opt for the DIY wiring approach.
To wire the unit without the "wiring kit," you will need the following components:
-
Red and black 4 AWG wire: This wire will be used for the main 12-volt power connection from your DC bus bar to the AC unit. Make sure to choose the correct wire gauge based on the length of the wire and the specific requirements of your setup.
-
Fusing for the red, positive wire: Depending on your setup, you can use an 80 amp mega fuse with a Lynx Distributor or a MIDI fuse holder with an 80 amp MIDI fuse. Ensure the fuse is placed as close to the connection point as possible for optimal safety.
-
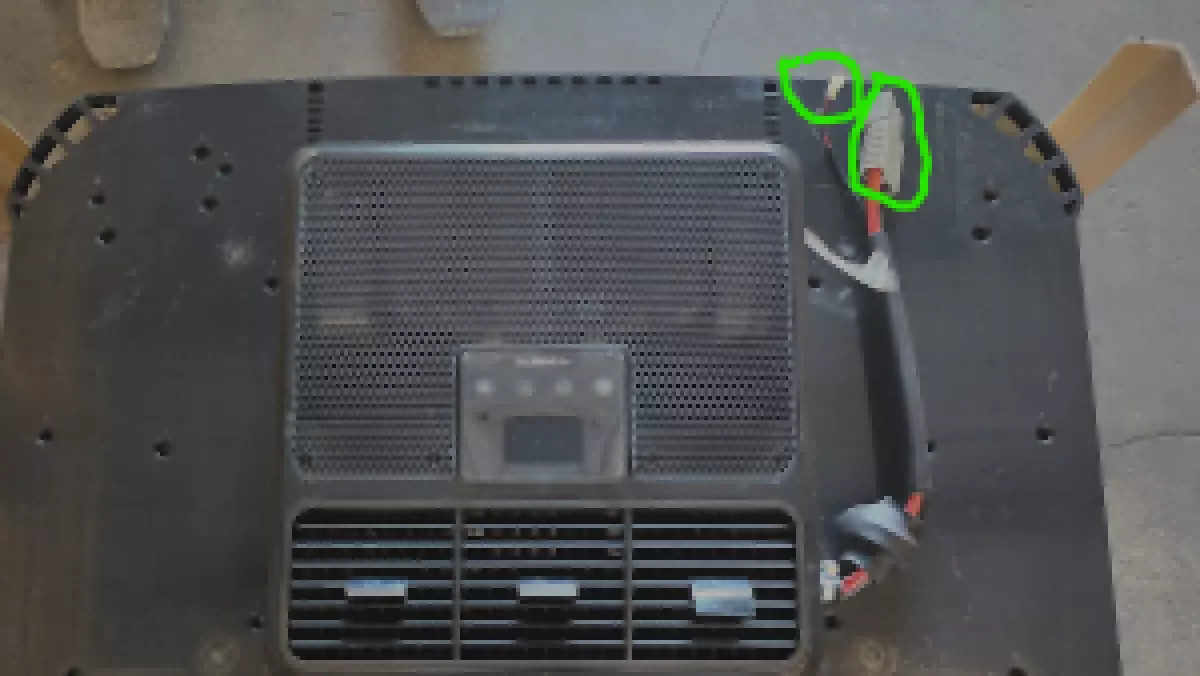
Southwire splicers with screw terminals: These splicers are used to connect the larger wire from the AC unit base to your 4 AWG 12-volt supply wires. Cover the splicers with heat shrink for electrical insulation.
-
18 AWG, 2-conductor wire: This wire is used with butt splices to connect the smaller wires from the AC unit base to the 12-volt DC supply or bus bar. These smaller wires sense voltage and should be wired to the same "source" terminal as the larger primary wires.
By choosing the DIY wiring option, you can save around $275 compared to the price of the Dometic "wiring kit." However, it's important to note that if you encounter any issues and require warranty support from Dometic, you will need to demonstrate that your wiring is not the cause of the problem.
Final Thoughts
When installing the Dometic RTX 2000 -12 Volt Air Conditioner (6,824 BTU), the "installation hardware kit" is essential for a secure and hassle-free setup. However, you can save money by opting for a DIY wiring solution instead of purchasing the "wiring kit." Make sure to follow recommended wire gauge sizes, use proper fusing, and document your installation with photos to ensure warranty support, if needed.
Remember, a successful installation ensures optimal performance and a comfortable environment, so choose the option that best suits your needs and budget.


