

Gallery walls are classic and timeless, adding a touch of sophistication to any space. However, the thought of putting together your own gallery wall can be intimidating. Art can be expensive, and curating a collection of personal items and photos takes time. But fear not! At EHD, we have mastered the art of creating gallery walls, and we're here to share our foolproof formula with you.
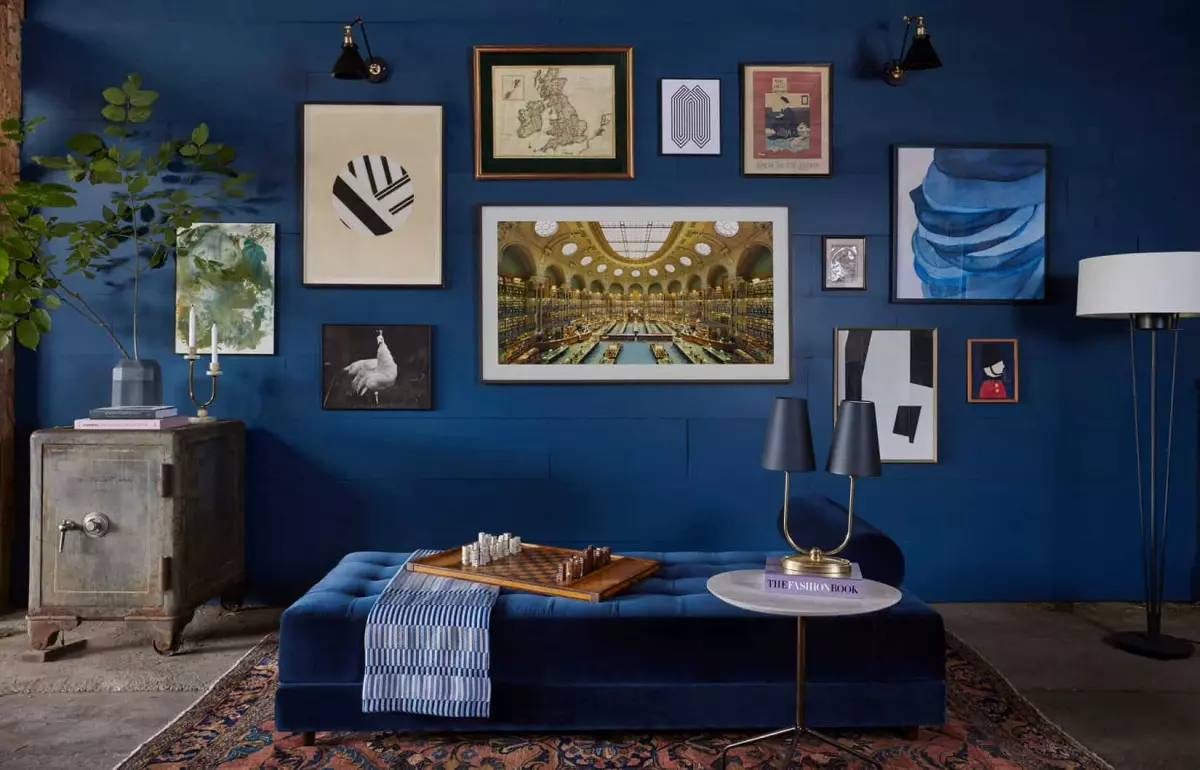 photo by geneieve garruppo | from: a 100 year old barn makeover
So, how do we pull together a stunning gallery wall? Let's dive in and discover the elements of a successful gallery wall, along with some helpful tips to guide you along the way.
First Things First: Plan Your Layout
Before you start hammering nails into your wall, take a moment to plan out your gallery wall layout. This step is essential to prevent unnecessary holes and ensure a visually pleasing arrangement. Here's how you can do it:
- Measure the space you want your gallery wall to fill.
- Tape off a box of the same size on your floor using painter's tape or kid's art paper.
- Lay out all your pieces within the taped area. This allows you to experiment with different placements and combinations without damaging your walls. Emily even has an IGTV video demonstrating her process.
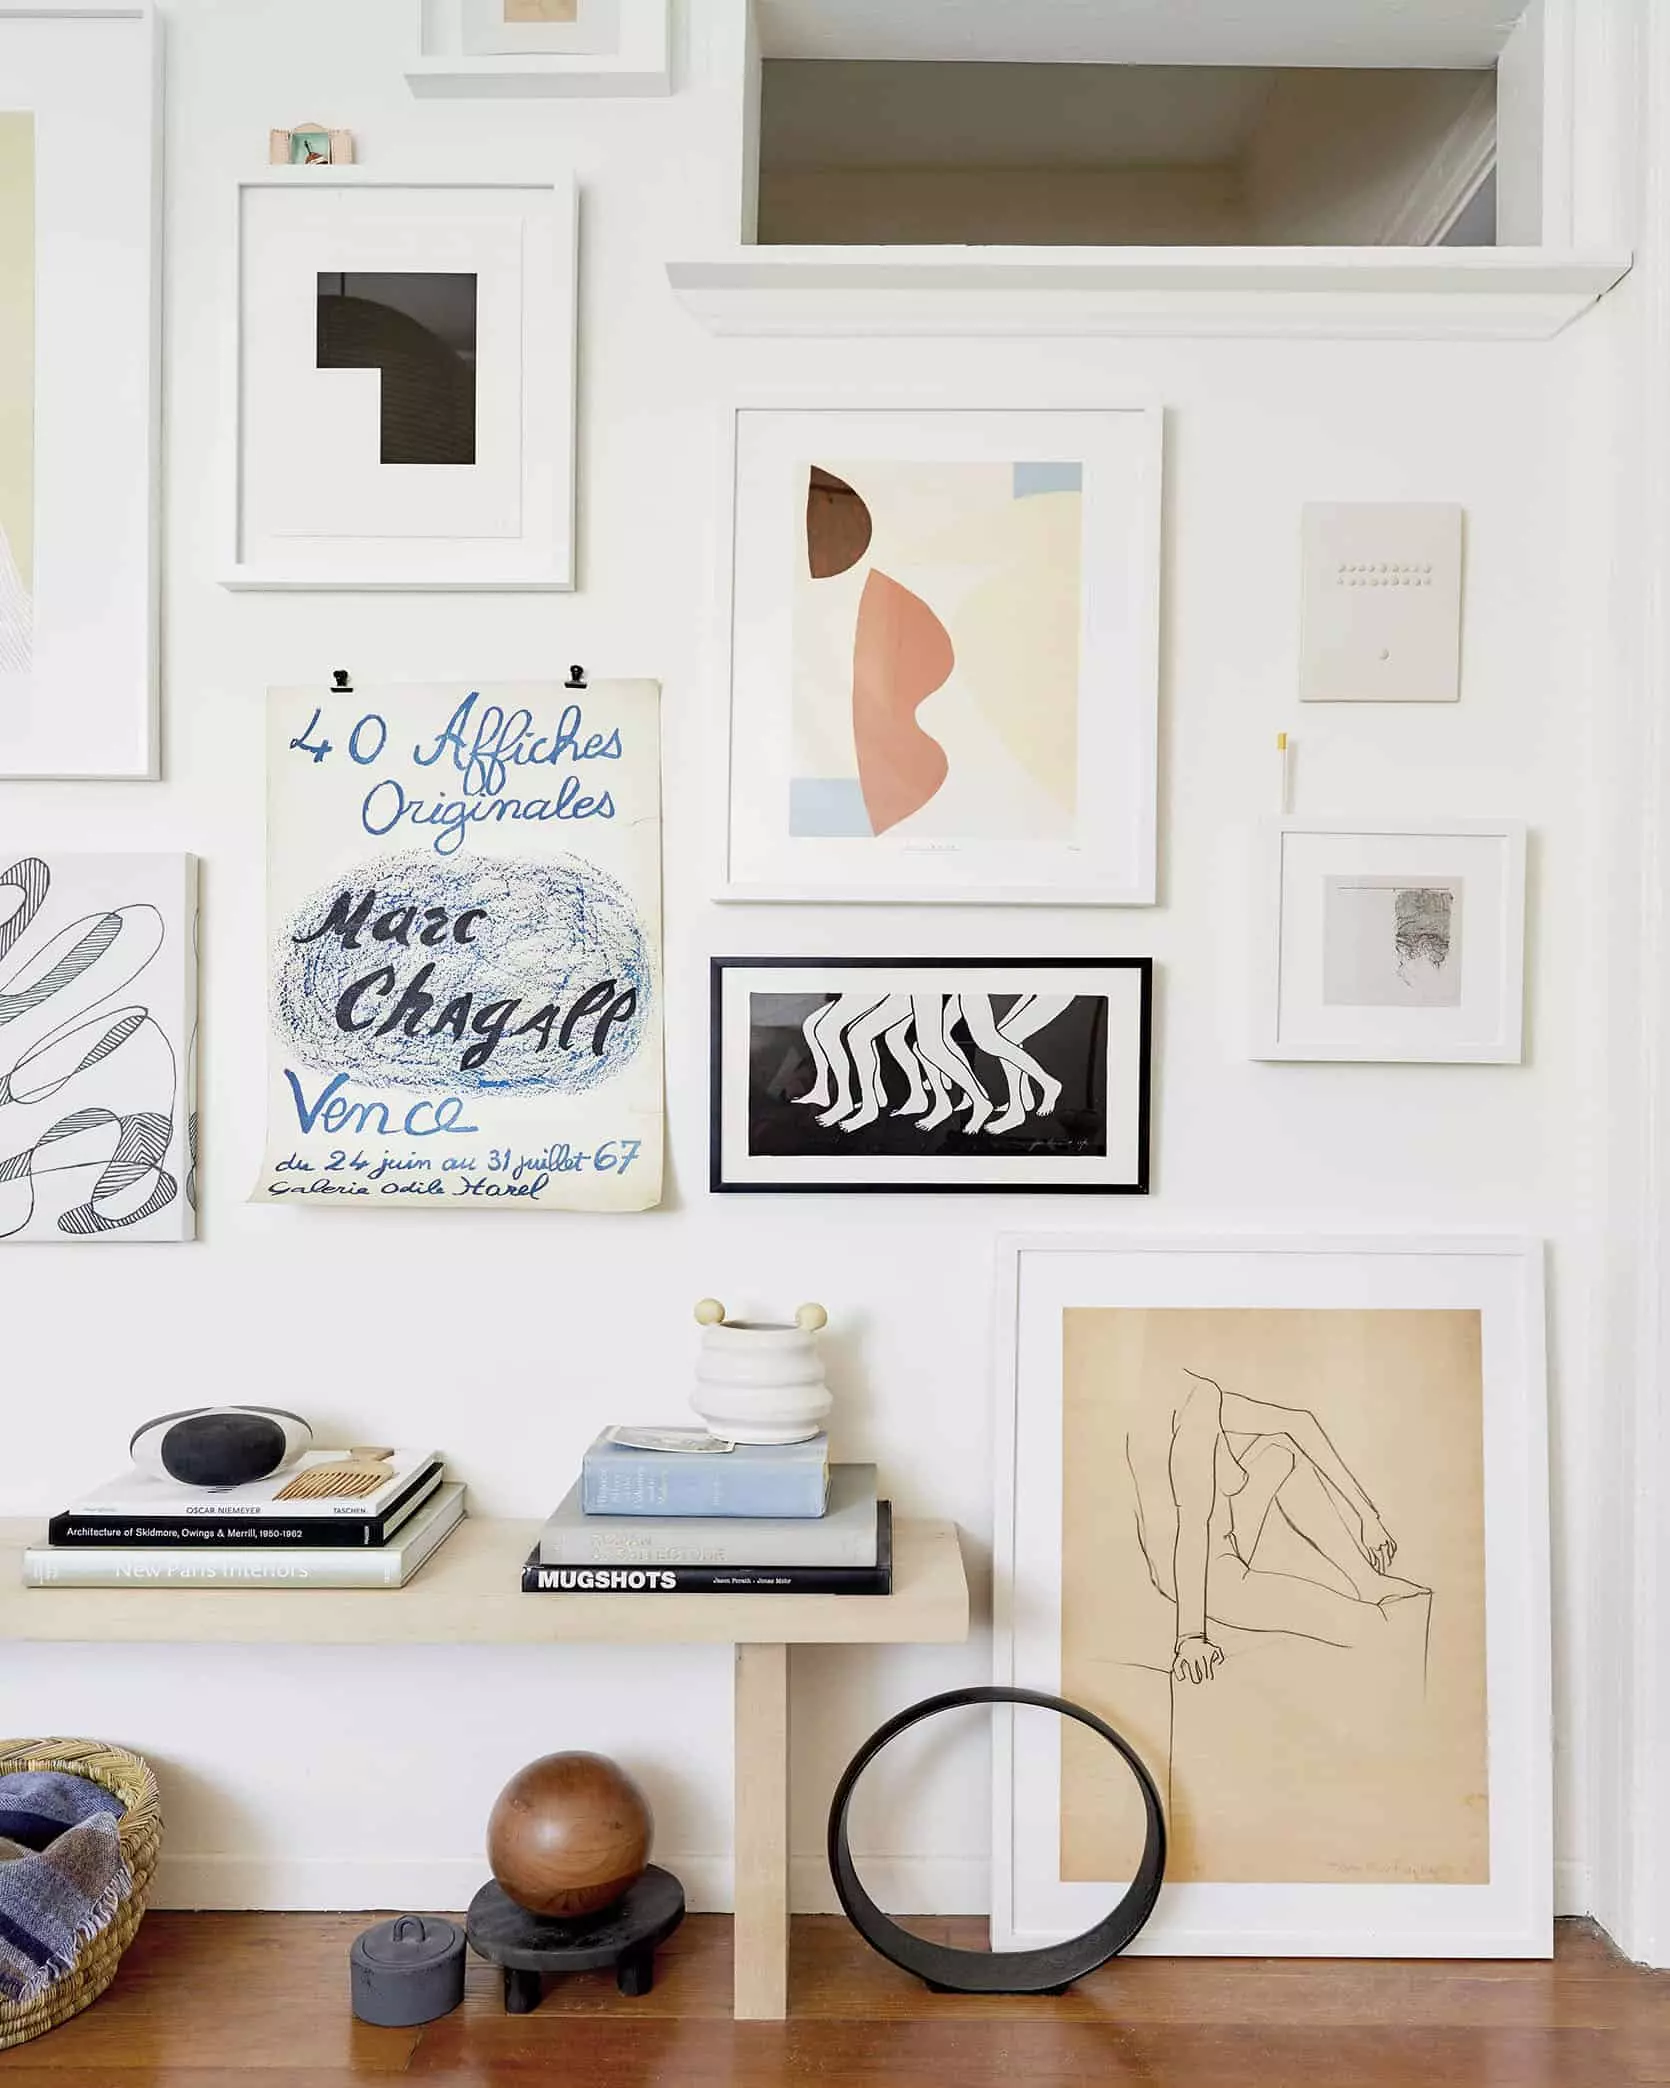 photo by sara ligorria-tramp | from: jess' small space makeover takeover
Create a Cohesive Color Palette
To achieve a polished and cohesive look, consider sticking to a color palette for your gallery wall. While this isn't a strict rule, it can help bring harmony to your collection. Choose colors that complement each other and create a cohesive visual story. For example, a gallery wall with neutral tones, blues, and touches of gold can create a sophisticated and elegant aesthetic.
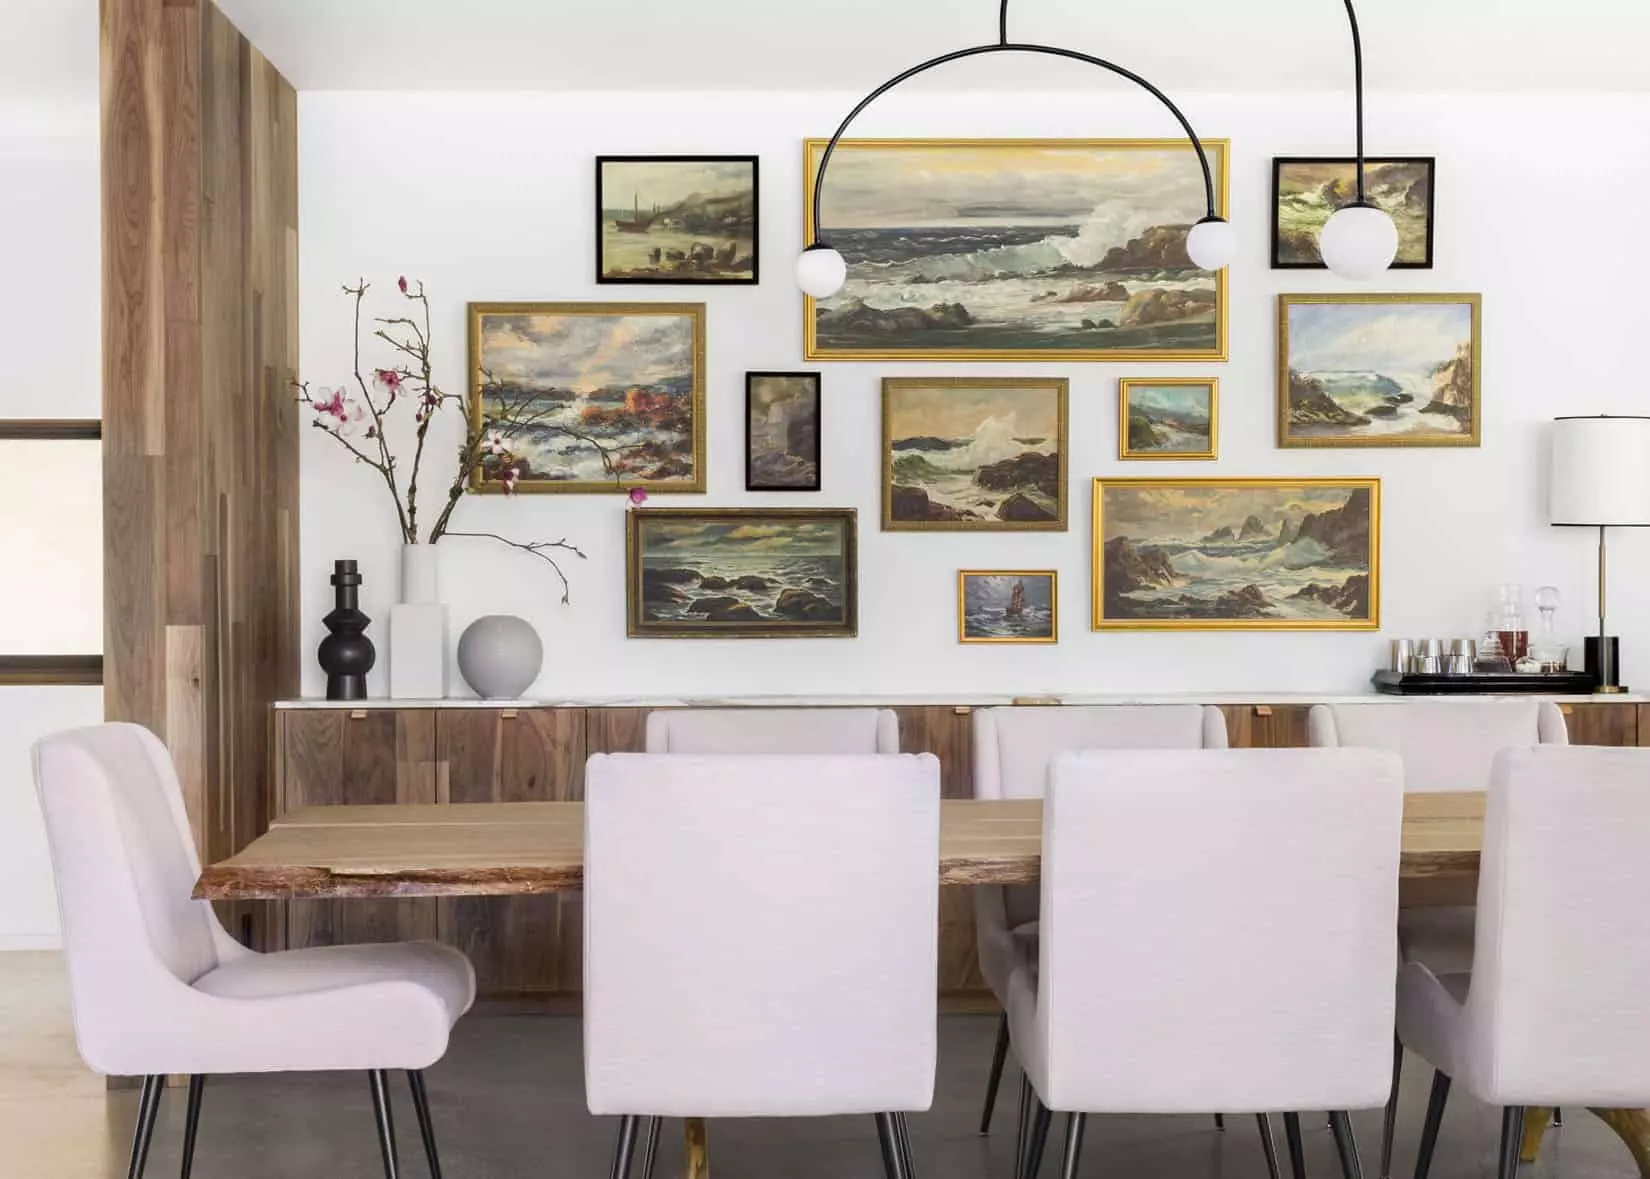 photo by sara ligorria-tramp | from: a modern and organic dining room makeover
Once you have finalized your floor layout, take a photo for reference and start transferring the pieces to your wall. You can measure meticulously or trust your instincts (cough cough like me). If you have access to giant paper templates, tape them directly to the wall, mark the nail positions, and hang your artwork. The paper can then be easily torn away from the nails.
Anchor Your Collection with a Focal Point
Begin building your gallery wall by starting with the largest piece of art. Place it in one of the four outer corners if you have a smaller collection or slightly off-center towards the middle for a larger collection. This anchor piece will serve as your starting point for arranging the remaining items. By placing it off-center, you create a visually engaging flow that encourages the eye to explore the entire gallery wall.
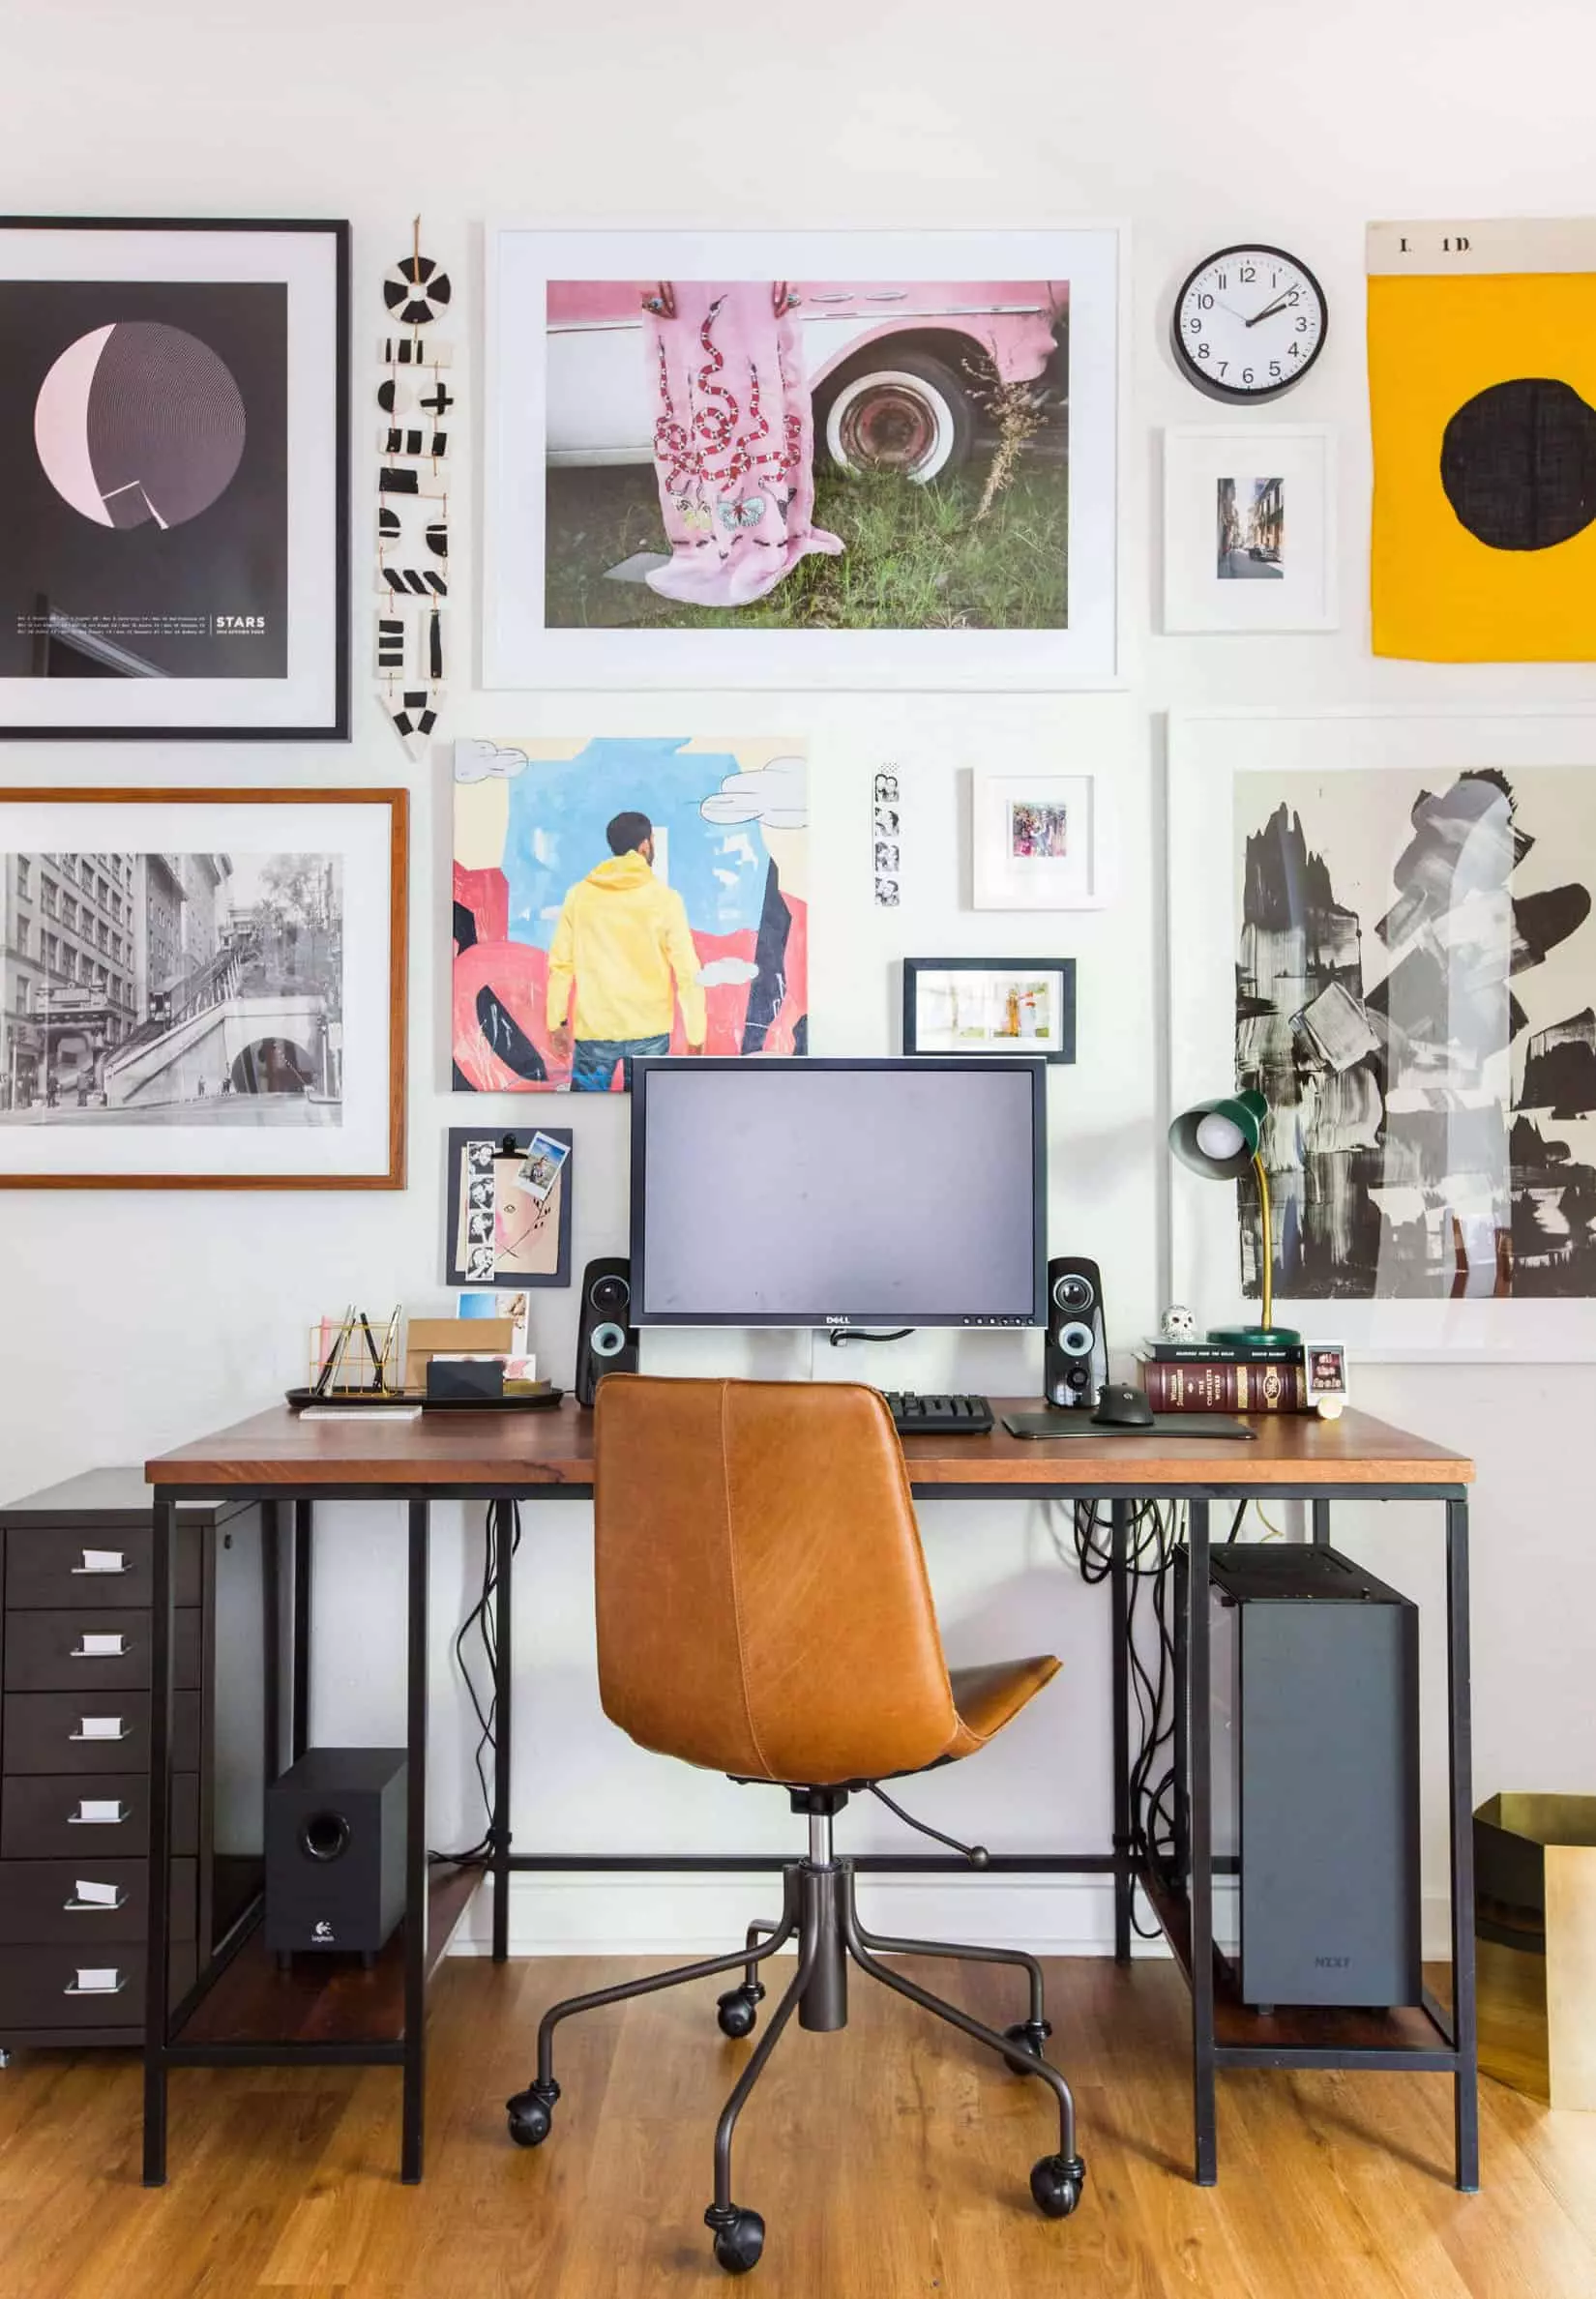 photo by tessa neustadt | from: sara's home office reveal
Mix Horizontal and Vertical Pieces
To keep your gallery wall visually interesting, incorporate a mix of horizontal and vertical pieces. If your largest pieces are horizontal, try placing a smaller vertical piece next to it, either centered or bottom-aligned. Similarly, if your largest pieces are vertical, add a smaller horizontal piece nearby. This blending of orientations creates a dynamic visual balance within your gallery wall.
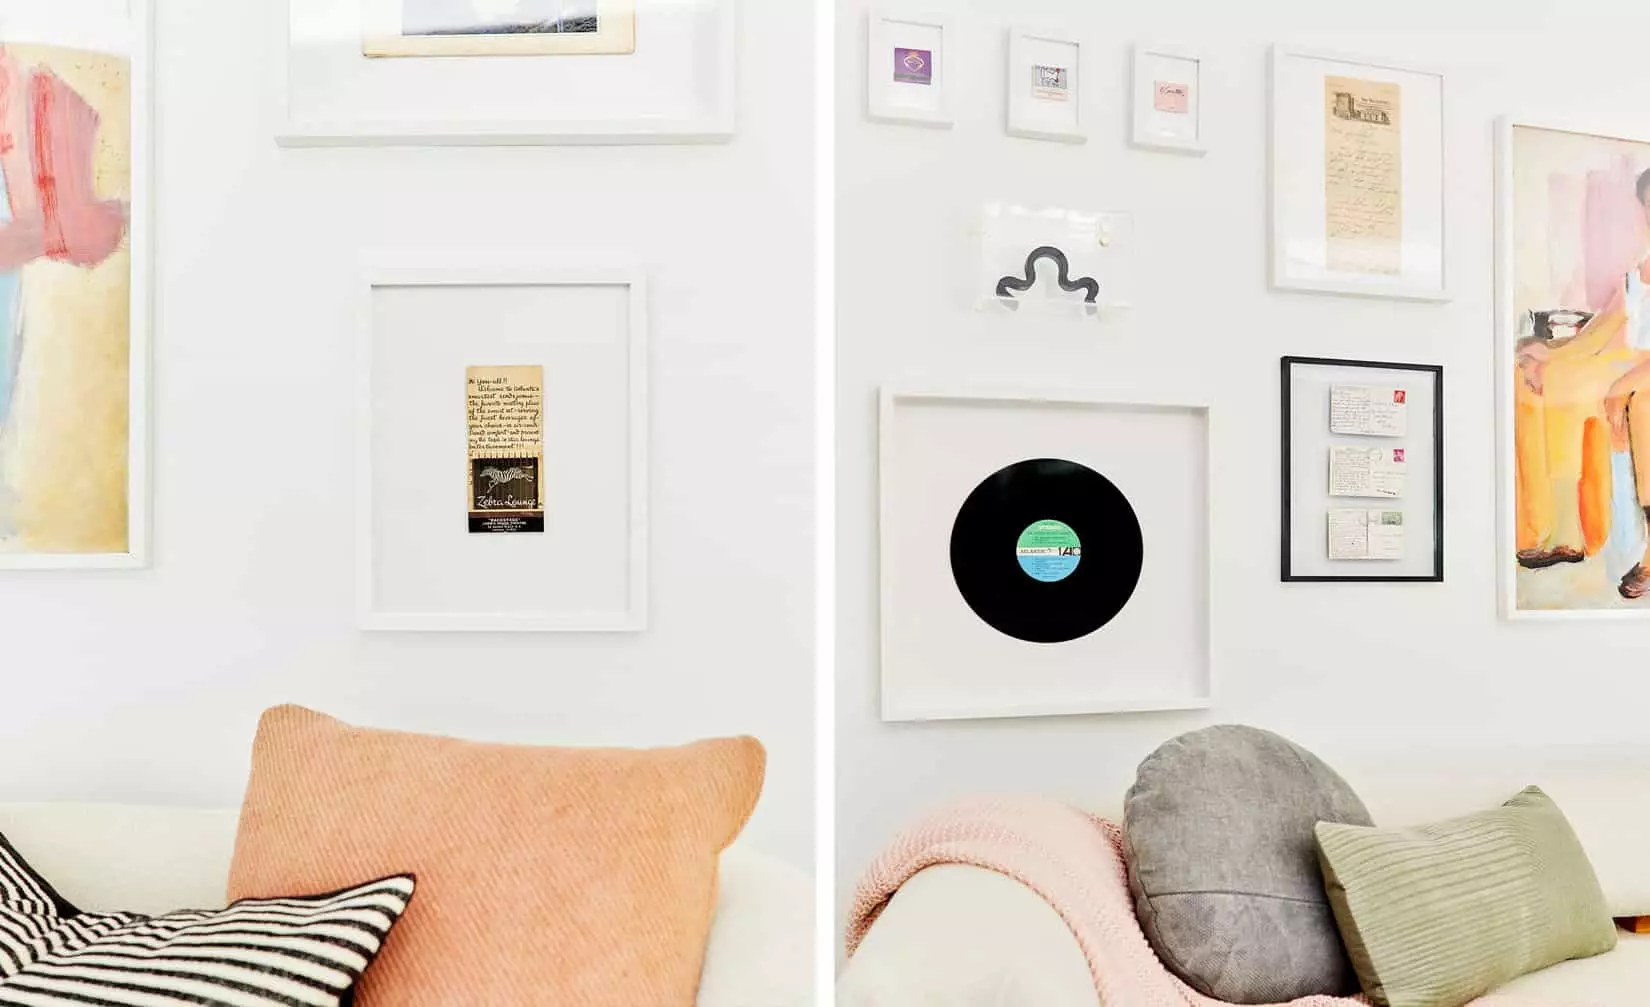 photo by zeke ruelas | from: oh joy's studio - the living room
For an added touch of sophistication, consider creating smaller grids within your gallery wall by grouping 2, 3, or 4 pieces together. This technique adds depth and structure to your display while offering an opportunity to showcase curated collections within the larger arrangement.
Embrace Frame Variety
Don't feel confined to using just one type of frame for your gallery wall. Embrace variety and mix it up! The larger the space and the more pieces you have, the more frame styles you can play with. Start with three frame styles as a foundation, such as white frames, black frames, and a wood option. Alternatively, opt for two modern frames and introduce one more ornate frame style for added interest, such as a touch of gold.
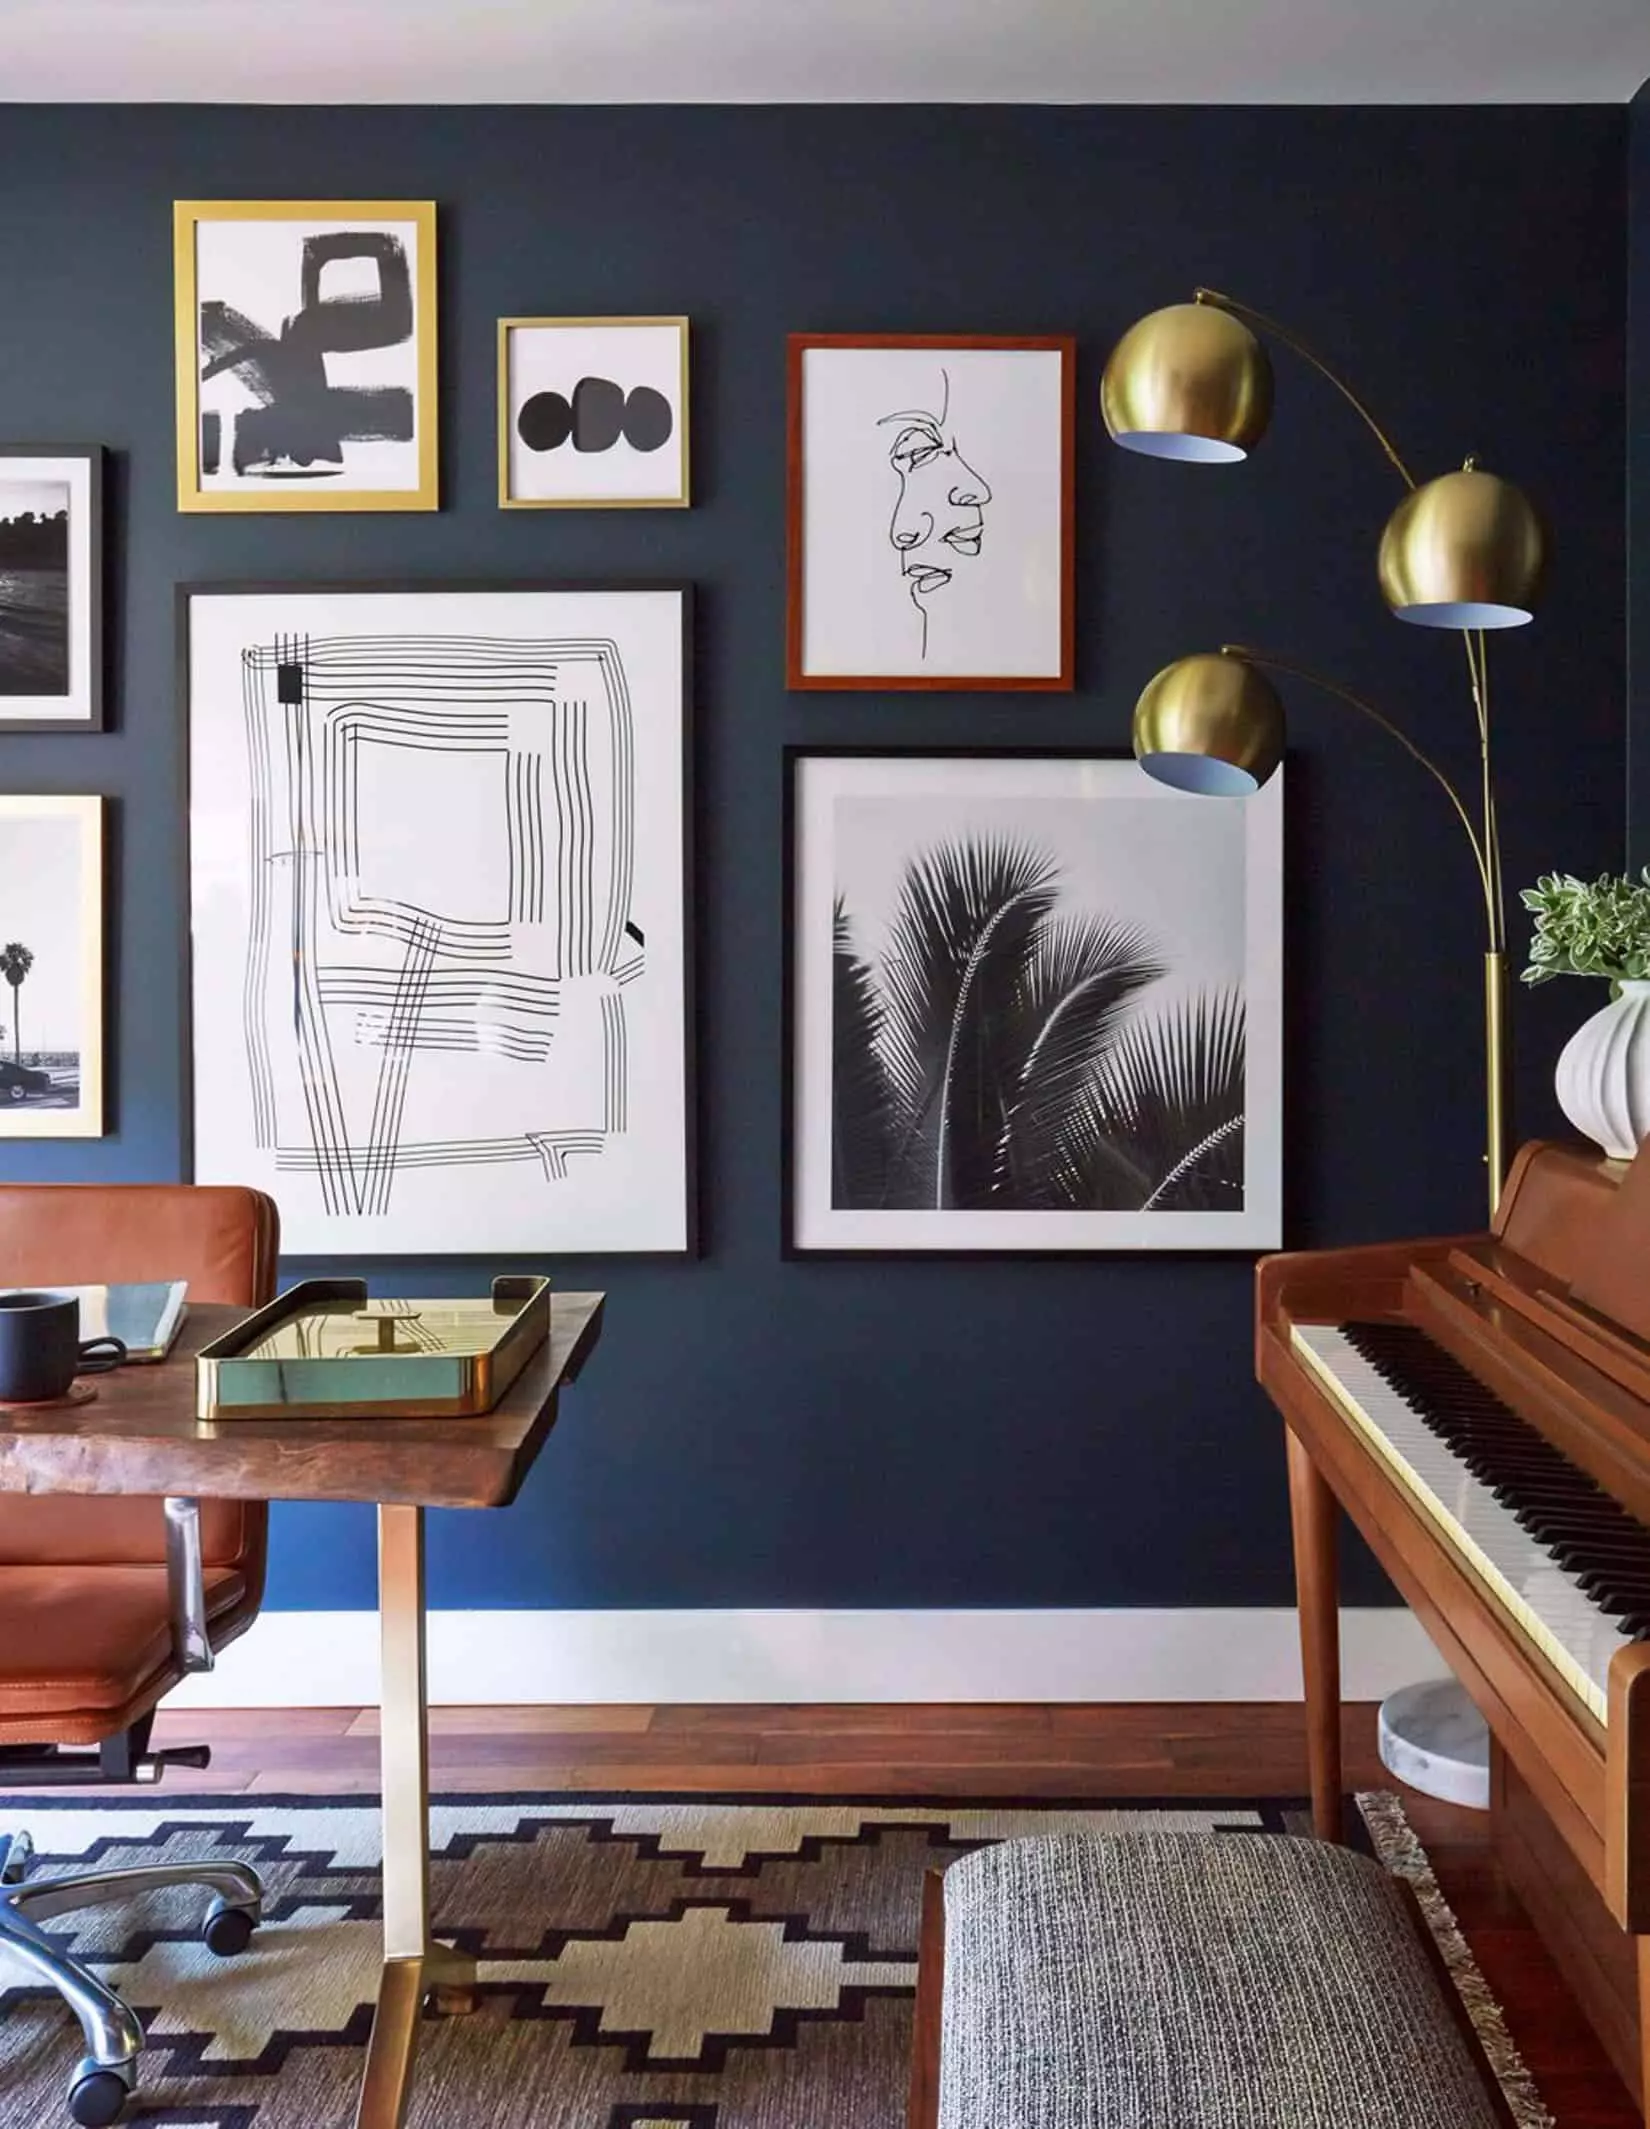 photo by zeke ruelas | from: a moody mid-century office
Think Beyond Frames
Not everything in your gallery wall has to be framed or square. Adding alternative elements can add intrigue and dimension to your display. Consider incorporating a photo strip on a clip, a board painting, a flag, a textile, or a sculptural piece like ceramics. Round pieces, such as oval canvases or embroidery hoops, can break the grid-like pattern of a gallery wall and provide visual interest.
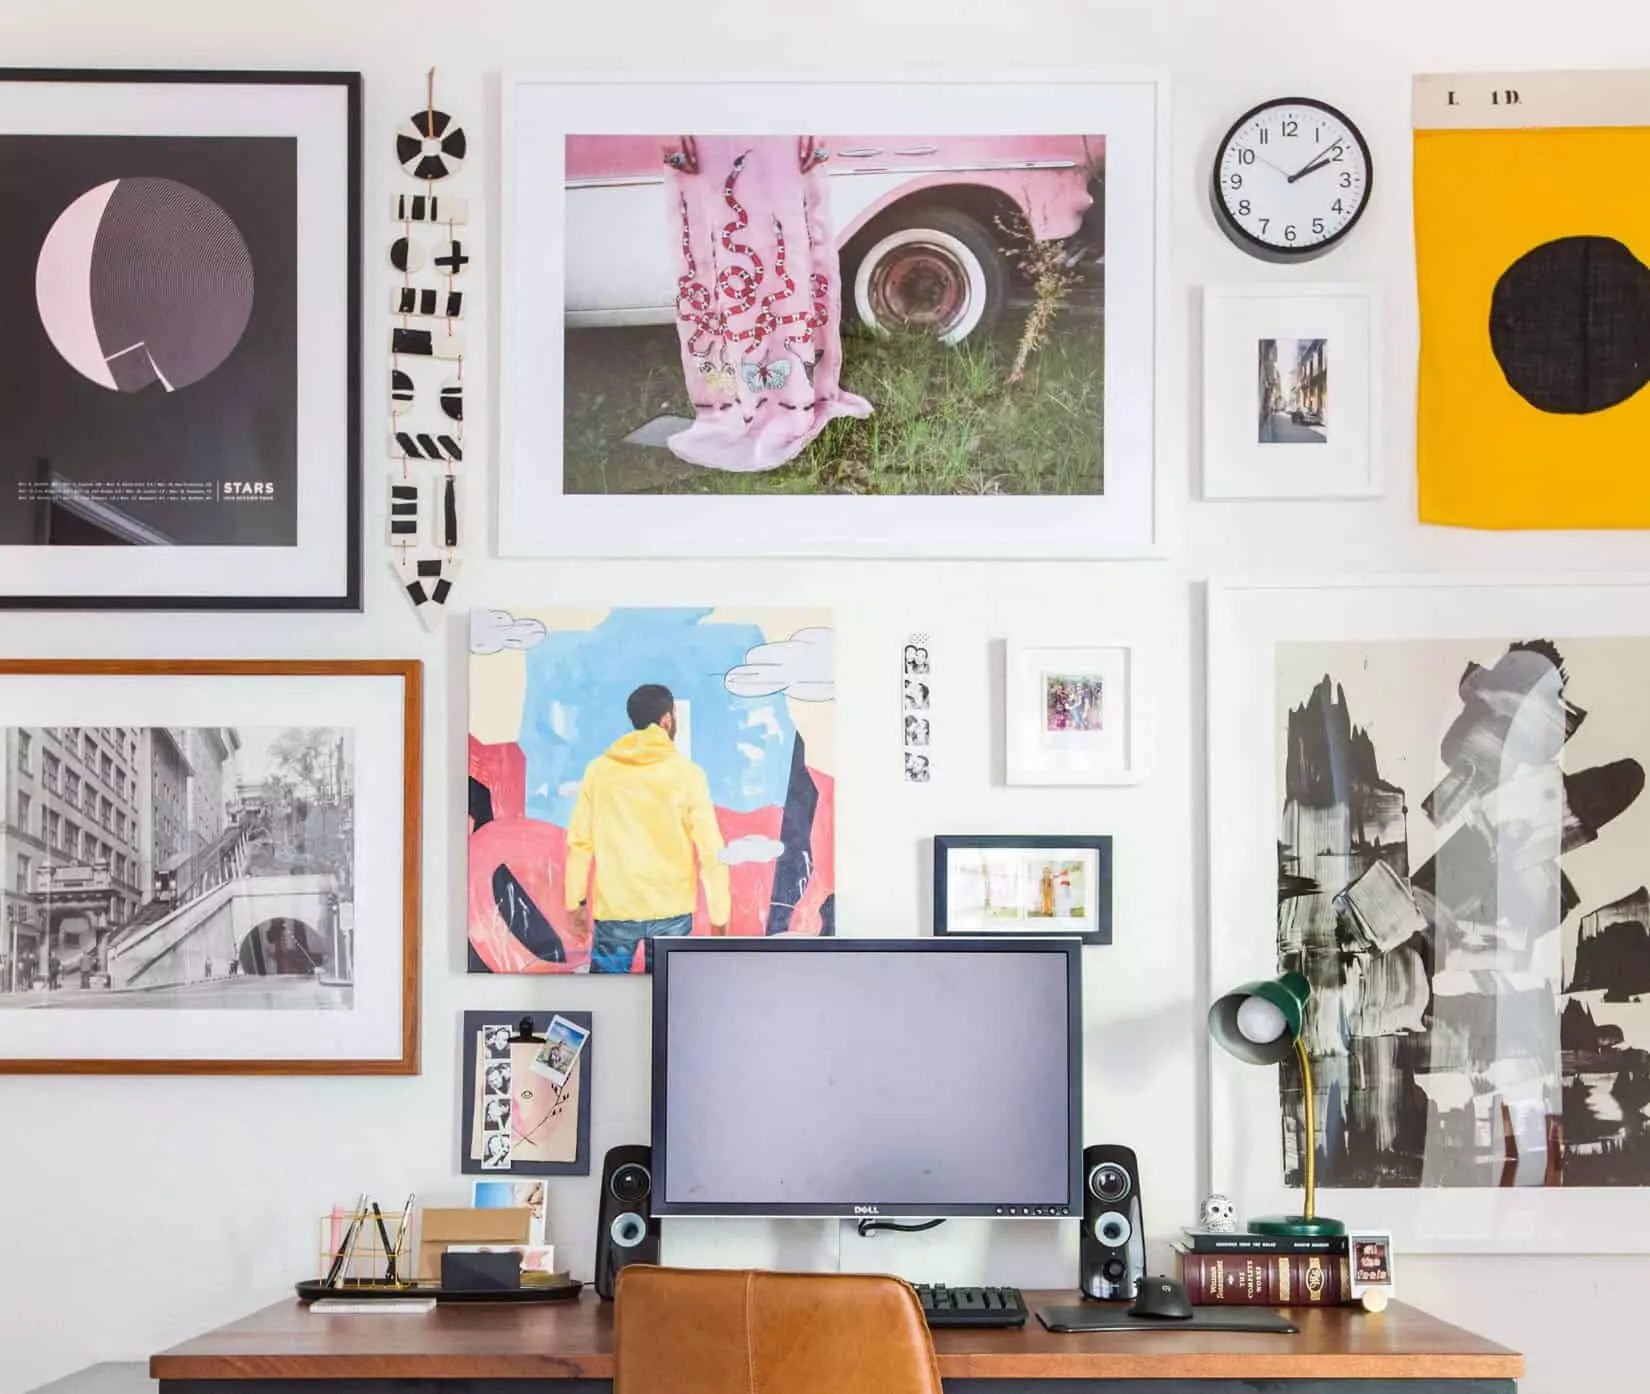 photo by tessa neustadt | from: sara's home office reveal
Float Mount for Instant Elevation
Elevate any item in your gallery wall by float mounting it. This technique instantly adds a touch of sophistication and can be applied to various objects, such as polaroids, ticket stubs, stamps, or keys. Float mounting has become easier than ever. You can either use framing services like Framebridge or DIY by using shadowbox frames from Ikea, foam adhesive stickers, and matte board or card stock.
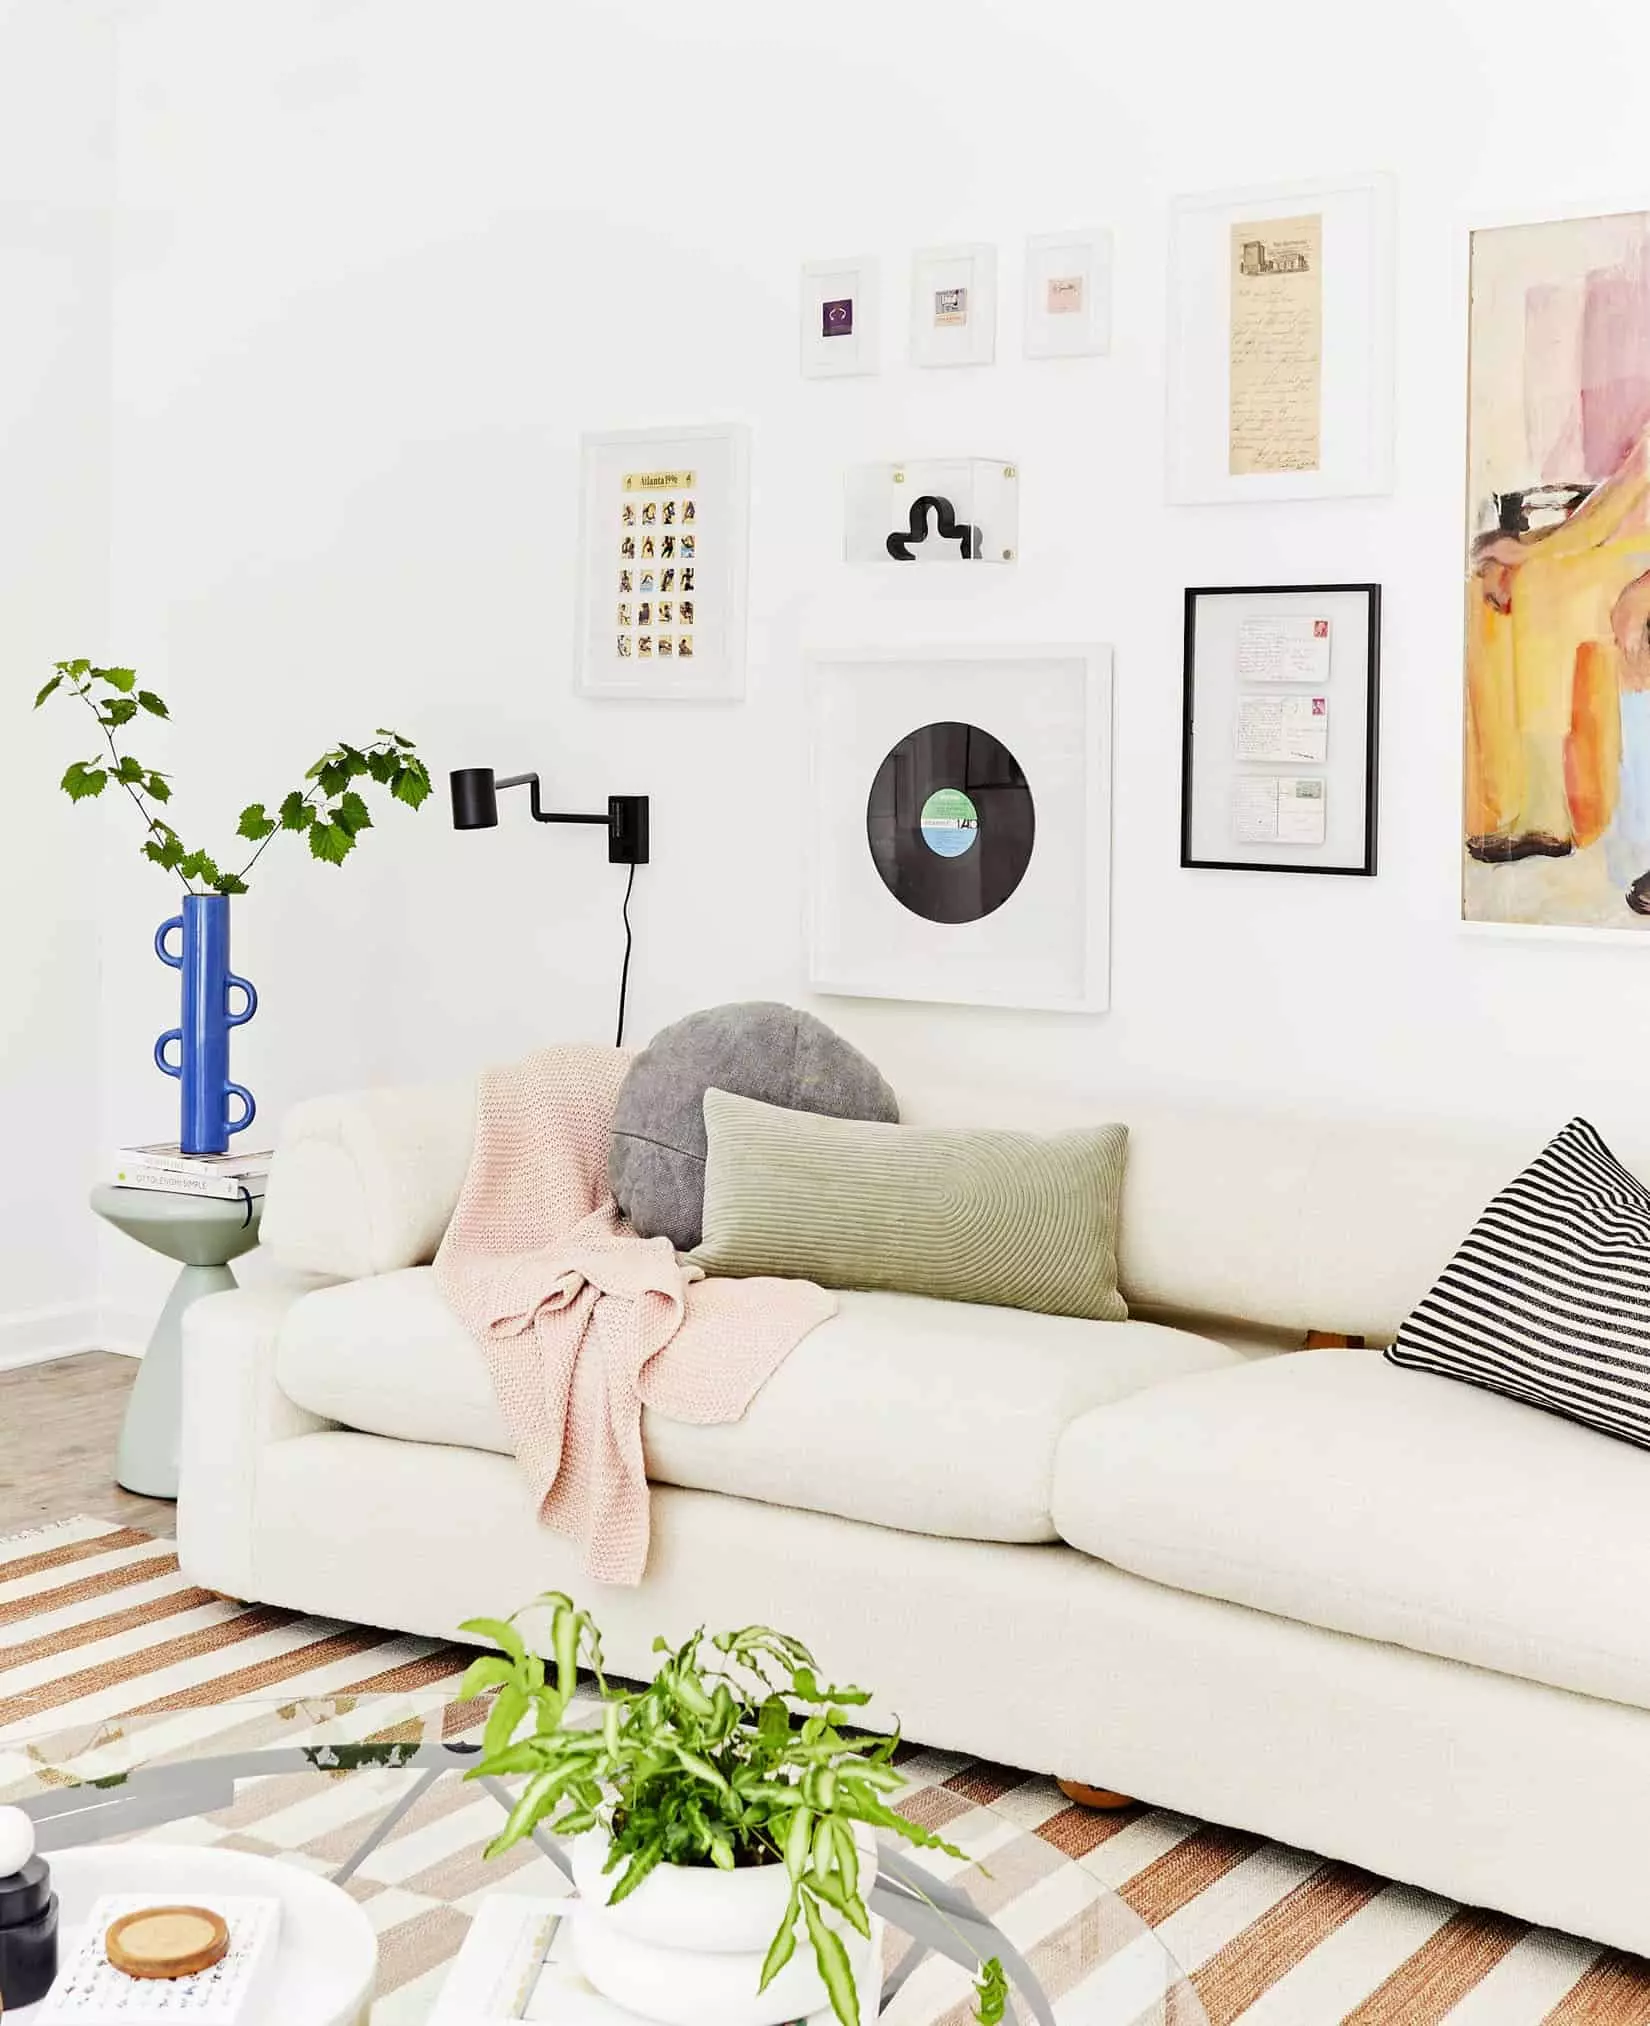 photo by sara ligorria-tramp | from: a budget-friendly living and dining room
Add Personal Touches
While digital prints are a great way to bring affordable art into your gallery wall, it's important to add personal touches as well. Including a few sentimental items can make your gallery wall truly unique and meaningful. Consider adding a drawing from a friend, an old photo of your grandmother, or even framing your vows. Remember, anything can be art! A cocktail napkin from a first date or an ultrasound can add a special touch.
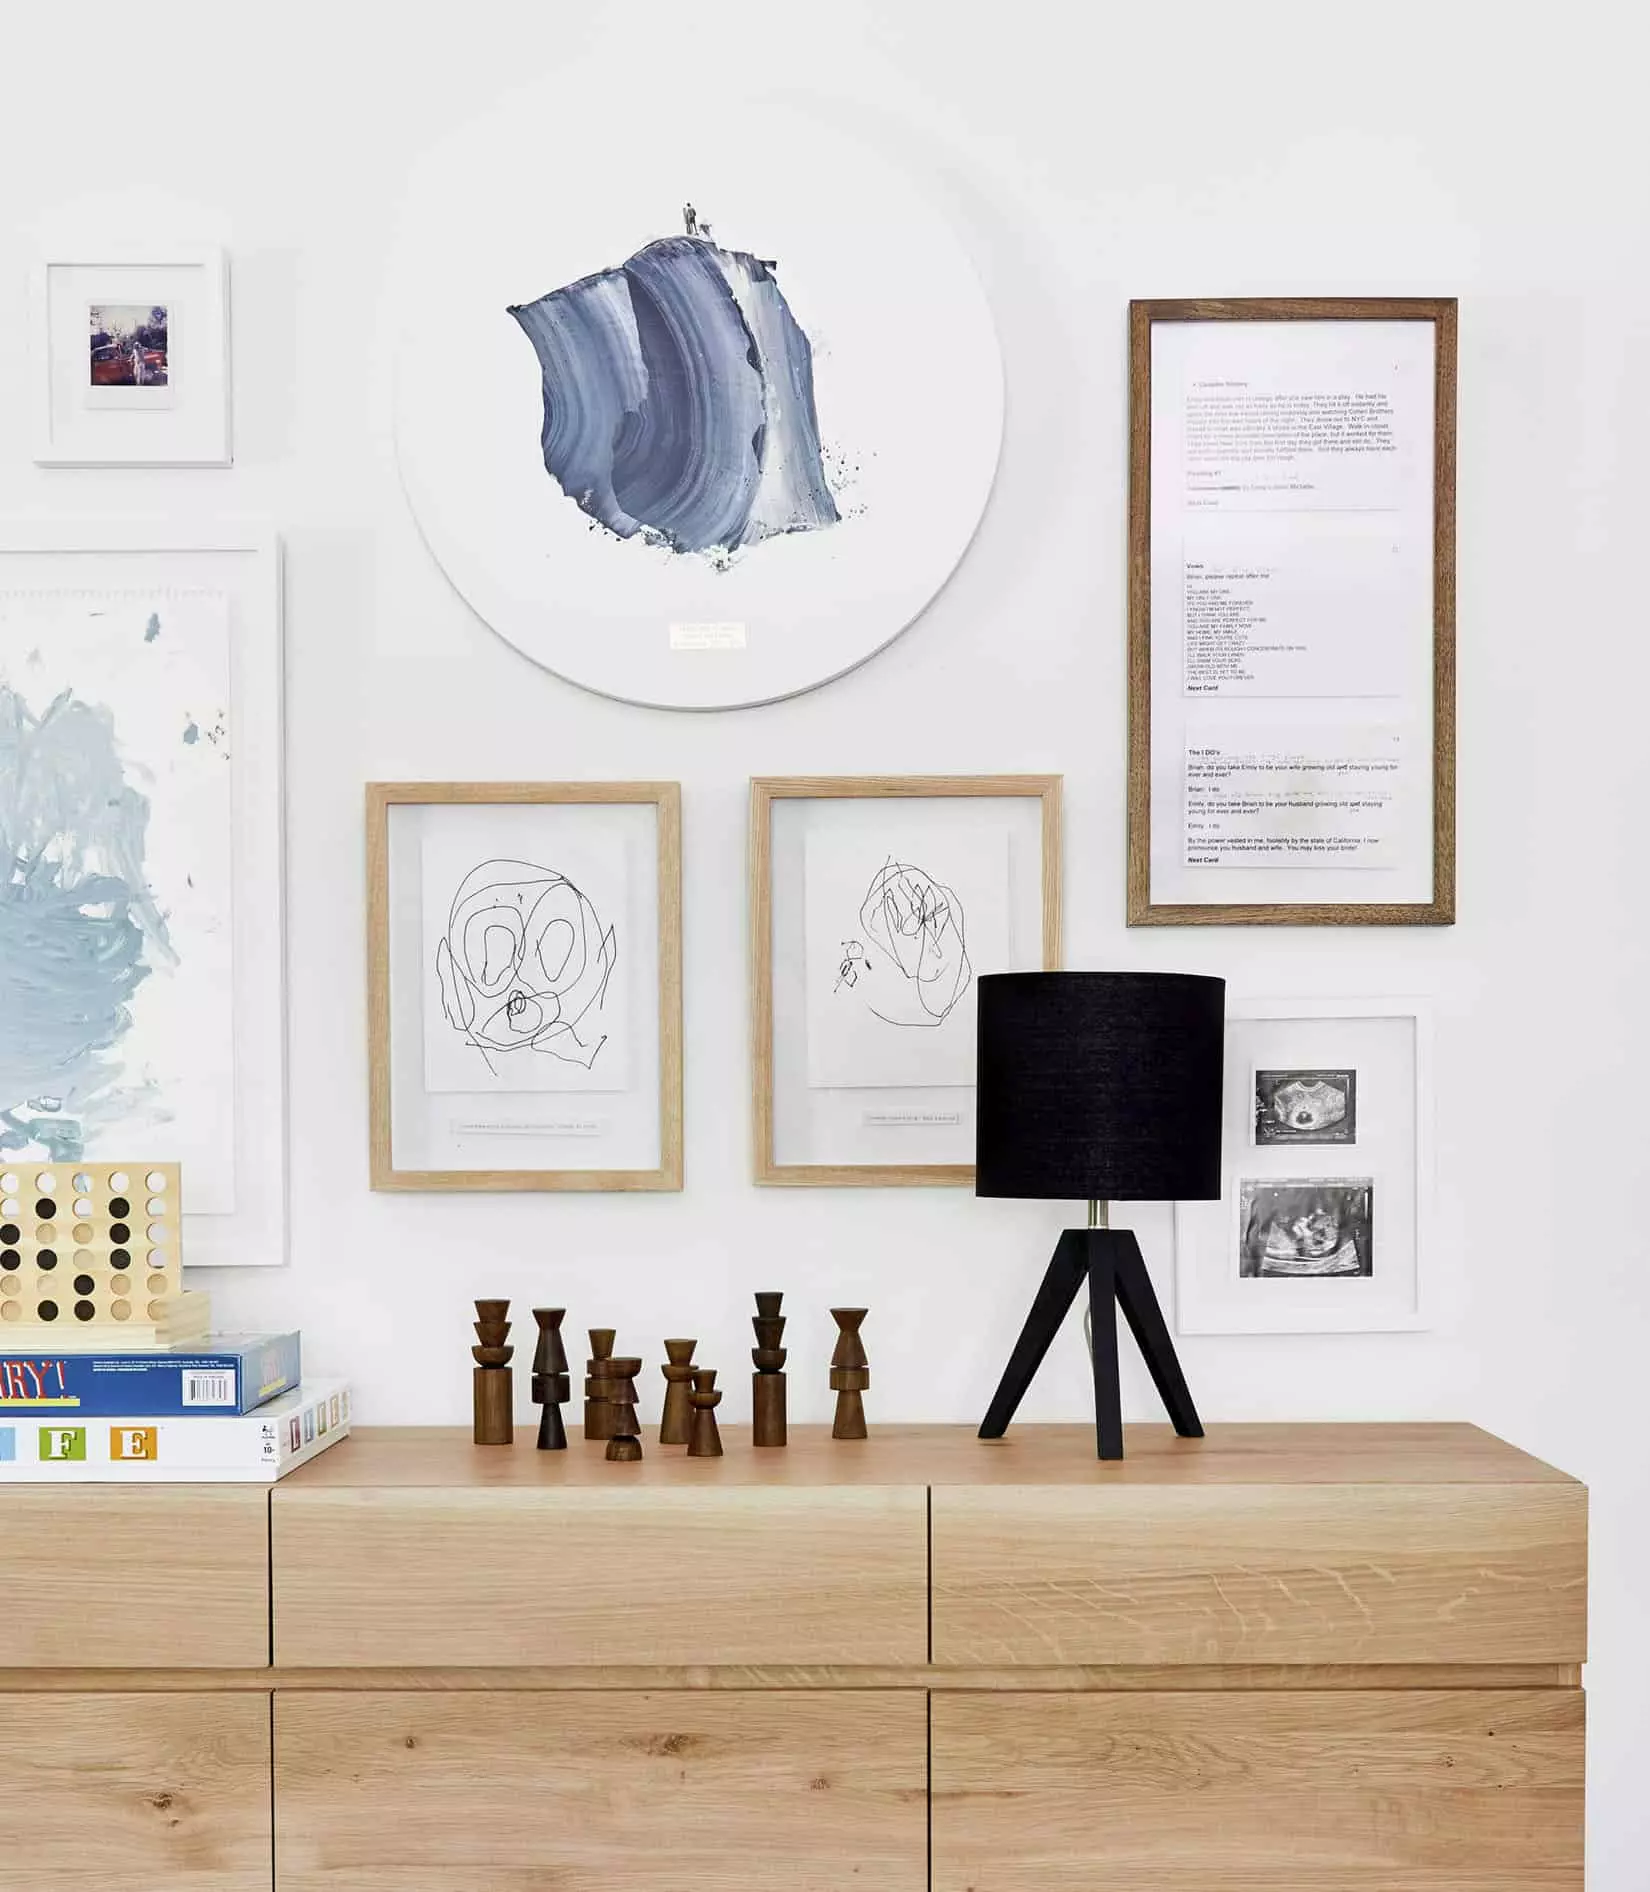 photo by sara ligorria-tramp | from: how we designed our super kid-friendly family room
Now that you have our foolproof formula for creating a stunning gallery wall, it's time to get creative and have fun with your own arrangements. Remember, putting up a gallery wall may seem daunting at first, but the end result is incredibly satisfying.
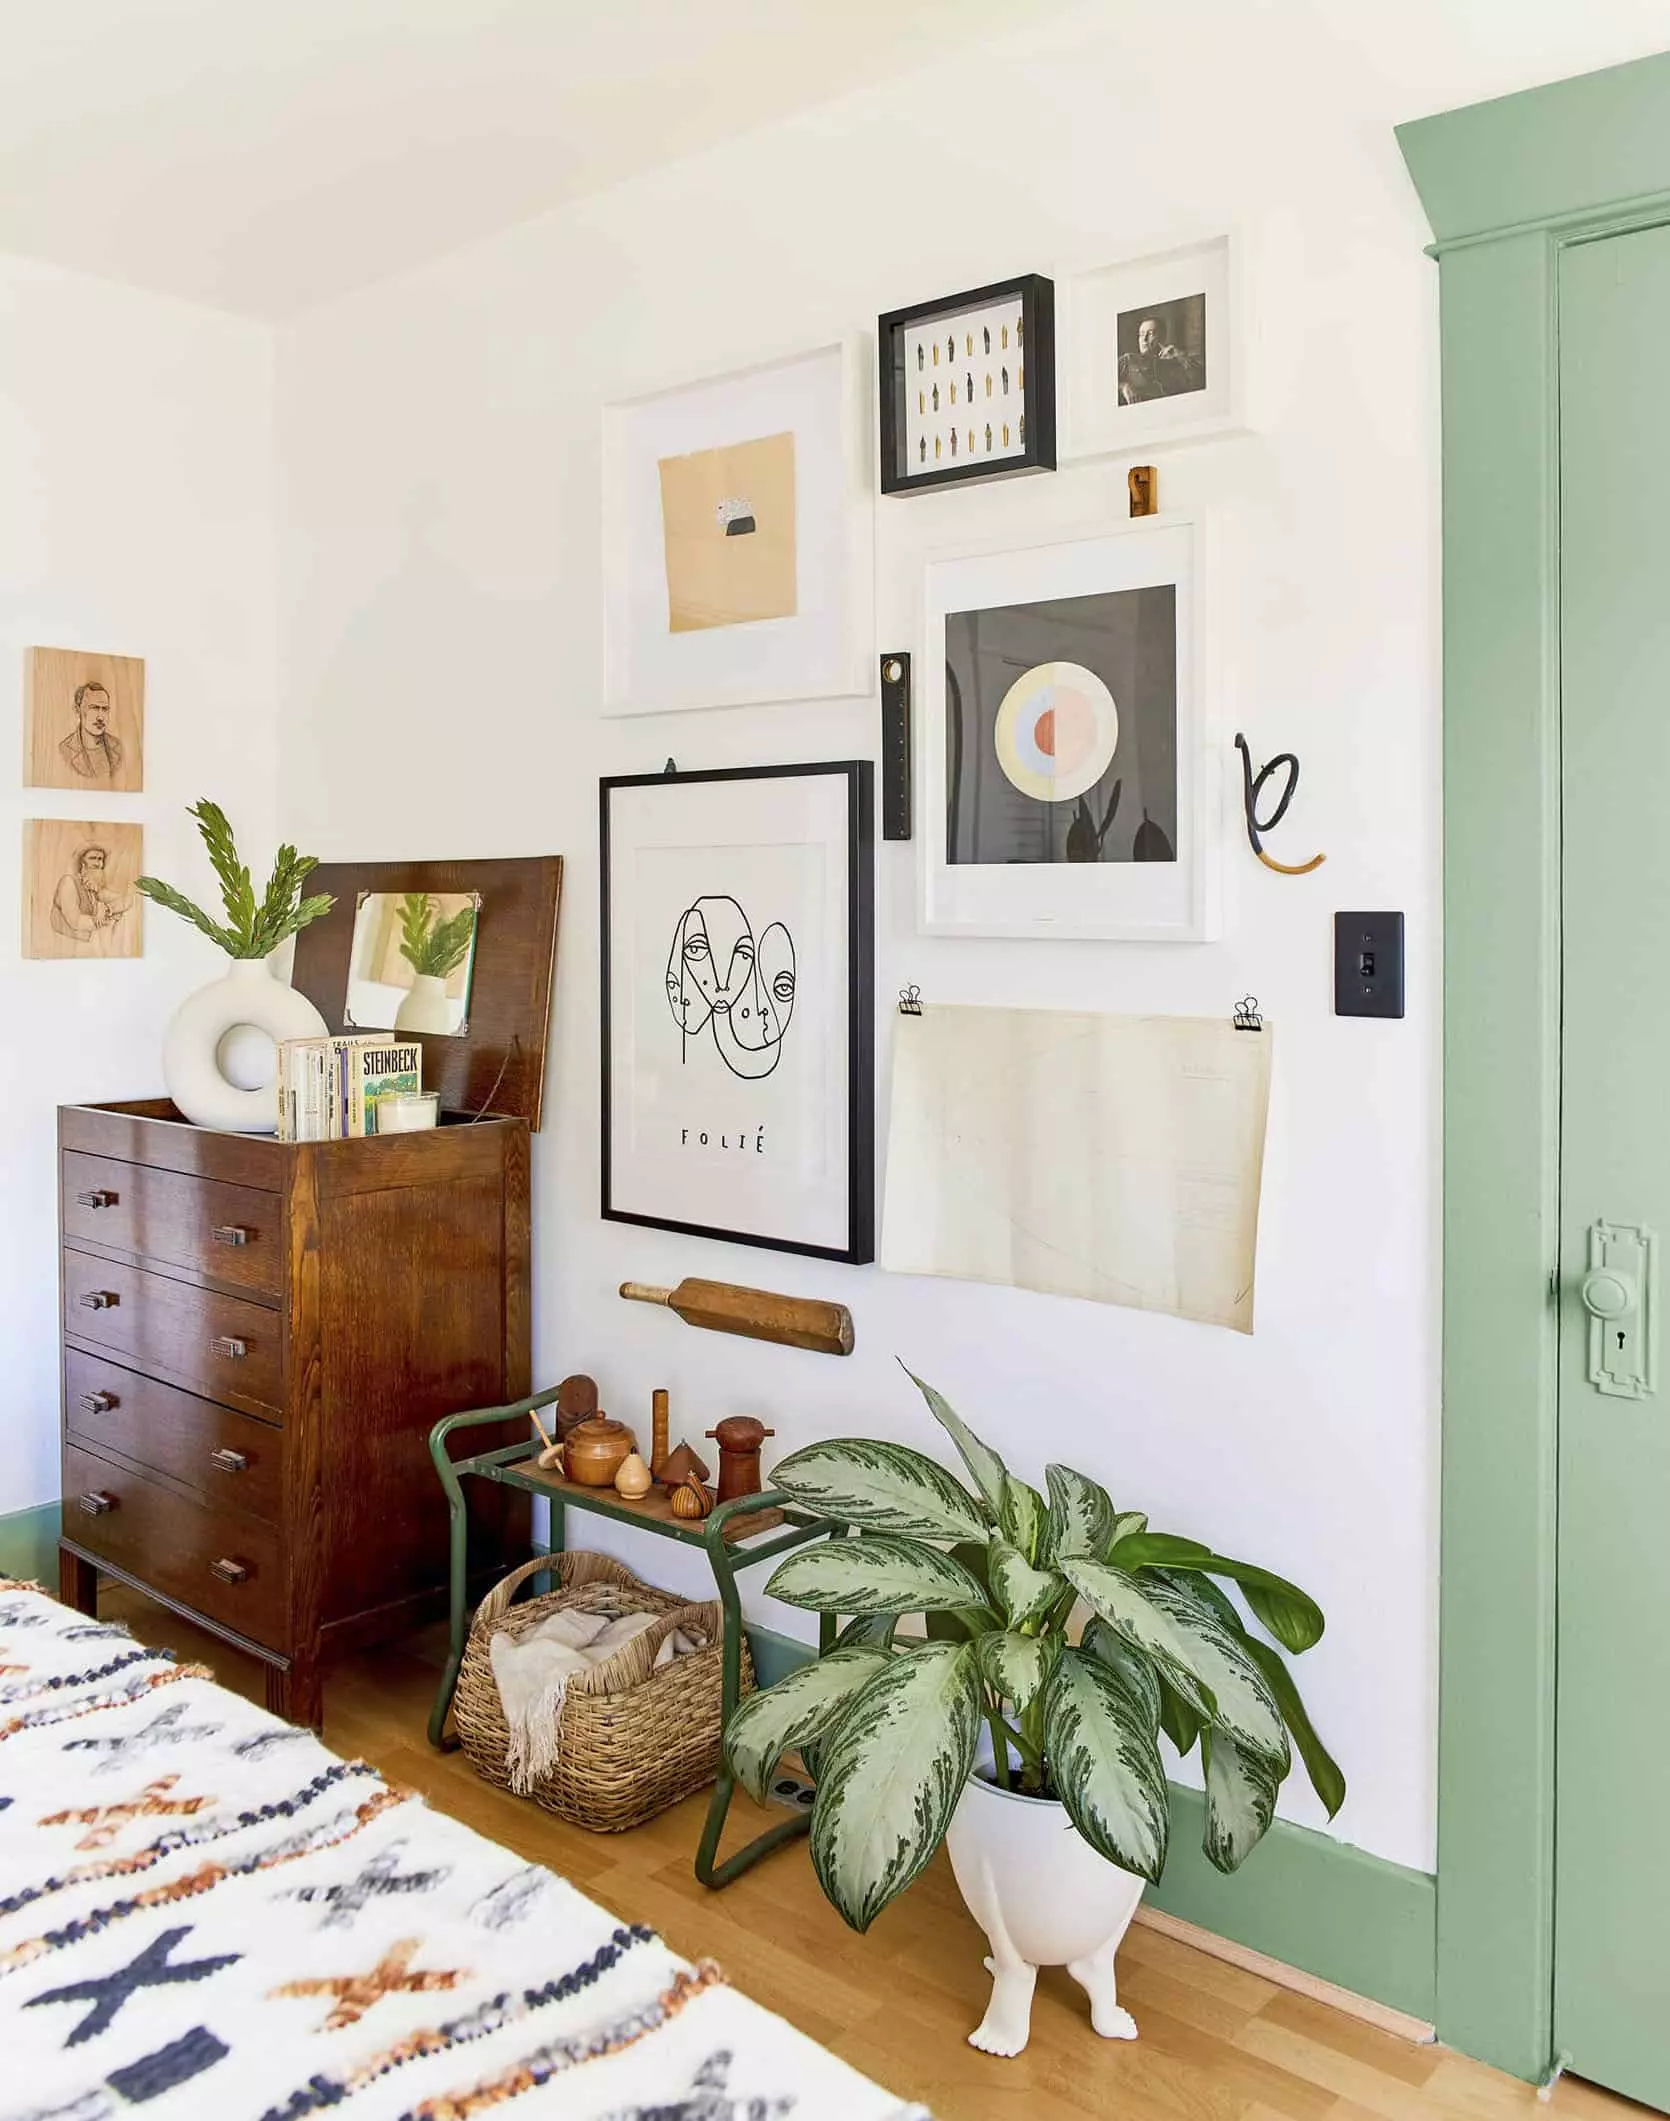 photo by sara ligorria-tramp | from: julie's bedroom makeover takeover reveal
And if you prefer a more auditory experience, check out Emily and Orlando's quick final overview:
[Link to Emily and Orlando's final overview video]
For more inspiration and helpful resources, take a look at these EHD articles:
- [How to Hang Art Correctly]
- [Affordable Large Scale Art & How to Get It in Your Home]
- [Top 5 Most Affordable Online Art Resources]
- [The Guide to a Well Hung Gallery Wall]
- [The 7 Things You Need to Know Before You Try to Hang That Gallery Wall]
- [Best Online Art Resources]
- [Design Mistakes: Generic Art]
- [15 Ideas for Hanging Art We Got From You Guys]
- [Stylist Hack: 7 Unexpected Places I Like to Hang Art (to Make Your House Look Unique)]
- [Is This the New Gallery Wall? (AKA Gallery Wall 2.0)]
- [Think Outside the Frame: Wall Hangings Are the Cure for Your Boring Walls]
- [How We Shoot, Edit, and Hang Family Photos With Framebridge]
- [How to Choose, Frame, and Hang an Art Collection]
- [Design Mistake: Different Walls, Same Art Configurations (AKA It's Time to Bring Life to Your Walls)]
And don't forget to check out these inspiring room reveals:
- [Griffith Park Living Room Reveal]
- [Silver Lake Hills Living Room Reveal]
- [Moody Mid Century Home Office]
- [Arlyn's Moody Dining Room Reveal]
- [Sara's Office Reveal]
- [Brady's Kitchen Reveal]
- [Jess' Living Room Reveal]
- [Portland Reveal: The 5 Design Elements Every Awesome "Big Kid" Playroom Needs]
- [Mountain House Reveal: How We Designed Our Super Kid-Friendly Family Room]
- [Sara's TV Room Reveal]
- [Cup of Jo Makeover: The Living/Dining Room]
- [The Curbly Family Dining Room Makeover]
- [Oh Joy's Studio: The 'Living Room']
- [A 120-Year-Old Barn Makeover with The Frame TV]
So go ahead, unleash your creativity, and create a gallery wall that will be the envy of all who see it!
Opening Photo Credit: Photo by Sara Ligorria-Tramp | From: A Budget-Friendly Living and Dining Room


