

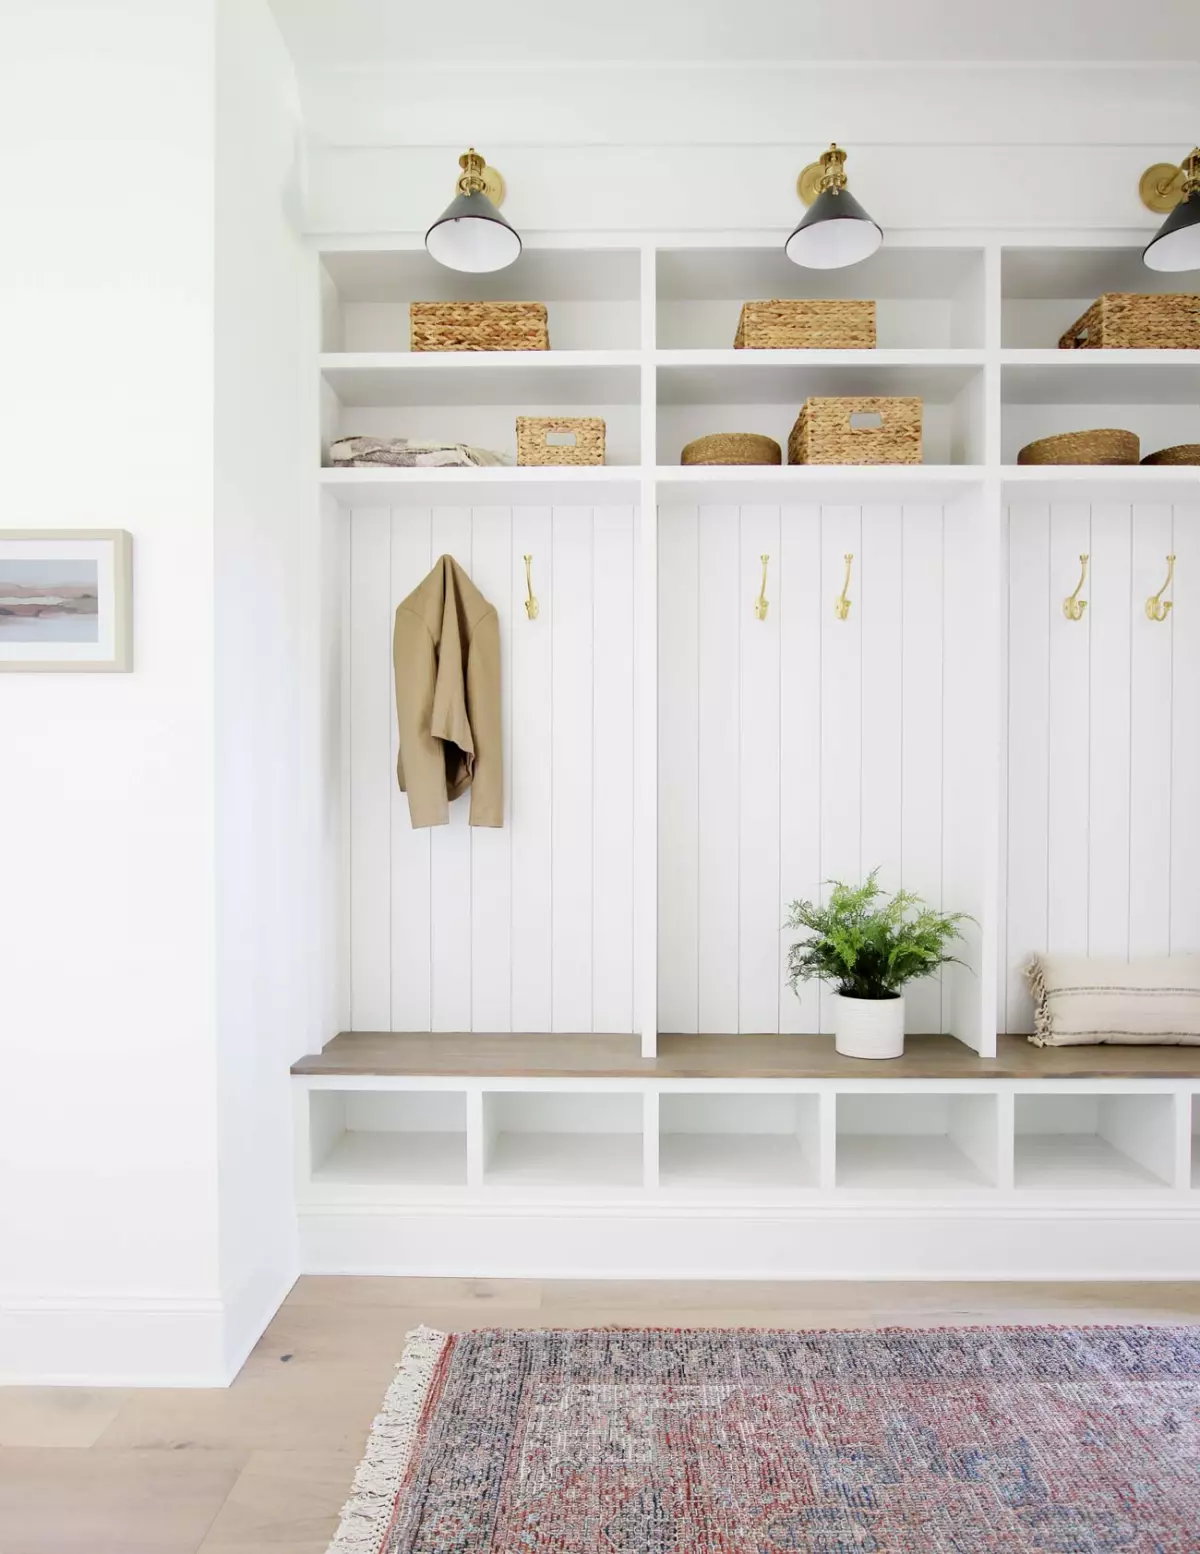
Our mudroom is the hub of activity in our house, the place where we come and go, and where shoes, backpacks, and coats find a temporary home. To optimize this space, I decided to create custom-built lockers that would enhance storage and organization. In this step-by-step guide, I will share my insights and show you how to construct your very own mudroom lockers.
What is a mudroom?
A mudroom is a small room or area near the backdoor or garage where you can conveniently remove shoes and coats before entering the main living area. It serves as a barrier to keep dirt out of the house and is a perfect spot for storing outdoor essentials like umbrellas and hats. Whether you have kids, pets, or simply want a designated drop zone, a mudroom with hooks, a bench, or lockers can be a valuable addition to any home.
Before we dive into the construction process, I highly recommend downloading our printable plans for a smoother building experience. These plans include detailed instructions as well as a SketchUp 3D model to help you visualize the project.

To build these mudroom lockers, you will need the following tools and materials:
- Finish Nailer
- Tape Measurer
- Wood Glue
- Miter Saw
- Table Saw
- Clamps
- Sand Paper
- 1 1/4″ Finish Nails
- 2″ Finish Nails
- Wood: 1×12's, 1×2's, 1×6's stain-grade wood (for seating)
Please note that the dimensions provided in this tutorial are specific to the available space I had. You may need to adjust the measurements to fit your own mudroom.
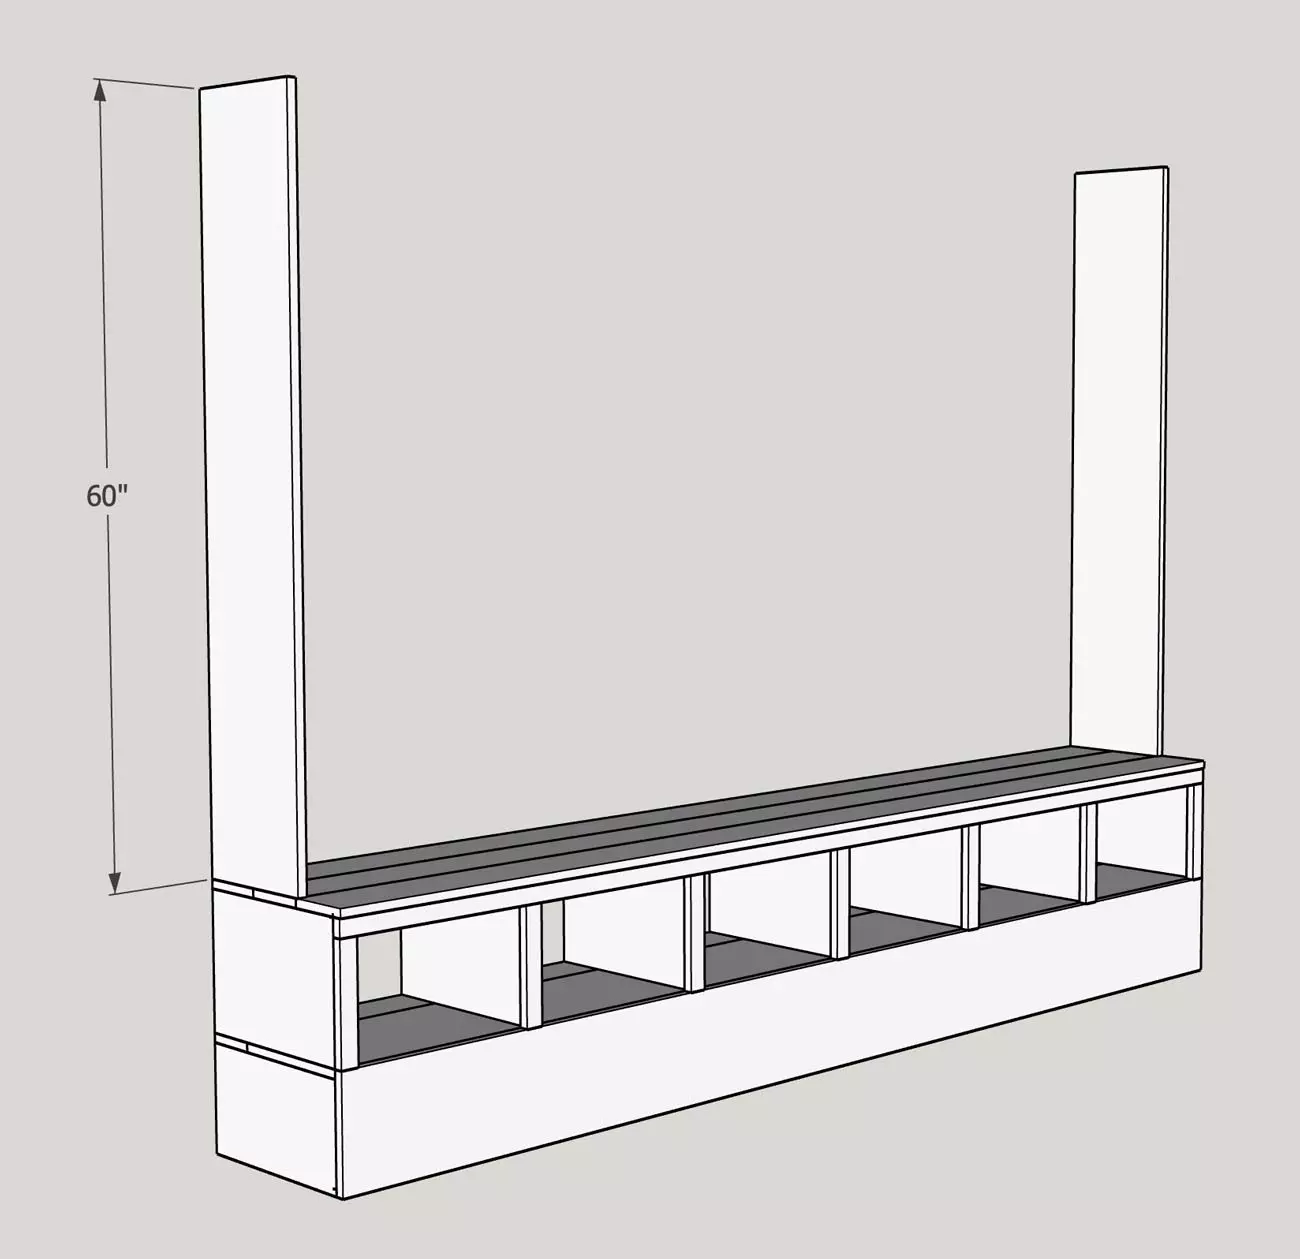
Step 1: Build the Base
When constructing built-in lockers, I like to incorporate the existing baseboard into the design for a seamless look. In my case, the baseboard is 7 1/2″ high, which influenced the height of the locker base. Using a 1×10″, I constructed the front of the base, as well as the ends and support pieces, following the dimensions in the provided diagram.
To create the top of the base, I cut a 1×6 down to 4 3/8″ wide and secured it to the ends and supports. Remember to use wood glue and nails for a sturdy construction.
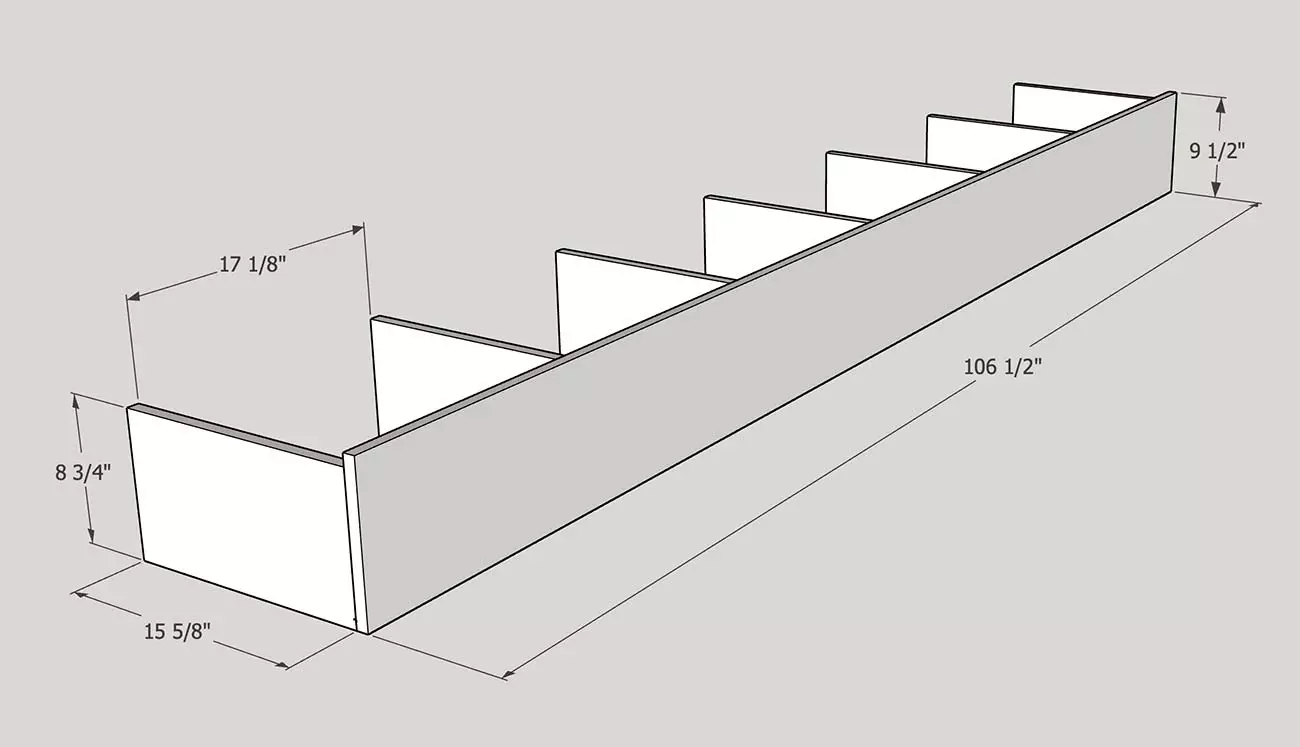
Step 2: Shoe Compartments
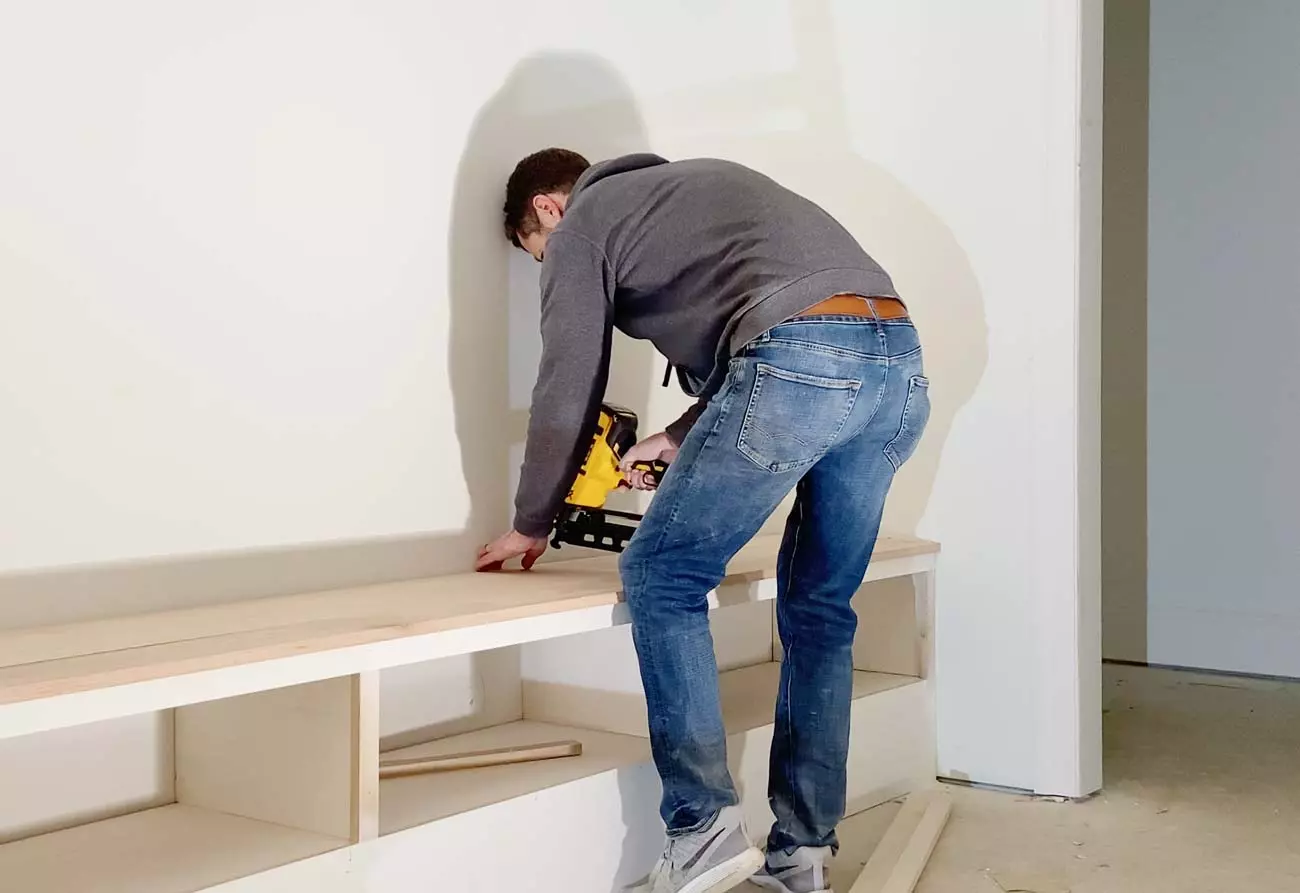
Next, we'll build the shoe compartments. Cut 7 pieces of 1×12 to a length of 15 5/8″. Nail the two end pieces to the wall studs to ensure stability.
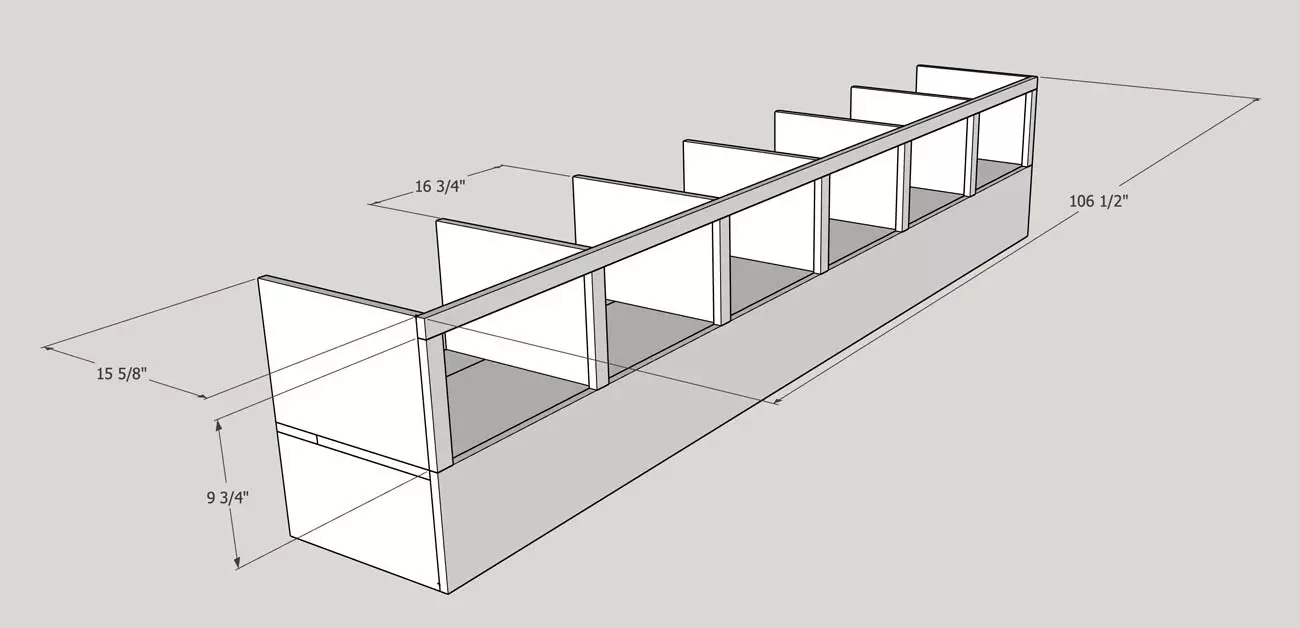
Connect the ends with a piece of 1×2 and attach each shoe compartment divider. Apply wood glue to the bottom of each divider and secure the top to the 1×2.
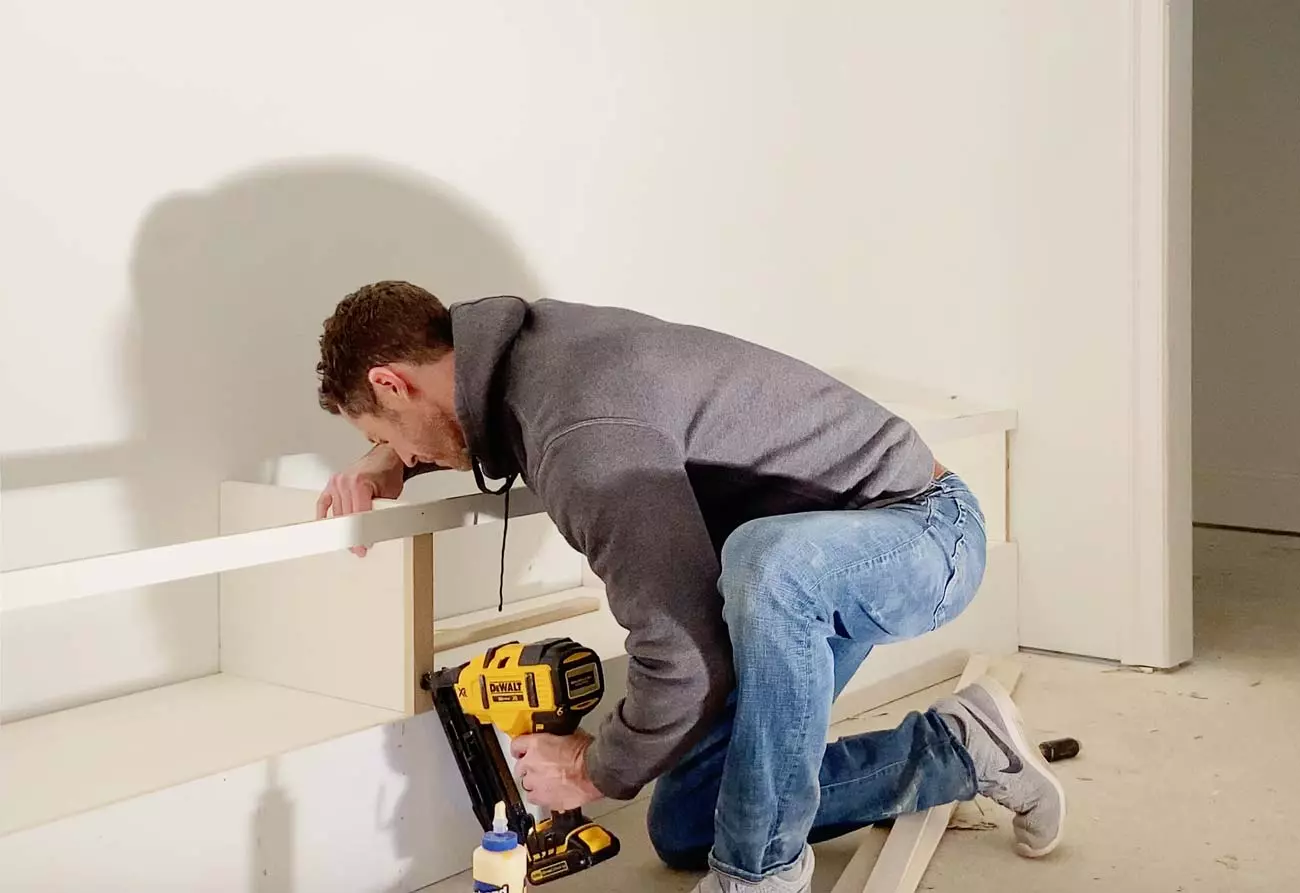 Using: Dewalt 20-Volt Finish Nailer
Nail a piece of 1×2 to the front of each divider, following the dimensions in the diagram.
Step 3: Seat
Adding the seat is a straightforward process. Apply wood glue to the edges of the oak boards and tightly pull them together as you nail them in place.
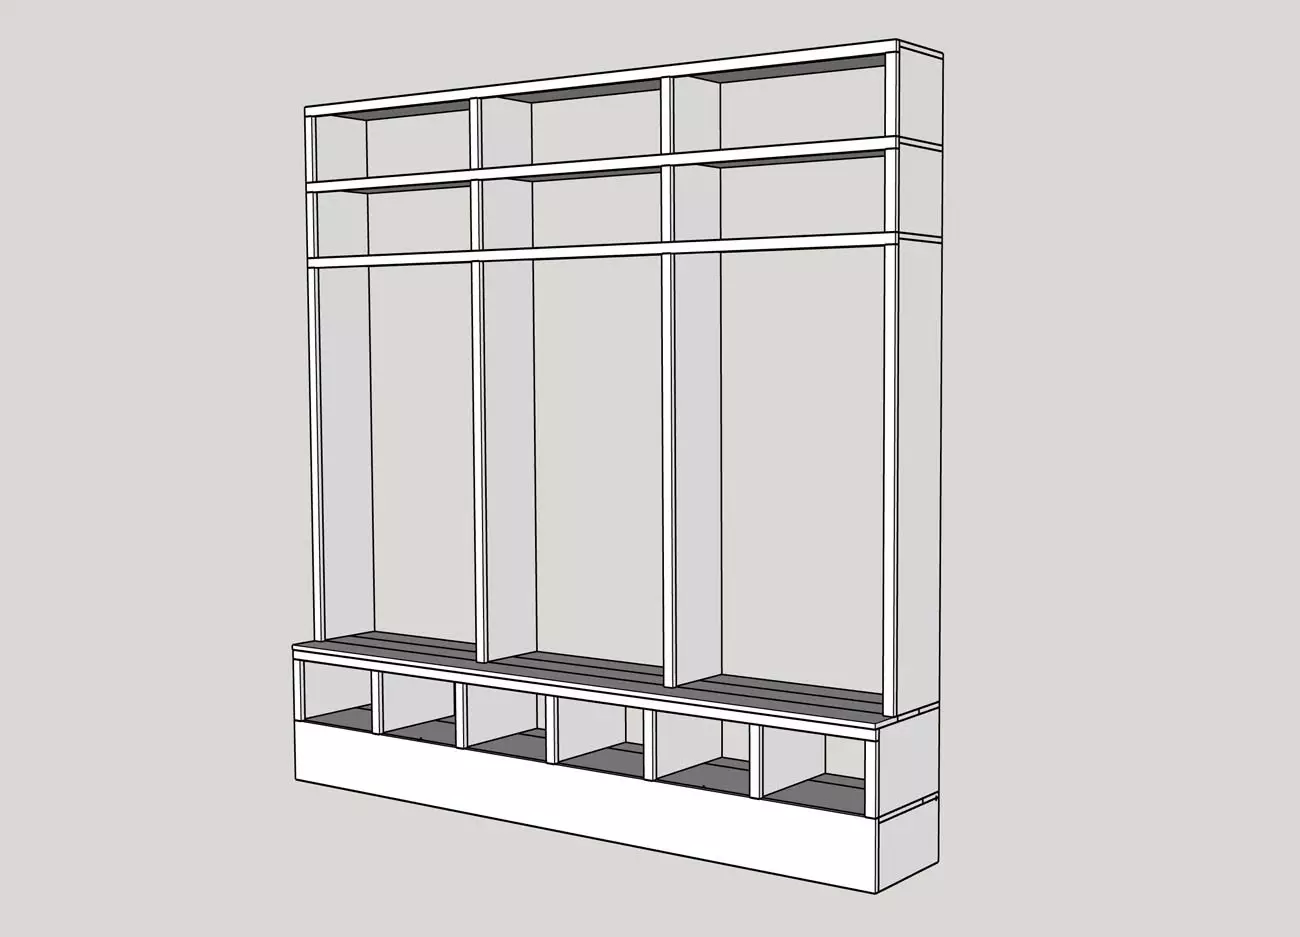
Step 4: Locker Dividers
Now, it's time to incorporate the locker dividers. Use a piece of 1×12 for each divider. Begin by nailing the two ends in place.
Nail scrap wood pieces to the wall to hold the middle dividers in place, provide support for the shiplap, and serve as a mounting point for hooks.
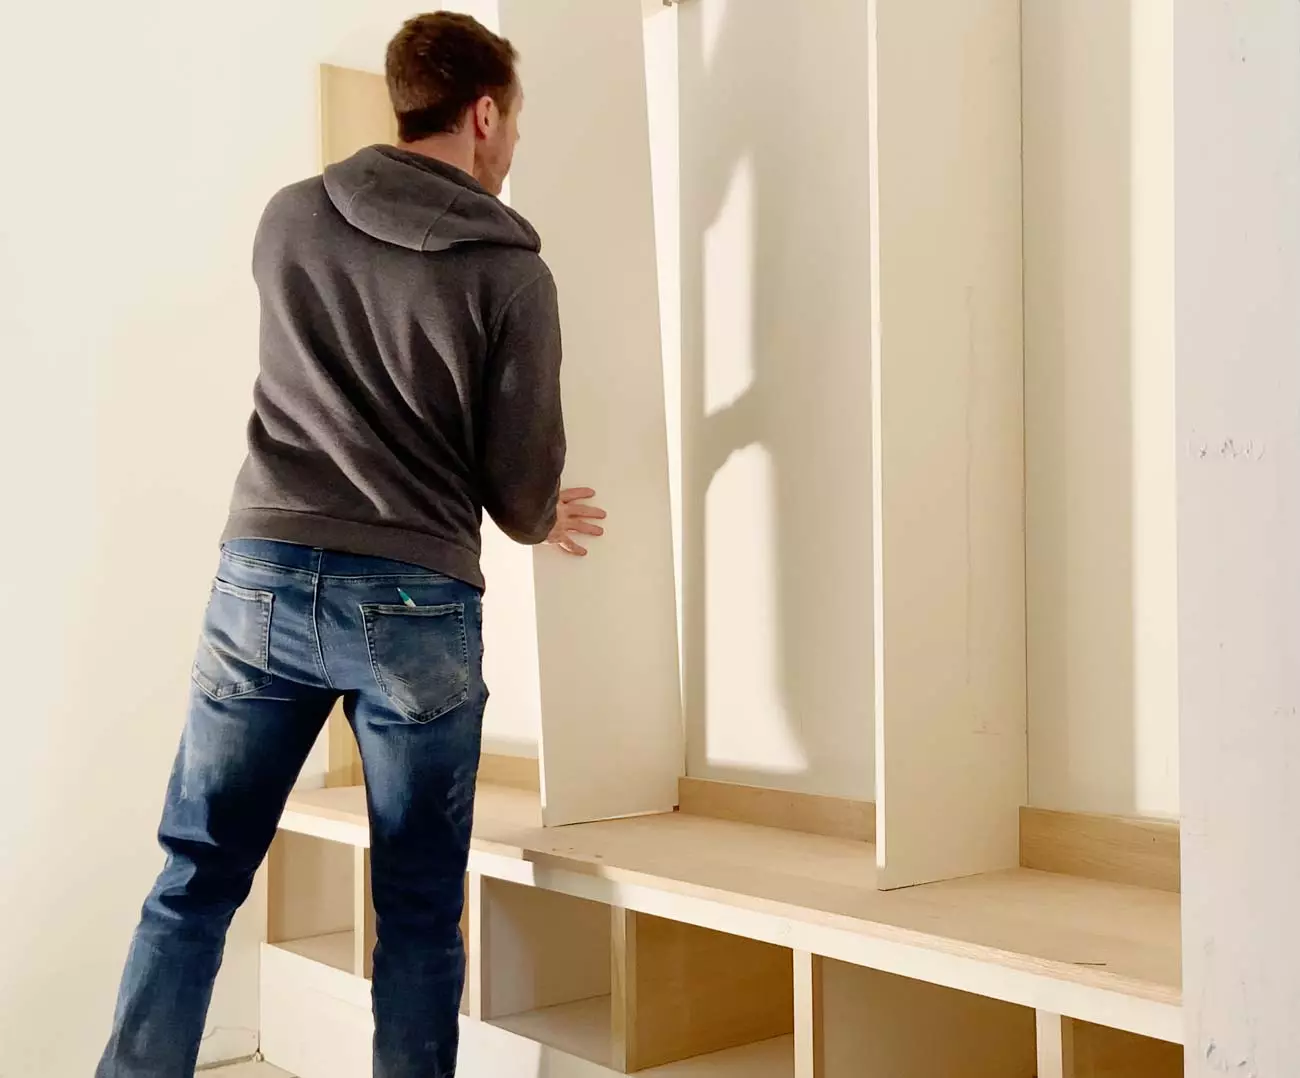
To secure the bottom of the dividers to the seat, add wood glue to the bottom and nail a 2×12 to the top.
Step 5: Vertical Shiplap
Fill the back wall of each locker section with vertically installed pieces of 4″ shiplap. Begin in the center of each section and work your way out, nailing the shiplap to the scrap boards.
Step 6: Top Shelves
Construct the top shelf sections before placing them on top of the lockers.

Lift each layer and secure them in place with nails.
Step 7: Trim and Finishing Touches
To add thickness and visual appeal, attach pieces of 1×2 to the front of the lockers.
Finally, complete the design by attaching a 1×12 board and a piece of 7″ crown molding to bring the lockers all the way to the ceiling.
After completing the construction, fill any holes, sand the lockers, and prepare them for painting. Additionally, you can work with an electrician to install wall sconces above each locker section.
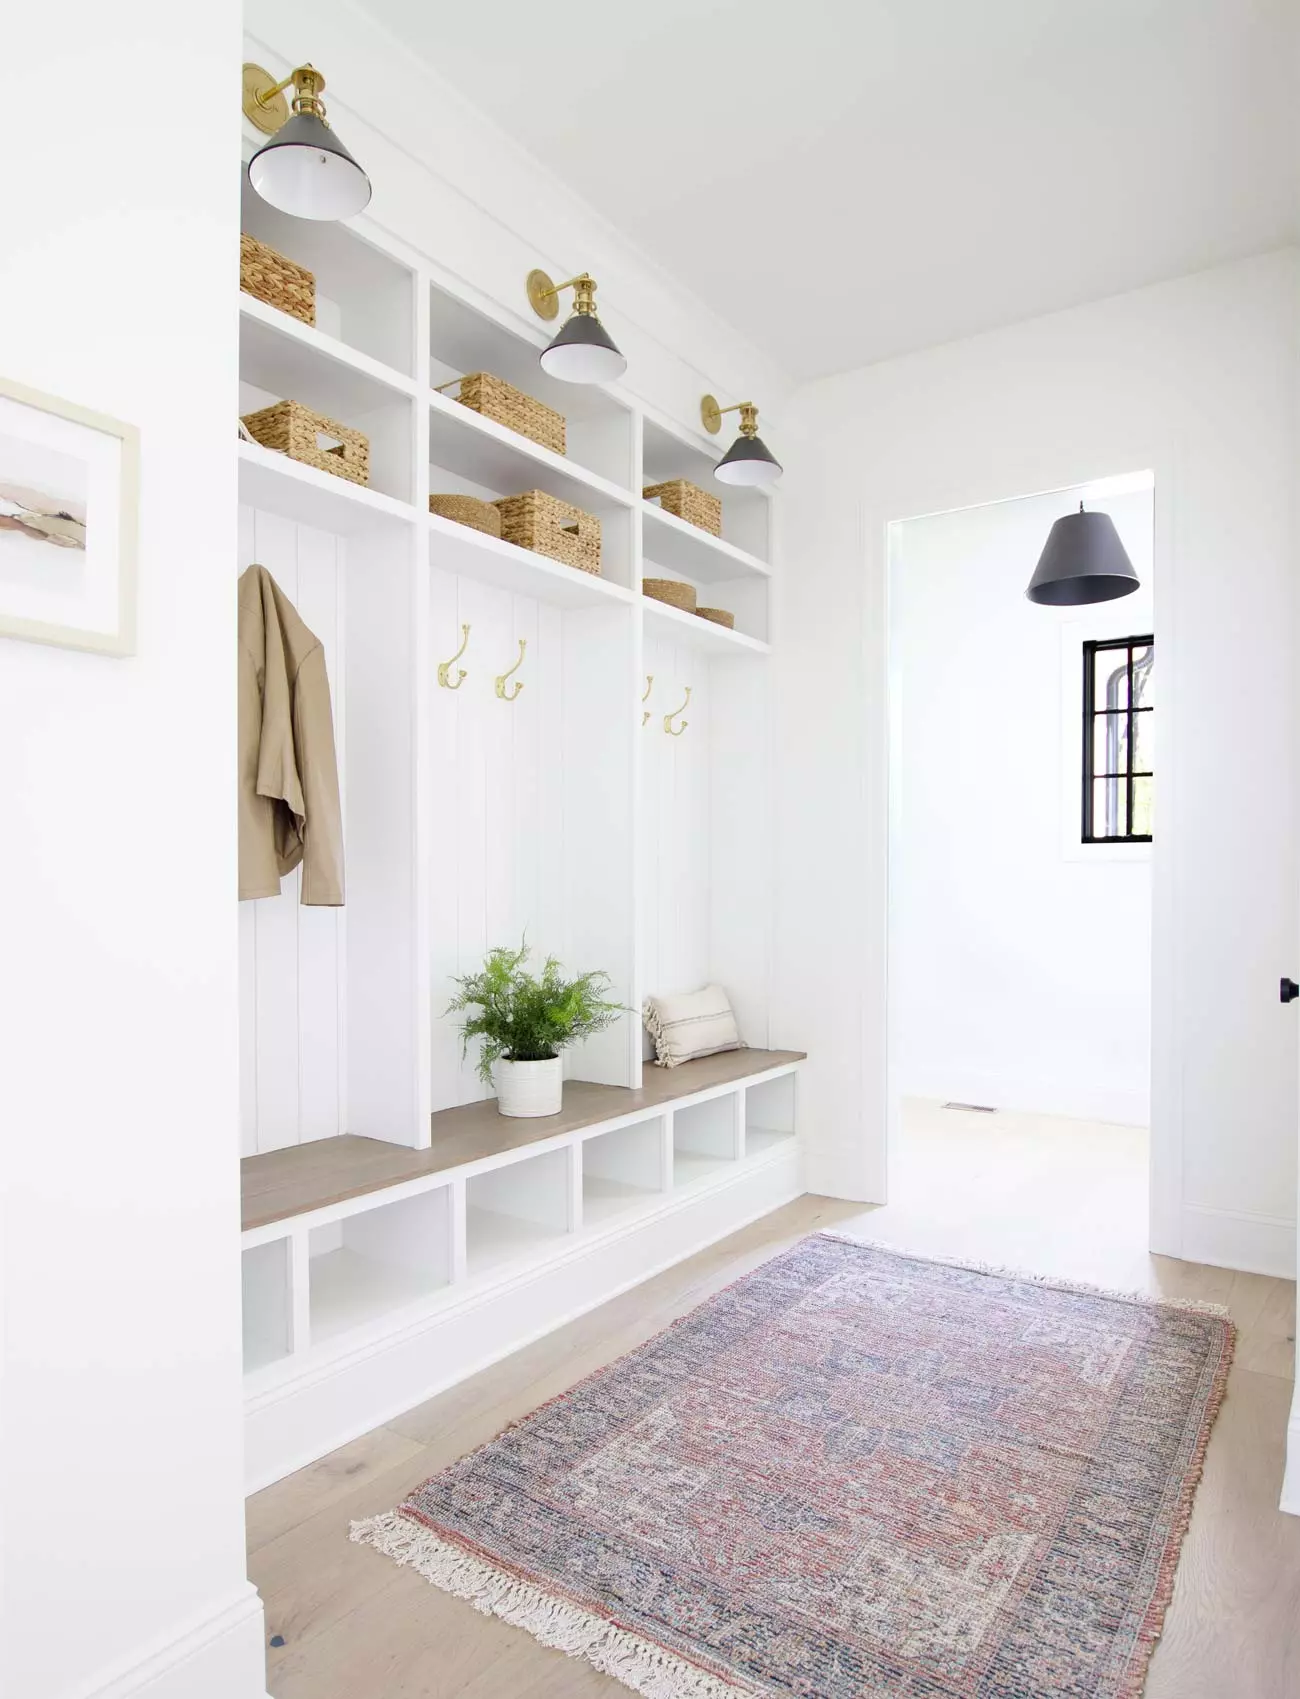
I am extremely pleased with how my mudroom lockers turned out. They not only enhance the aesthetic appeal of the space but also provide practical storage solutions. Now, everyone in the household has a designated spot to store their belongings.
I hope you found this tutorial helpful in your own locker-building endeavors. Happy constructing!
Shop This Look
This page contains affiliate links. If you make a purchase through one of these links, we earn a small commission at no additional cost to you.


