

Ready-to-assemble (RTA) cabinets, also known as flat-pack cabinets, have long been associated with poor quality. However, there are now sturdy options available in the market that defy this reputation. Not only do RTA cabinets typically cost half as much as pre-assembled cabinets, but the installation process is also significantly easier and requires less manpower. In this article, we will delve into the project of assembling and installing a kitchen's worth of flat-pack cabinets and provide you with valuable tips and insights.
Start with a plan
 Cabinet layout is crucial when it comes to utilizing all available wall space and accommodating storage needs and nearby appliances. It's essential to leave room for filler strips at inside corners, allowing drawers and doors to fully open.
Sketch it out
The cabinet design should be thoroughly reviewed and agreed upon by the homeowner. A 2D drawing showcasing cabinet sizes, locations, and appliance placements is usually sufficient, but the more detailed, the better. It's highly recommended to have sample cabinets or at least sample doors and drawers available during the design process. This ensures that installers and clients are on the same page regarding the size and finishes of the cabinets to be installed.
Get unpacked
The first step is unloading the cabinets from the delivery truck. Although the cabinet boxes are heavy and bulky, they are smaller than pre-assembled cabinets, making them a suitable choice for tight spaces and walk-up multifamily buildings. However, it's important to note that RTA cabinets weigh the same as their fully assembled counterparts due to identical parts and hardware.

Divide and conquer
To streamline the installation process, it is recommended to start by installing the upper cabinets. Separate the uppers and lowers and begin building the cabinets you'll start with. While your team sorts and moves the cabinets, lay out their locations directly on the wall based on the kitchen design. A level 1x ledger can be screwed to the studs to aid in setting the uppers, and any resulting holes can be covered by a tile backsplash.
Tips for smooth assembly
A large, smooth work surface is crucial for seamless box assembly. A sturdy table made from a pair of sawhorses and a sheet of BC plywood will prove to be a valuable asset.
RTA cabinets offer substantial cost savings for clients while providing exceptional durability. Unlike inexpensive pre-assembled cabinets, RTA cabinets are fully glued with wood glue and do not rely on hot-melt adhesive. By assembling the cabinets ourselves, we minimize damage and reduce lead time. With a two-hour drive to pick up the order, we can have a full kitchen's worth of cabinets in just one to two days—a remarkable feat considering the common supply chain issues prevalent today.
Our RTA cabinet supplier, Kitchen Cabinet Distributors, offers a wide range of sizes and heights, providing ample options to suit various kitchen designs. Additionally, they offer pantry cabinets, end and appliance panels, and an extensive selection of trim pieces and accessories, rivaling what's available from a semi-custom cabinet manufacturer.
Build and install the uppers
Each upper cabinet box consists of a back, two sides, a bottom, a face frame, and doors. To ensure seamless assembly, dry-fit the back, sides, and bottom to verify the accuracy of dadoes and rabbets.
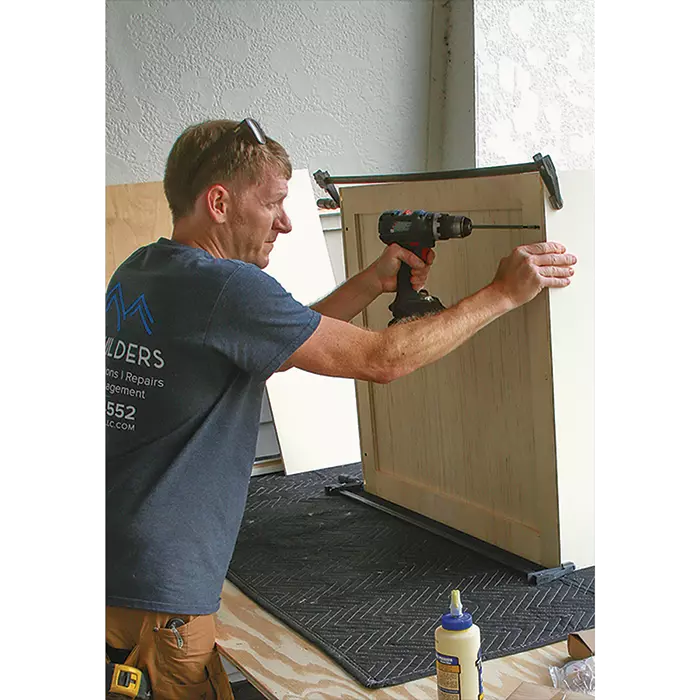
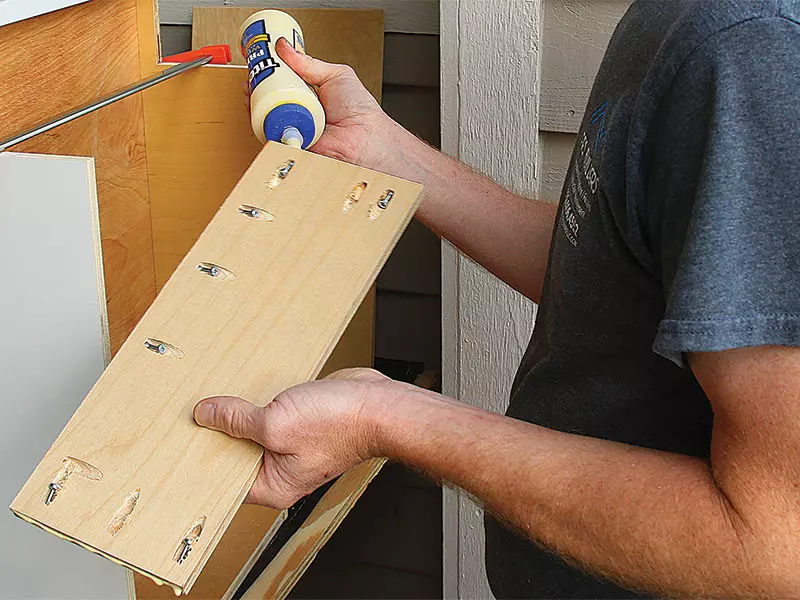
1. Glue and screw the back
Apply wood glue to the back and sides, and then insert the sides into the rabbets on the cabinet back. Once the cabinet is upright, use bar clamps to secure the pieces together. Drive screws into the pocket holes on the cabinet back, gradually increasing the torque setting to avoid stripping them.
Tips for smooth assembly
Lots of clamps are essential for successful cabinet assembly. Utilize 24-inch F-body bar clamps and a few 36-inch and 12-inch clamps to ensure stability.
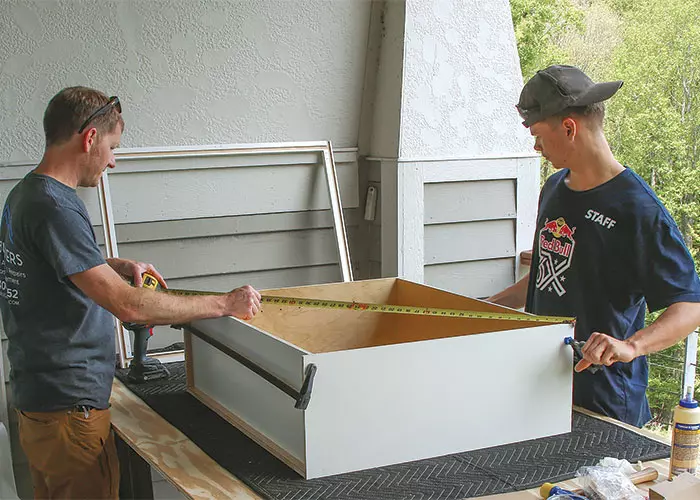
2. Fit the top and bottom
After the glue sets, proceed to attach the cabinet top and bottom. Apply glue to the rabbets for the top and bottom and slide them in, ensuring that the finished side is inside the cabinet. Clamp or brad-nail the sides to the top and bottom to hold the parts together while the glue dries.
Tips for smooth assembly
Lots of glue is necessary to ensure strong and durable cabinets. Consider using a combination of Titebond II for the boxes and Titebond Quick & Thick for gluing on face frames.
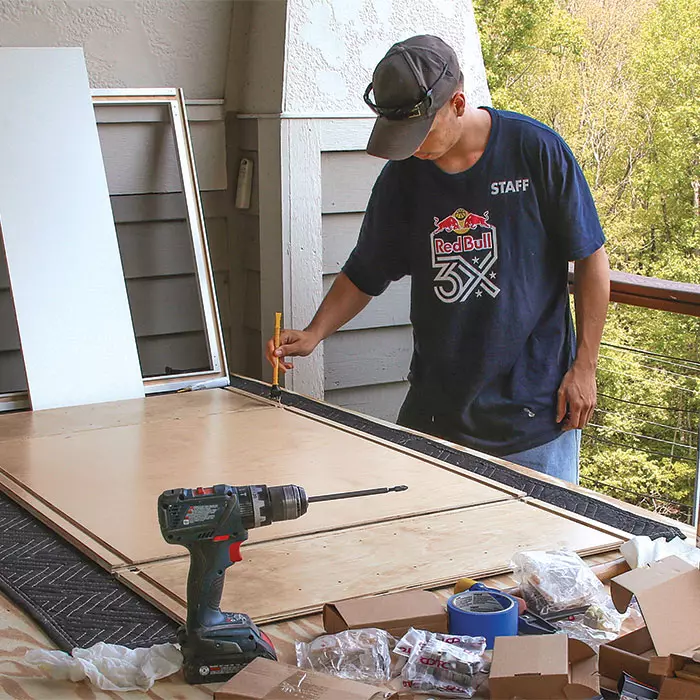
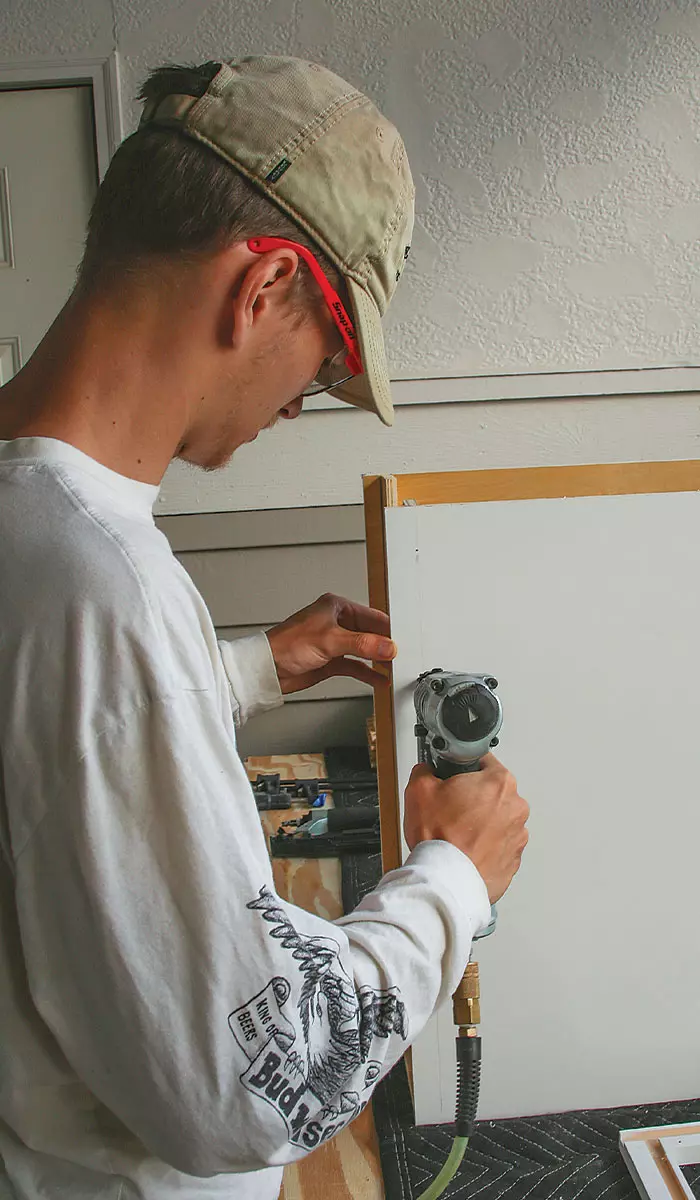
3. Attach the face frame
Before gluing on the face frame, check the cabinet for squareness and use clamps to correct any out-of-square conditions. Utilize Titebond Quick & Thick fast-setting glue to attach the face frame, along with 1-inch, 23-gauge pins to secure the sides and bottom of the cabinet to the face frame. Pay close attention to the proper installation of the face frame to avoid any complications.
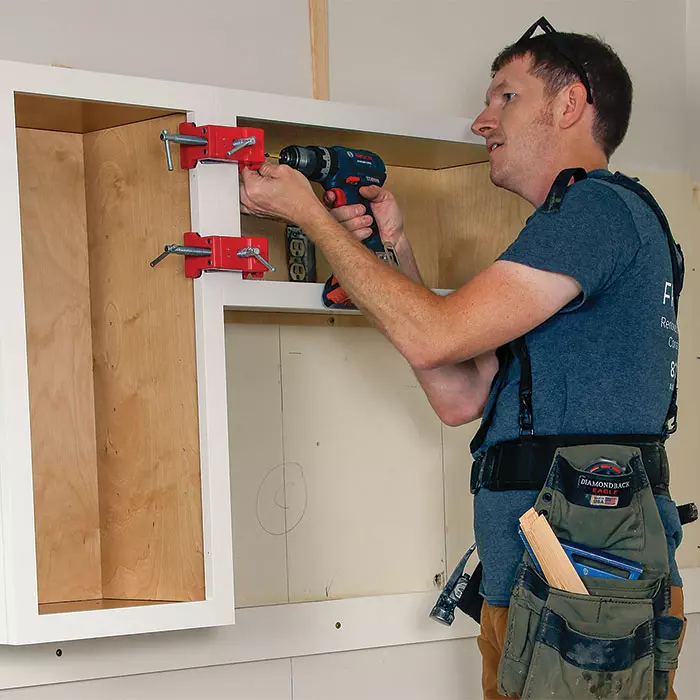
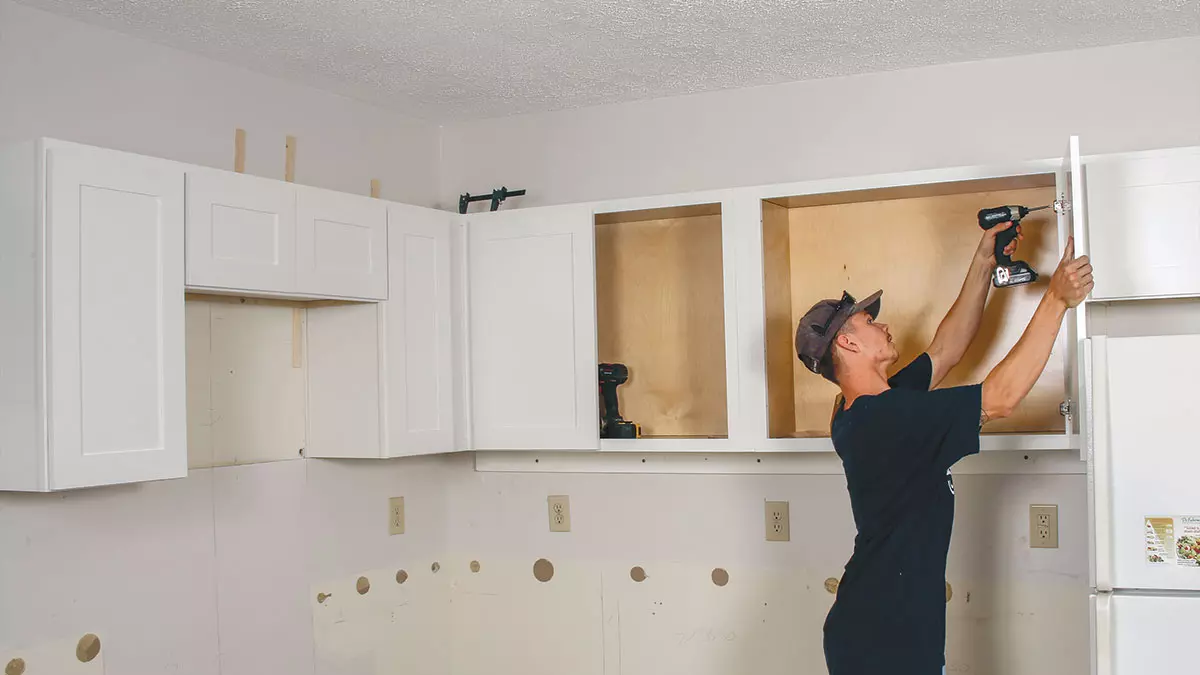
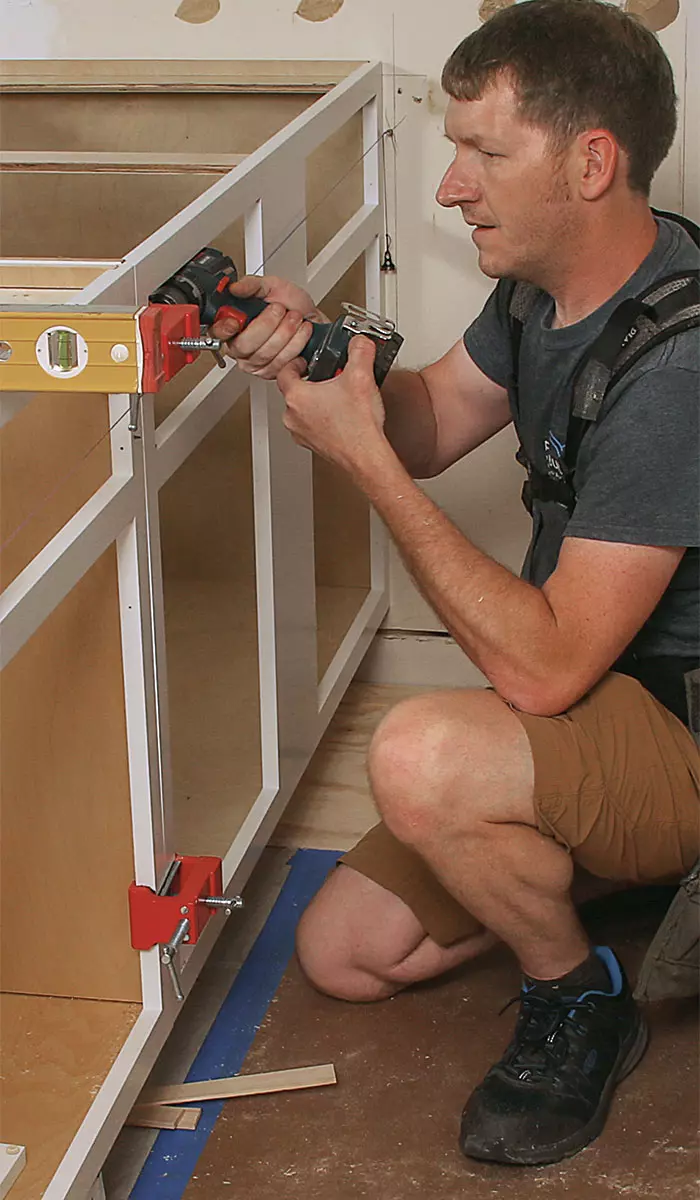
4. Install the wall cabinets
Begin by centering the cabinet above the range. Install the first upper cabinet and secure it to a stud at the top. Then, set the next cabinet in the run and use clamps to join the face frames together. For the range wall of cabinets, install them first, gradually moving towards the refrigerator. Determine the exact size of the filler strips required to evenly space the remaining cabinets. Utilize face-frame clamps from Bessy to align the face-frame fronts and secure them with trim-head screws. Install the doors once all the cabinets are in place.
Build and install the bases
The assembly process for base cabinets is similar to that of upper cabinets, with the addition of drawers and a toe kick. It's important to note that building drawer base cabinets takes longer than standard base cabinets, so plan your labor accordingly.
1. Assemble the lowers
Begin by assembling the sides and backs of the lower cabinets, then slide in the bottoms, just as you did with the uppers. There are plywood strips that should be brad-nailed and glued into the sides for mounting the countertop. If the cabinet side is visible, glue the strips rather than nailing them. Install the sub-toe kick by drilling pocket holes in the sides and top of the toe kick material, then secure it in place with glue and screws. The cabinet maker may supply plastic corner brackets, but it is advisable to glue and clamp everything together for added stability. For drawer bases, install the slides during the cabinet build, as the cabinet backs and face frames are predrilled for easy positioning.
Tips for smooth assembly
Finding enough space to store completed cabinets while the glue dries can be challenging in smaller homes.
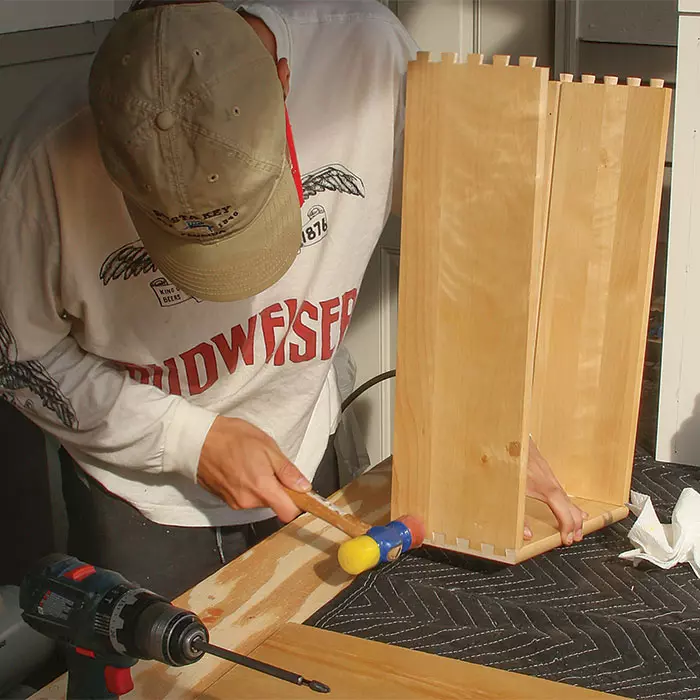
2. Build the drawers
Apply glue to the dovetails on the ends of the drawer sides where they meet the back, as well as to the groove on the drawer bottom. Attach the back to the sides, insert the bottom, and then attach the front. Connect the predrilled drawer front to the box front using the provided screws, and glue the front to the rest of the box. Use a rubber mallet if needed to tap the pieces into place. Clamp the joints while the glue sets. To secure the bottom of the drawer box to the sides, utilize a 23-gauge pin nailer. Once the glue sets, install the drawer latches on the drawer bottom.
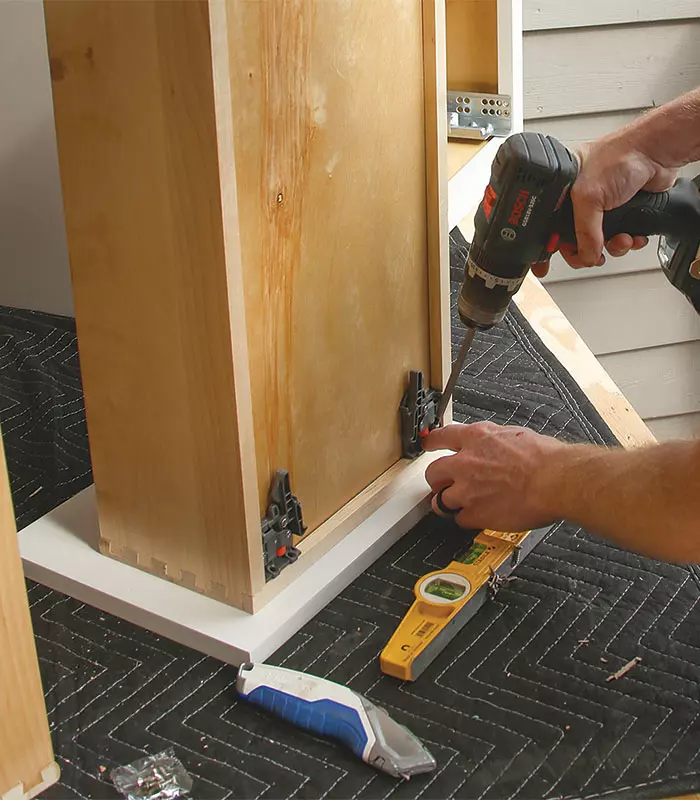
3. Install the lowers
Before installing the base cabinets, use a laser to check the floor for levelness and identify the highest spot. Starting at the high point allows for shimming the low cabinets, which is much easier than cutting down cabinets that are too high. The cabinet tops must be level and coplanar to provide even support for countertops. Utilize a stringline to maintain a straight line of cabinets, and shim them up and down and front to back as needed to ensure everything is level and coplanar. Once a run is in the correct position, screw the face frames together and fasten the cabinet backs to the wall studs. Install the doors, drawers, crown, and contact a professional to have the stone countertop templated.
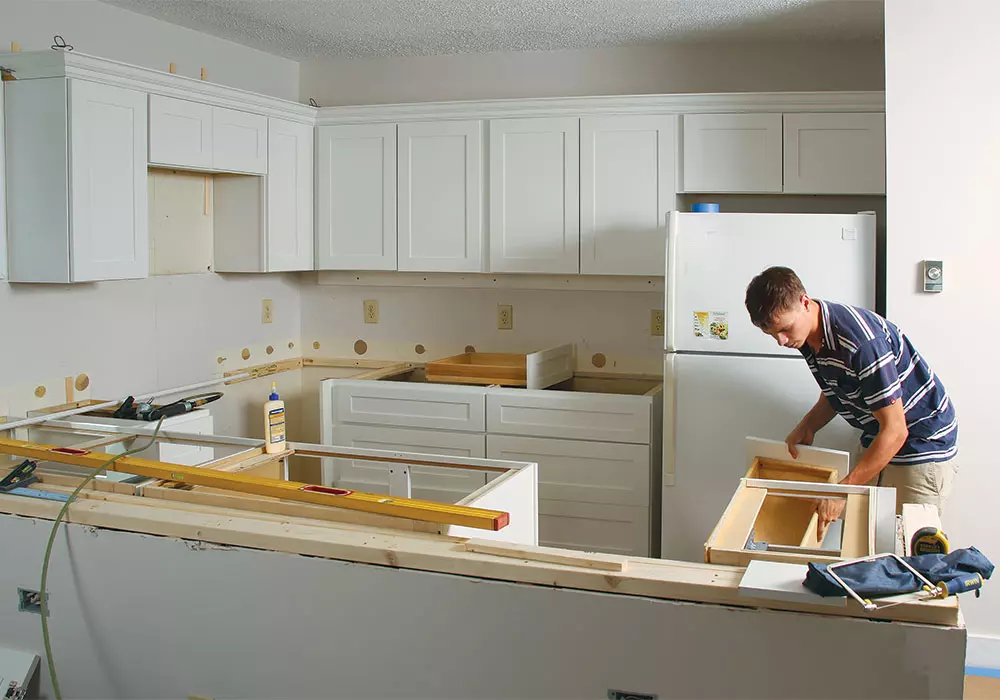
The stocked cabinets found at big box stores pale in comparison to the quality of RTA cabinets. While the color and style choices may be somewhat limited, the overall quality far exceeds that of stocked cabinets. In the case of our kitchen project, the cabinets cost just over $4,000 and took three carpenters a total of 8 hours to build and install. RTA cabinets offer an excellent solution for clients seeking affordability without compromising durability and aesthetic appeal.
Author: Andrew Steele, a builder and remodeler in Purlear, N.C. Photos by Patrick McCombe.
RELATED STORIES


