

Installing a split AC can be a daunting task, but with the right guidance, it becomes a breeze. A poorly installed split AC not only affects its efficiency but also leads to higher energy consumption and frequent maintenance cycles. To ensure optimal performance and longevity, follow these 8 easy steps for installing a split AC.
1. Selecting the Right Installation Area
Before beginning the installation process, carefully choose the installation area. Opt for a strong wall that can accommodate both the indoor and outdoor units. A sturdy wall minimizes vibrations and ensures stability. Leave a distance of 15 cm above and on the sides of the indoor unit. Ideally, the height should be 7 feet from the ground.
2. Fixing the Mounting Plate and Drilling Outlet Hole
Start by holding the mounting plate against the chosen wall. Ensure that the plate is horizontal. If you don't have a spirit level, use a measuring tape to achieve a level position. Mark the points for drilling and insert plastic anchors. Secure the mounting plate with screws. Drill a hole of about 7-8 cm in a suitable position for the pipes and wires to connect the outdoor unit.
3. Mounting the Indoor AC Unit
Remove the front cover of the split AC and lift it towards the mounting plate. Pass the two copper pipes, drainage pipe, and wire through the outlet hole. Smooth bends in the copper pipes ensure optimal cooling performance. Bind all four together with electrical tape for neatness. Carefully mount the AC unit on the mounting plate and reattach the front cover.
Now, let's move on to the outdoor unit.
4. Choosing the Right Installation Spot
Select a location for the outdoor unit that allows for a distance of 30-35 centimeters around it. This spacing ensures optimal performance. Avoid areas with direct sunlight or excessive dust.
5. Fixing the Brackets
Once you have chosen the installation area, make drilled holes for the brackets. Ensure they are horizontally aligned. Fix the brackets securely using the shipped fasteners.
6. Mounting the Outdoor Unit
Lift the outdoor unit and place it on the brackets. Ensure that the screw holes on the bracket and the AC unit align. Bolt up the outdoor unit firmly to the bracket.
7. Connecting the Wires
Open the cover over the electrical ports. Follow the AC unit's connection diagram to connect the power cable to the outdoor unit. It is crucial to follow the manufacturer's instructions to avoid any damage.
8. Connecting the Copper Pipes
Before connecting the copper pipes, clean them using a vacuum pump. Connect the copper pipes to the corresponding pipe ports using flare nuts. Make sure the flare nuts are tightly closed. Finally, open both gas valves.
Congratulations! You have successfully installed your split air conditioner. If you have any queries or need further assistance, please leave a comment below.
 Mounting Plate - Ensure a horizontal position for secure installation.
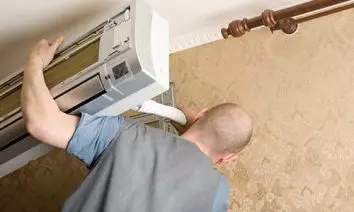 Mounting the Indoor AC Unit - Lift the unit towards the mounting plate, passing through the necessary wires and pipes.
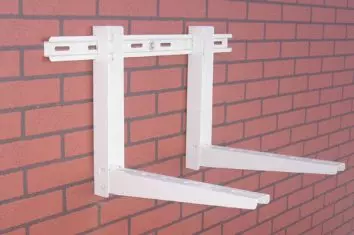 Fixing the Brackets - Ensure horizontal alignment for secure installation.
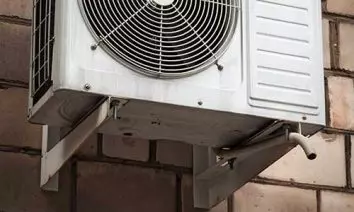 Mounting the Outdoor Unit - Securely attach the outdoor unit to the brackets.
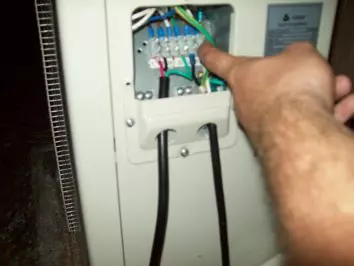 Connecting the Wires - Follow the connection diagram to safely connect the power cable to the outdoor unit.
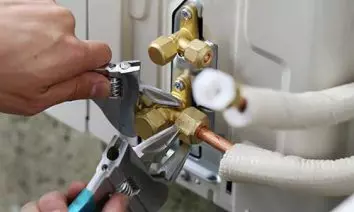 Connecting the Copper Pipes - Clean the pipes and securely connect them to the corresponding ports using flare nuts.


