Introduction: As an aspiring DIY enthusiast, you're probably looking for new and exciting projects to take on. One intriguing project that can add a touch of elegance to your home is creating your own resin table top. In this guide, we'll explore the dos and don'ts of this fascinating technique, ensuring that you can achieve the desired look and avoid any potential pitfalls along the way.
Prep Work
Base Coat of Paint
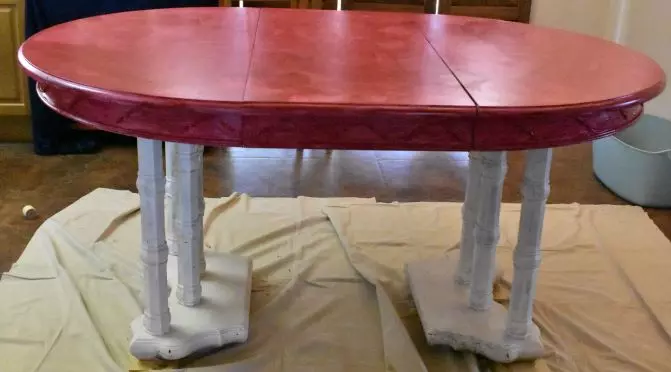 First, you'll need to prepare the table for the resin application process. Begin by priming the entire table with Zinsser Bulls Eye Primer. Then, paint the top of the table with a deep red color, ensuring that it complements the overall aesthetic of the space. Remember to paint in thin, even coats and let it dry completely before moving on to the next step.
Protect Areas not to be Epoxied
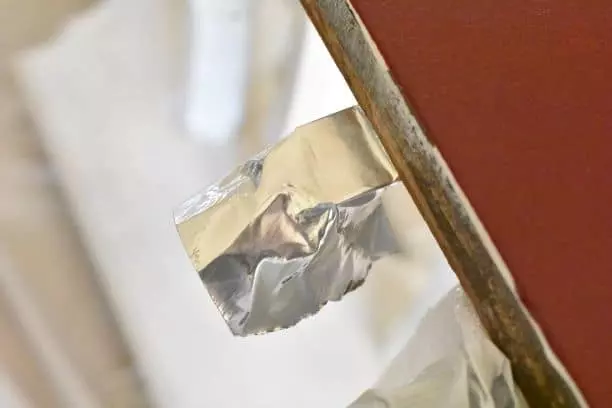
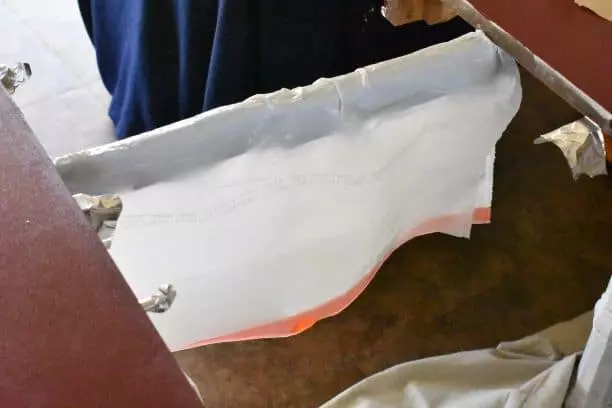
To ensure a clean and seamless finish, cover the dowels and leaf holes with aluminum tape, allowing for easy removal once the resin is applied. Place plastic trash bags over the rails that the leaf sits on, protecting them from the resin. Additionally, create a skirt with plastic sheeting around the lower half of the table to protect it from any accidental spills.
Work Space Safety Considerations
When working with chemical substances like resin, it's crucial to prioritize safety. Ensure that you're working in a well-ventilated space, preferably with an open sliding glass door and a box fan facing outside to expel the fumes. This will create a safer environment for you to work in.
HUGE "What Not to Do" when Prepping for your Resin Table Top
While trying to achieve a contiguous look for your table, it's essential to avoid sealing the pieces together with resin. This separation will allow you to treat the table as one piece instead of pouring the ends and the leaf separately. However, be cautious of resin dripping between the table parts and causing unwanted puddles. Always consider the self-leveling nature of the resin and plan accordingly.
Prepping the Surface
Before applying the epoxy resin, make sure that the surface is clean and free from any dust or lint. Wipe the table down thoroughly using a microfiber towel. Additionally, ensure that the surface is level to avoid any uneven resin coating.
Supplies
To embark on this resin adventure, gather all the necessary supplies beforehand. You'll need two-part epoxy, stir sticks, Popsicle sticks, plastic measuring containers, color additives (such as paint), gloves, and a heat gun. Having everything prepared ensures a smooth and time-efficient process. However, feel free to experiment with different supplies and techniques to achieve your desired results.
How much epoxy?
The amount of epoxy you'll need depends on the project at hand. Take into account the surface's porosity and consult the instructions for the specific brand of epoxy you're using. Aim to have enough epoxy to complete the project without running out mid-process. For reference, a gallon of epoxy was more than sufficient for a similar table project.
Mixing and Applying
 To create a visually stunning resin table top, you can tint the epoxy with different colors. Use paint as a color additive, ensuring not to exceed 10% paint by volume to maintain proper resin curing. Mix the resin thoroughly and apply a base coat evenly across the table. Add smaller amounts of other colors, swirling them together to create captivating patterns. Remove any air bubbles using a heat gun.
Finishing a DIY Resin Table Top
Once the resin has dried, carefully remove any drips from the underside of the table and clean up the edges. Ensure that the table is completely dry before proceeding. You can use sandpaper to smooth the base if needed. The finished resin table top will have a shiny and elegant appearance, impressing your family and friends.
A Few Things I Learned
Throughout this DIY resin table top project, I learned several valuable lessons that I'd like to share with you:
- Be mindful of the environment in which you're working to avoid any unwanted elements from interfering with your resin.
- Pay attention to temperature, both in your workspace and when handling the resin. Follow the manufacturer's instructions for optimal curing.
- Keep your cords and tools away from the epoxy to avoid any mishaps.
- Consider using a heat gun instead of a blowtorch for removing air bubbles. Exercise caution as the heat gun can get very hot.
- Work with epoxy in small batches as it reacts and cures more quickly in larger quantities.
- Enlist the help of a partner or friend to ensure a smooth and time-efficient process. Assistance with air bubble removal is crucial for a flawless finish.
- Have rubbing alcohol readily available to clean any uncured epoxy from your hands, feet, or surfaces.
- Use aluminum tape instead of painter's tape if you want the epoxy to be easily removable.
Conclusion
Embarking on a DIY resin table top project can be a rewarding and enjoyable experience. By following the dos and don'ts discussed in this guide, you can achieve a stunning and professional-looking finished product. Remember to prioritize safety, take your time, and enjoy the creative process. So go forth and resin with confidence!
Note: For more inspiration and detailed tutorials, be sure to check out our social media channels and website. Pin this tutorial on your favorite Pinterest board for future reference. Happy crafting!