If you're looking to elevate your real estate photography skills to new heights, HDR (High Dynamic Range) might be just the technique you need. With HDR, you can add remarkable depth and detail to your photos, creating a more realistic and captivating look. In this article, we'll guide you through the step-by-step process of shooting HDR real estate photography like a pro!
Understanding HDR Real Estate Photography
HDR photography involves capturing a wide range of lighting in a single image, allowing you to mimic the way our eyes perceive light. By blending multiple exposures, you can achieve balanced and stunning visuals that emphasize every detail of the scene. This technique is particularly valuable for real estate and interior photography, where it helps showcase the space in its best light.
Why Choose HDR for Real Estate Photography?
The main advantage of using HDR in real estate photography is its ability to replicate the way our eyes see things, resulting in more lifelike and appealing images. It's especially useful for balancing interior spaces with exterior views, creating a harmonious composition. To explore the versatile applications of HDR in real estate photography, be sure to check out our ebook, "Picture Perfect Properties."
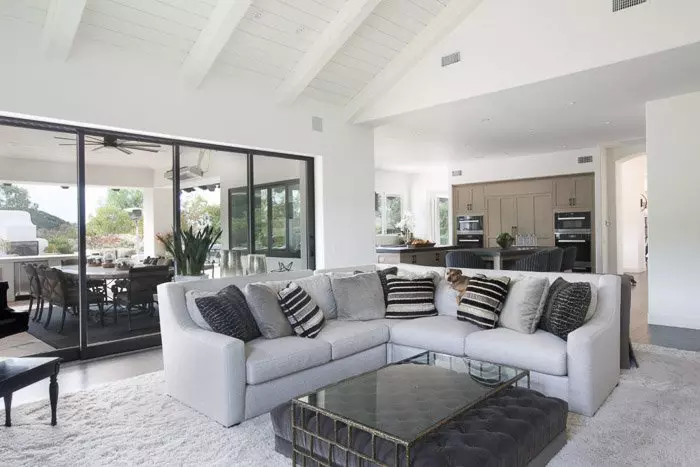
 Photo by Jean van der Meulen from Pexels
Capturing HDR Images In-Camera
The process of working with HDR begins during the photoshoot, not just during post-processing. To shoot for HDR, start by taking multiple exposures of the same subject or location. Capture an accurate exposure as your base photo and additional shots that are darker and brighter to capture the desired details in bright and dark areas. It's recommended to bracket your exposures in one-stop increments (-2, -1, +1, +2).

Creating an HDR Image in Photoshop
While there are specific software designed for HDR editing, you can easily create HDR images using Photoshop. Let's walk through the basic steps of HDR editing in Photoshop:
Step 1: Open Your Photos
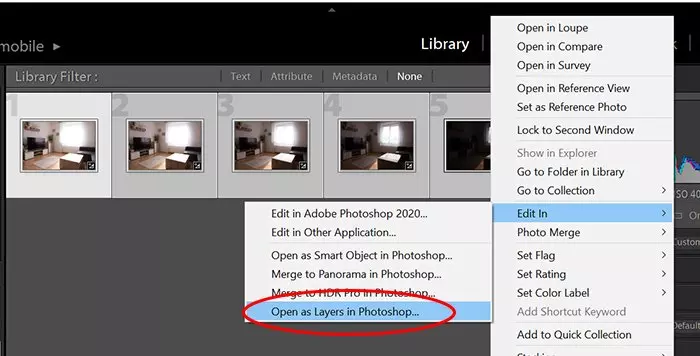
Open all the photos you wish to blend as individual layers in one file. If you're working solely in Photoshop, start by opening the base photo. Then, drag and drop the additional photos into the Photoshop window. Alternatively, you can open each layer individually and copy them into the base photo. If using Lightroom, import the photos and open them as layers in Photoshop.
Step 2: Arrange Your Layers
Organize your layers by placing the darkest exposure at the top and progressively working your way down to the brightest. Finish off by placing your base exposure as the bottom layer.
Step 3: Add Layer Masks
To selectively blend different parts of each layer, add a layer mask to each layer. This allows you to control the visibility of each layer. Click on the "Add layer mask" button at the bottom of the Layers panel to create a mask.
Step 4: Brush on the Mask
Using the Eraser tool with black as the color, brush on the areas of the top layer that you want to make visible. Adjust the brush settings (size, opacity, and hardness) to refine the effect. Repeat this process for each layer, revealing the desired elements.
Step 5: Fine-tune and Correct
Use the Eraser tool with white as the color to make corrections. If you revealed too much or need to make adjustments, simply brush with white to correct the mask. This allows you to achieve the desired balance and harmony in your HDR image.
Step 6: Save Your Work
If you started in Lightroom, save the file to automatically create a new layered file within your Lightroom gallery. If you solely used Photoshop, save the layered image as a Photoshop file for reference. When you're satisfied with the result, merge the layers and save the final image as a JPEG for universal use.

Additional Tips for HDR Real Estate Photography
While using HDR as a powerful editing technique, it's essential to maintain authenticity and avoid over-processing. Balance the exposure between the interior and exterior, slightly overexposing the outside to achieve a natural feel. Be mindful of shadows and avoid excessively brightening dark areas, as it can wash out the image. Use HDR as a tool in moderation and experiment to find your style and comfort zone.

In Conclusion
HDR is an invaluable technique to master when working with real estate and interior photography. By understanding and harnessing the power of HDR, you can create stunning images that effectively showcase properties. Whether you're a seasoned professional or just starting, these steps will guide you towards incorporating HDR into your client shoots. Remember to experiment and enjoy the process of bringing your real estate photography to life!


