Chairs with cane seats have a timeless charm that adds a touch of elegance to any space. If you've ever wondered how to re-cane a chair seat or repair a broken one, you've come to the right place. In this article, you'll find step-by-step chair caning instructions that will guide you through the process and help you create a beautiful caned seat.
Chair Caning Instructions: How to Weave a Lace Cane Seat
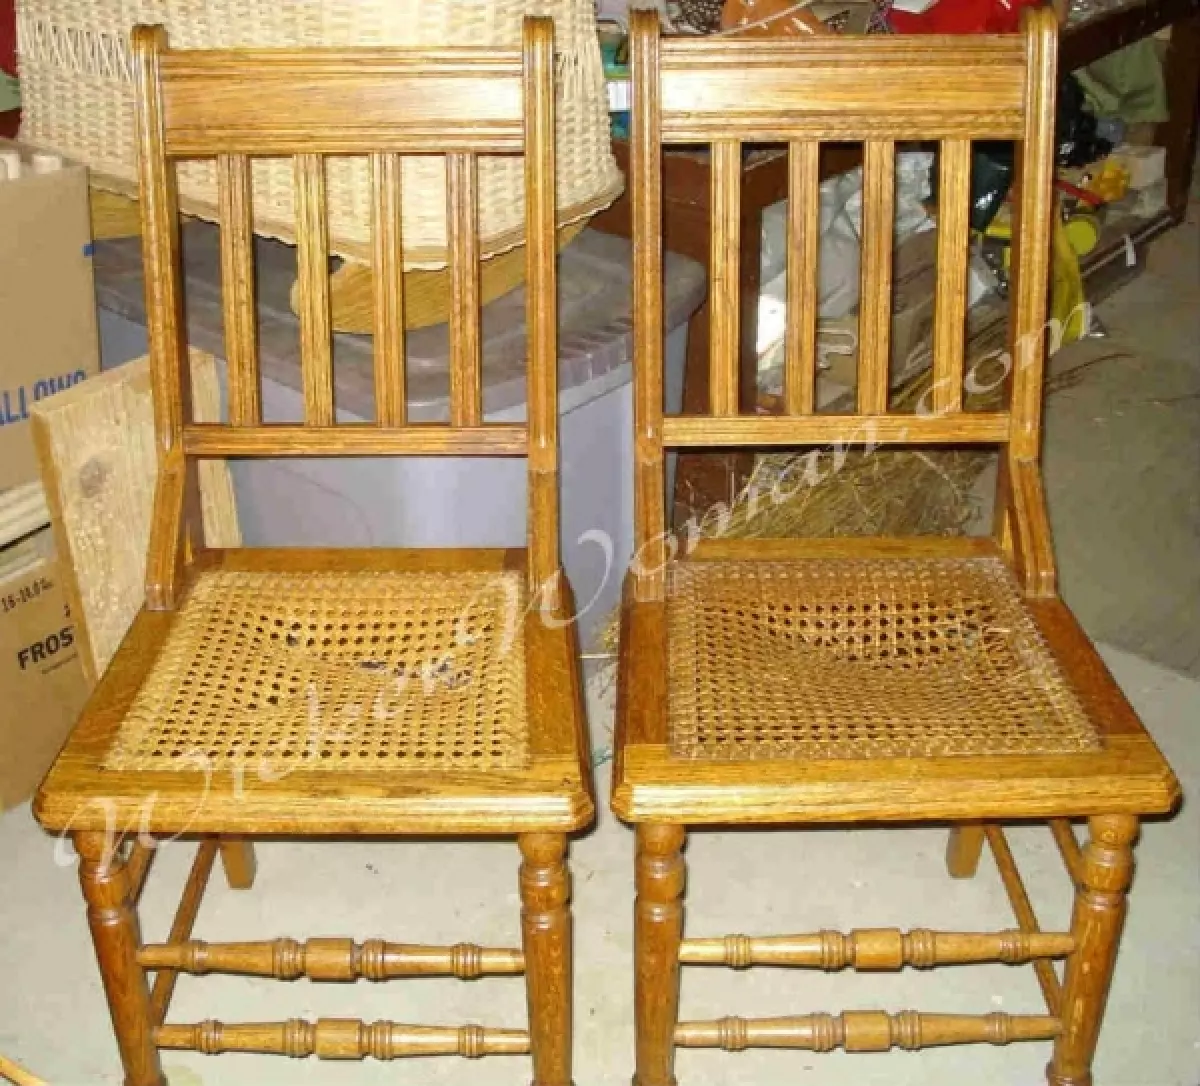
You may have seen chairs with a lattice-look weaving pattern that has caught your attention. These chairs, often found at flea markets or passed down through generations, can be easily repaired using the following instructions.
Before we dive into the instructions, here are the tools you'll need for this project:
- Trapezoidal shape (wider in front than in back) chair with straight seat rails and pre-drilled holes
- 270 feet strand chair cane and 6 feet of binder cord, in the appropriate gauge for your project
- Work table at the right height to prevent bending over
- Measuring tape or chair caning gauge tool
- Chair caning pegs
- Dish pan or water bucket
- Scissors
- Small hammer or tack hammer
- Awl or ice pick
- 1/4" diameter wooden dowel rod
- Water-soluble white glue or hide glue (avoid yellow carpenter's glue or gorilla glue)
- Spray bottle
- Bath towel or hand towel
Helpful Caning Prep Tips
For your first caning project, choose a chair that is structurally sound and doesn't require refinishing or regluing. The chair should have holes drilled around the perimeter of the frame. A square or rectangular footstool is an ideal practice piece. If you can't find one, a trapezoidal chair with fewer than 72 drilled holes is the next best option. Round chair seats, horseshoe-shaped seats, and chairs with over 72 drilled holes are more challenging and not suitable for beginners. Remove any old cane from the seat before starting the project.
Determine Correct Size Chair Cane
To ensure you're using the correct size cane for your chair, measure the diameter of the drilled holes and the distance between center-hole-to-center-hole of neighboring holes. Write down the measurements and compare them with the cane gauge conversion table to determine the appropriate size of cane to use.
Quick Way to Choose Strand Cane Gauge or Size
To determine the right size of cane, measure a six-inch span on the seat rail and count the number of holes in that section. Use the following guide to select the size of cane based on the number of holes:
- 12 holes = Fine Fine Cane, 2.25mm
- 11 holes = Fine Cane, 2.50mm
- 10 holes = Narrow Medium, 2.75mm Cane
- 9 holes = Medium Cane, 3.0mm
- 8 holes = Common Cane, 3.50mm
How Many Cane Coils to Weave a Seat?
The amount of cane you'll need depends on the size of the chair seat. As a general guideline:
- 250-270 ft. will be enough for one 14" chair seat
- 500 ft. will be enough for two 14" chair seats
- 1,000 ft. will be enough for four 14" chair seats
If you have larger chair seats, order extra cane coils to ensure you have enough.
Ordering the Correct Gauge Chair Cane
Once you've determined the correct size cane for your project, you can purchase it from reputable cane and basket supply companies. Check out their selection and order the appropriate gauge cane for your chair.
Assemble All Necessary Tools for Chair Caning
Gather all the tools you'll need for the chair caning project. Most of these tools can be found around the house or in your toolbox. Make sure your work area is comfortable, and consider using an adjustable-height table or anti-fatigue mat to save your back.
How to Weave a 7-Step Hole Cane Seat
Now that you have all the necessary tools and materials, it's time to start weaving your chair seat. Follow these 7 steps to achieve a beautifully caned seat:
Step #1: Laying the Vertical Cane Strands
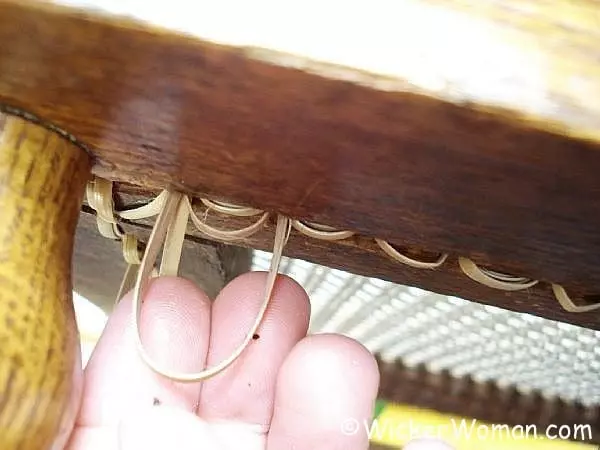
Soak a few strands of chair cane in warm water for about ten minutes. Replace the soaked strands with fresh ones as needed. Find the center holes in the front and back of the chair seat and mark them with pegs. Start weaving the vertical strands from the back to the front, making sure the shiny side of the cane faces you. Weave under and over the other strands, skipping the corner holes.
Step #2: Laying First Horizontal Cane Strands
Continue weaving by laying horizontal strands over the vertical ones. Keep the strands parallel and skip the corner holes.
Step #3: Laying Second Vertical Cane Strands
Weave the second set of vertical strands over the previous ones, slightly to the right. Maintain the under-over pattern while skipping the corner holes.
Step #4: Second Horizontal Cane Strands
The actual weaving begins with the second set of horizontal strands. Weave over and under the vertical pairs, following the pattern established in the previous steps.
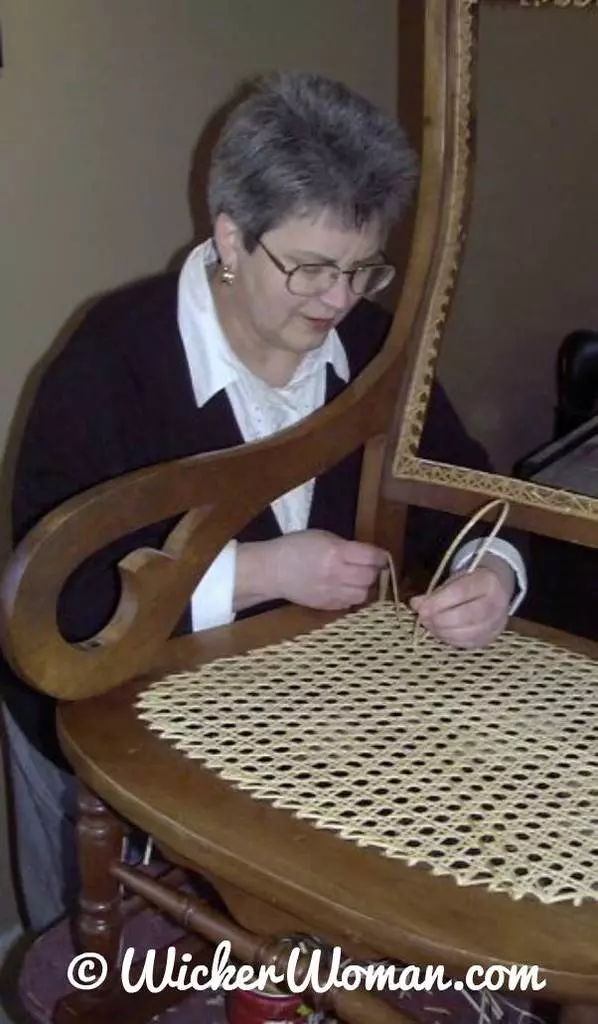
Step #5: Weaving the First Diagonal Cane Strands
Start weaving the diagonals from the front left corner of the chair. Weave over the verticals and under the horizontals, creating a slanted pattern.
Step #6: Second Diagonal Cane Weaving
Complete the weaving of the opposite diagonal, starting from the lower right corner. Weave over the horizontals and under the verticals, following a right-to-left slanting pattern.
Step #7: Applying the Cane Binder Cord Strand
The final step is applying the wide binder cane to cover up the holes and give a finished look to the seat. Secure the binder cord in the corner hole and weave it through to cover the holes on all four rails of the chair seat. Tie off any loose ends and secure them with a spot of white glue.
Congratulations! You've successfully caned your chair seat using the traditional hole-to-hole method. Follow the included maintenance tips to keep your caned seat in excellent condition.
We hope you found these chair caning instructions helpful and enjoyed this step-by-step guide. If you have any questions or need further assistance, feel free to reach out. Now, go ahead and start transforming your chairs with the timeless beauty of caned seats!