

In the world of real estate photography, there is a popular editing technique known as flambient editing. This technique combines flash and ambient lighting to achieve balanced and visually appealing images. In this article, we will explore a simple and quick flambient blending method that is even faster than HDR editing. Get ready to elevate your editing skills and captivate your audience with stunning real estate photos.
Understanding the Flambient Method
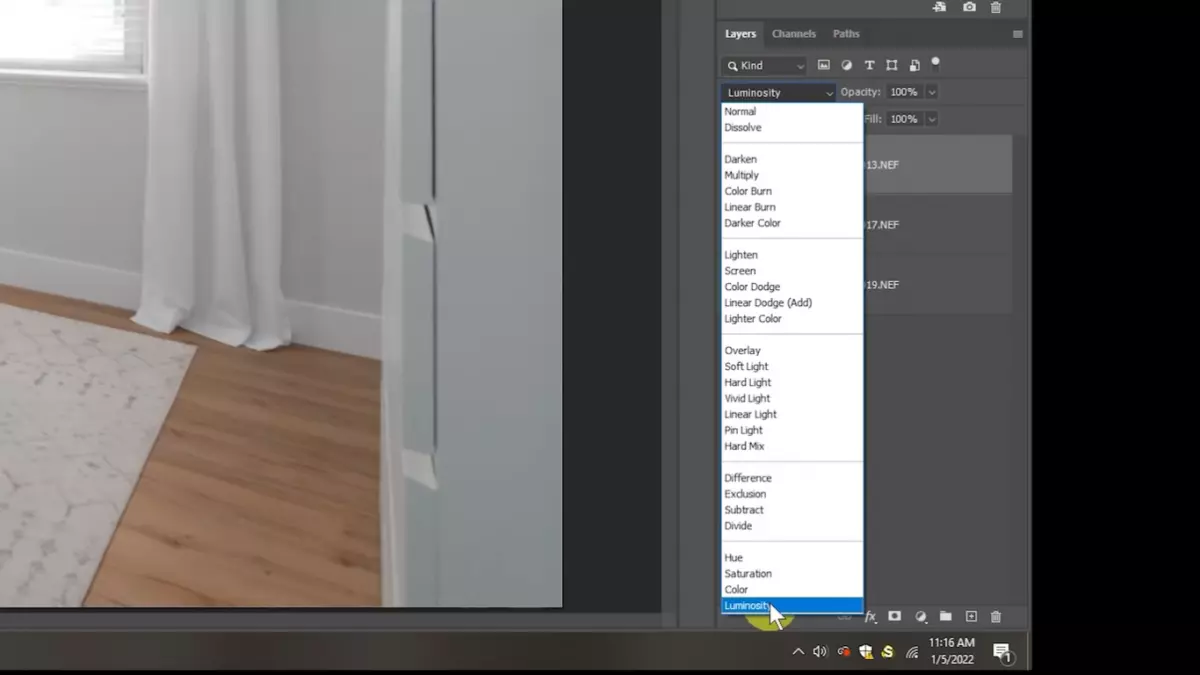
Before we dive into the editing process, let's take a moment to understand the concept of flambient editing. In a typical interior shot, different light sources can cause color inconsistencies and unwanted hues. Flambient editing solves this problem by blending two exposures: one taken with ambient light and another with flash. The ambient shot captures the natural light in the room, while the flash shot illuminates darker areas and removes color casts. By blending these two exposures using the luminosity mode, you can create a harmonious and evenly lit final image.
In a previous post, we discussed a guide on how to shoot photos for the flambient technique. Now, let's explore the most simple and fast way to edit real estate photos using the flambient technique in post-production.
Step 1. The 50/50 Blend Technique
 Flambient blending in Photoshop
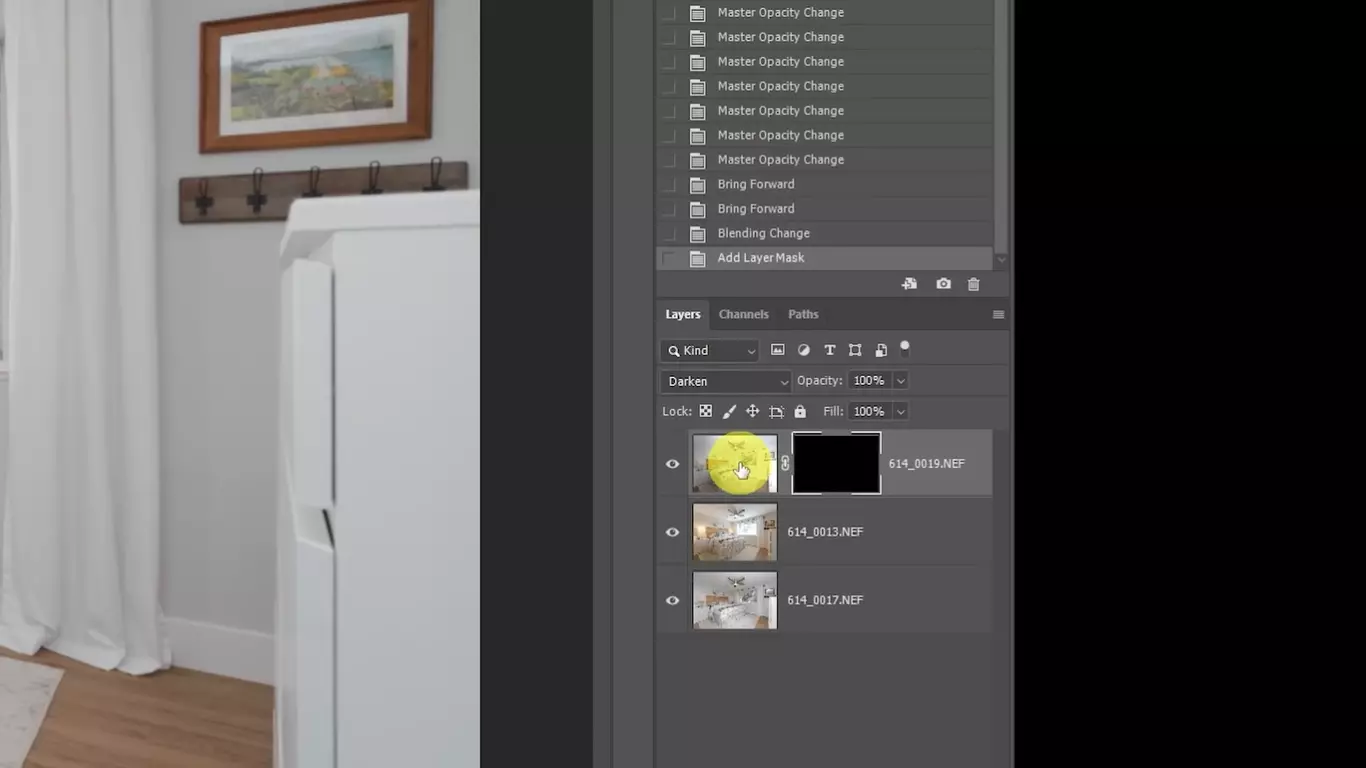
To achieve the optimal 50/50 blend using the flambient editing method, start by opening your image in editing software like Photoshop. Once you have the image ready, change the mode of layers from 'normal' to 'luminosity'. This allows you to combine the ambient and flash shots. Set the opacity of the layer to 50% for both exposures, ensuring an even balance between the two lighting sources. And that's it!
This 50/50 blend creates an image that combines the sharpness and lighting of the flash shot with the vibrant yet natural nature of the ambient shot, effectively highlighting the space's features.
Step 2. Fine-Tuning the Blend
 Fine-tuning flambient blending
If you desire a different blend ratio between the ambient and flash shots, you have the flexibility to adjust it further. By selecting the move tool (shortcut: Escape + V), you can change the opacity of the layer using numeric values on your keyboard. For example, pressing Escape + V + 9 increases the opacity to 90%, while Escape + V + 4 sets it to 40%. Experiment with different opacity levels until you achieve the desired balance between the two exposures.
Step 3. Enhancing Window Pulls
Enhancing window pulls in Photoshop
Windows play a crucial role in real estate photography, and ensuring they look their best is essential. To enhance the window pull, you can use a simple technique. Start by applying an action or manually create a new layer for the window pull. Move this layer to the top, change the blending mode to darken, and add a hide-all layer mask. Using a polygon selection tool, roughly select the areas where the window pull should be visible. With the brush tool, set to a low opacity (around 30%), carefully blend the window pull into the image. Adjust and erase as necessary to achieve a seamless integration.
Step 4. Additional Color Correction
In some cases, you may need to address color issues in your image. Consider using color correction techniques to further enhance the overall appearance. One popular method involves using curves adjustments to fine-tune the colors. By manipulating the curves and adjusting the color balance, you can transform a lackluster image into a vibrant, visually appealing masterpiece. Experiment with different color correction techniques to find the style that best suits your vision.
Taking It a Step Further
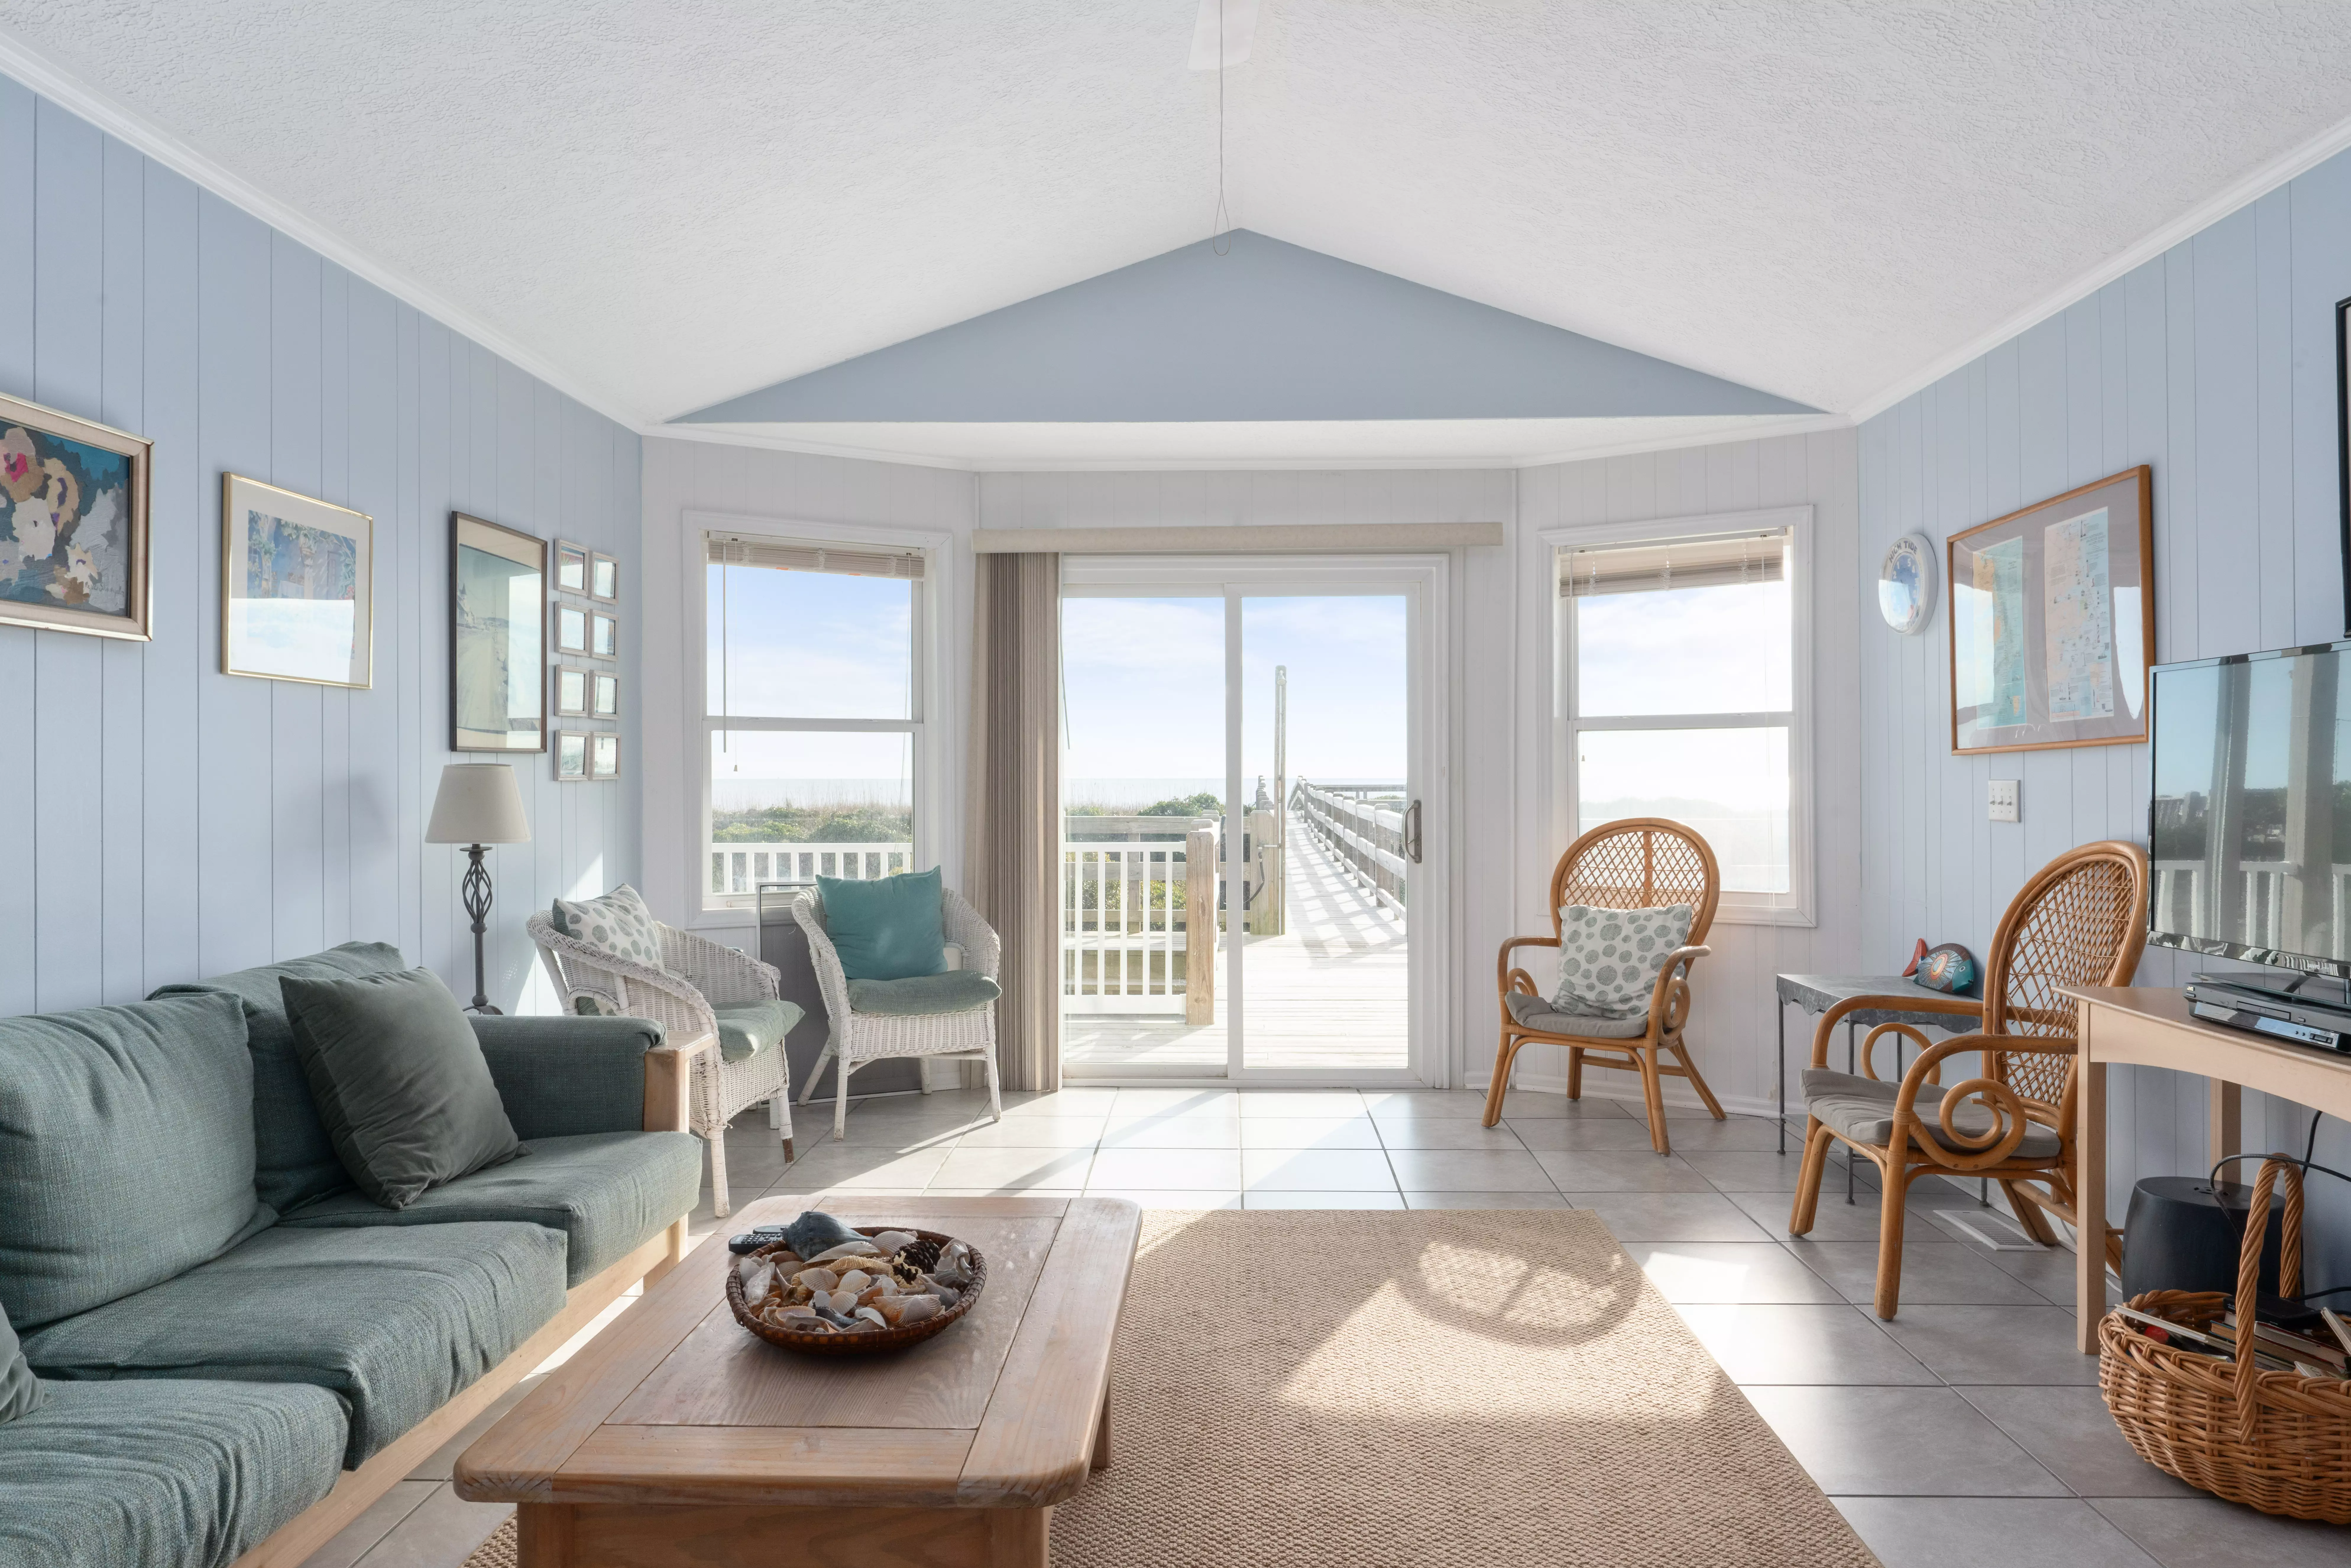 Living room with lots of light
Now that you've mastered the 50/50 flambient blending technique, it's time to tackle more complex scenarios. If you encounter challenging lighting conditions or specific areas that need additional illumination, you can introduce a supplementary light source. By strategically placing a flash or artificial light, you can fill in dark corners or highlight specific details. Follow the same process of blending exposures and fine-tuning the opacity to achieve a cohesive and visually striking final image.
Conclusion
Flambient blending is a powerful tool that allows real estate photographers to produce captivating images that make properties shine. By mastering the 50/50 blend technique, enhancing window pulls, and utilizing additional light sources, you can transform ordinary photos into extraordinary ones. Remember to experiment, practice, and refine your skills to create unique and eye-catching visuals. Incorporate these techniques into your editing workflow and watch as your real estate photography portfolio stands out from the crowd.


